How To Make Compound Butter (With Recipes!)

Recipe: How to Make Compound Butter - Seasoned with Sydney Blog

You know what makes everything better? Butter. And you know what’s better than plain butter? Butter with extra flavorings! I think you and I should drop what we’re going and make some compound butter together.

If you don’t know what compound butter is, allow me to paint a little picture for you. Think of a stick of unsalted butter - yellow, smooth, and a little bland on its own. It’s a blank canvas ready to be mixed with other things to become what it’s meant to be; much like a caterpillar on its way to becoming a butterfly. Now think of some of your favorite flavors. Put those two together, and you’ve got compound butter. It is, quite simply, one of the easiest things you’ll ever make in your kitchen, and once it’s done, one of the fanciest. Nothing makes me more excited than going to a restaurant (lol, remember eating in one of those and not just picking up an order in the freezing cold?) and seeing that the table has a variety of butters to go with super fresh bread. Now you can make do it at home!

Recipe: How to Make Compound Butter - Seasoned with Sydney Blog

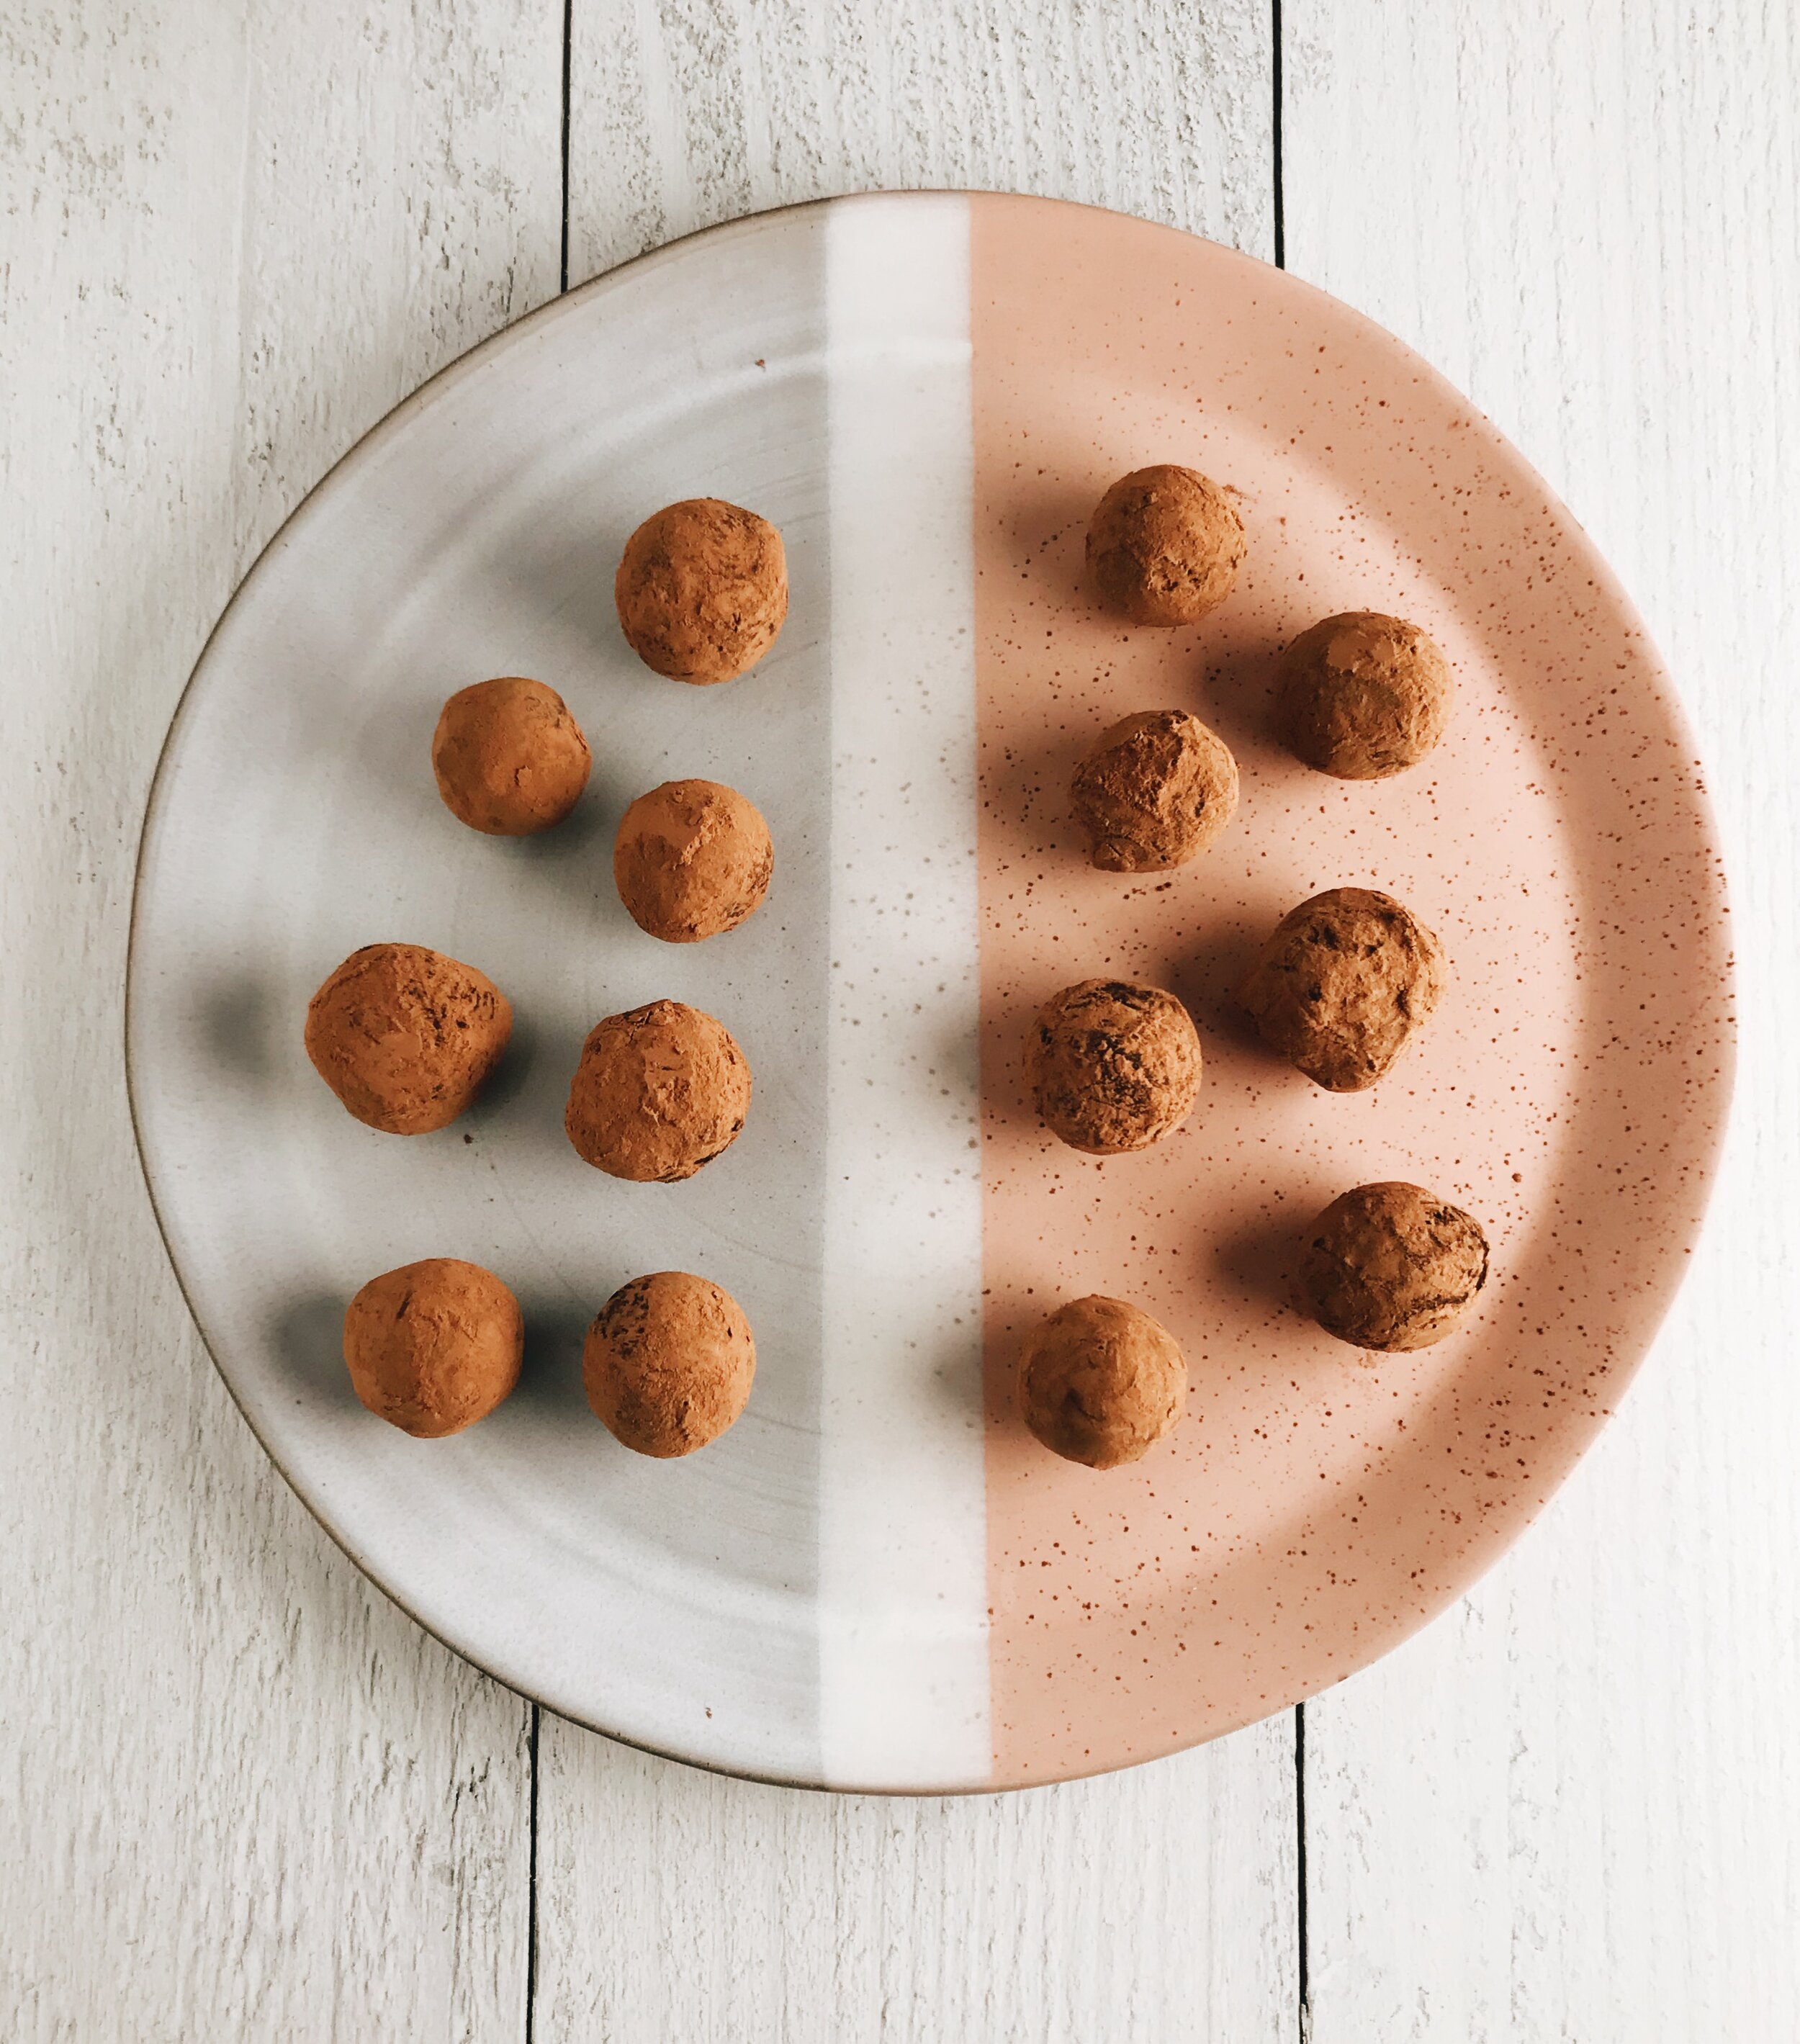
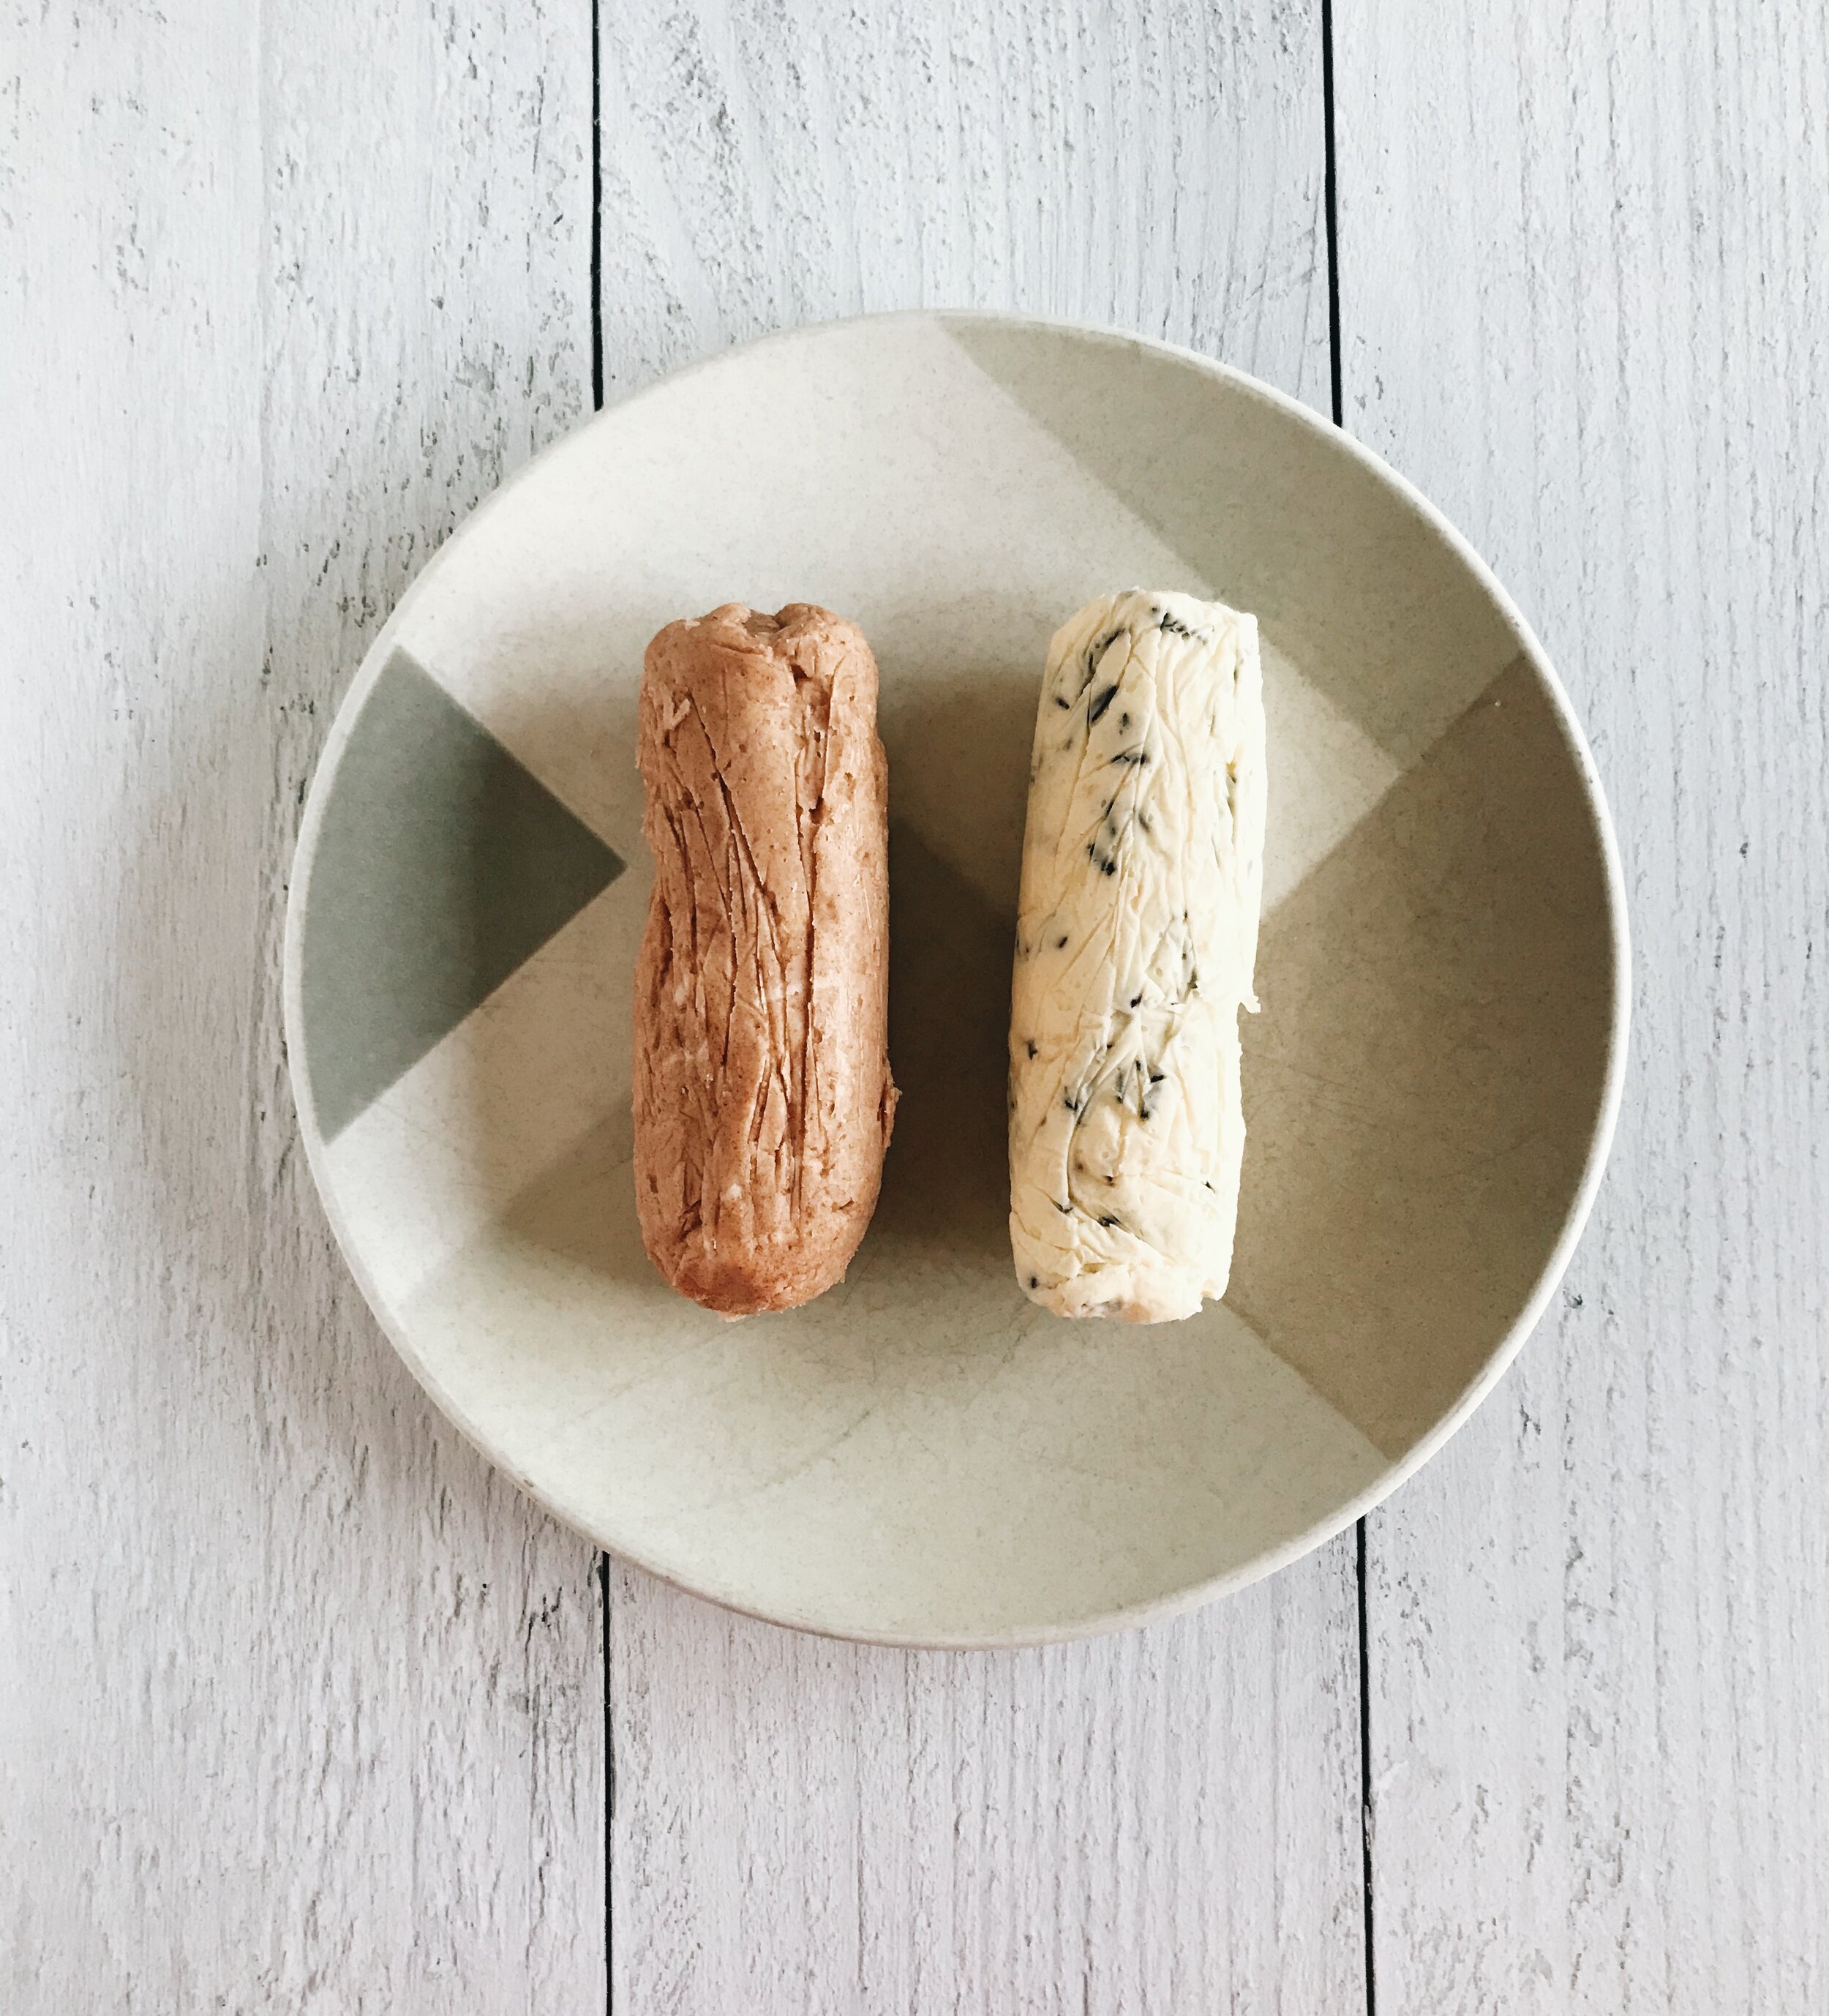
The flavor combinations are literally endless when it comes to making compound butter. You could go sweet or savory, smooth, or with lots of texture. And since you might be stuck on what flavors to smash together into butter first, I’ll give you two of my favorite combinations: Garlic-Rosemary Butter and Cinnamon-Maple!

Recipe: How to Make Compound Butter - Seasoned with Sydney

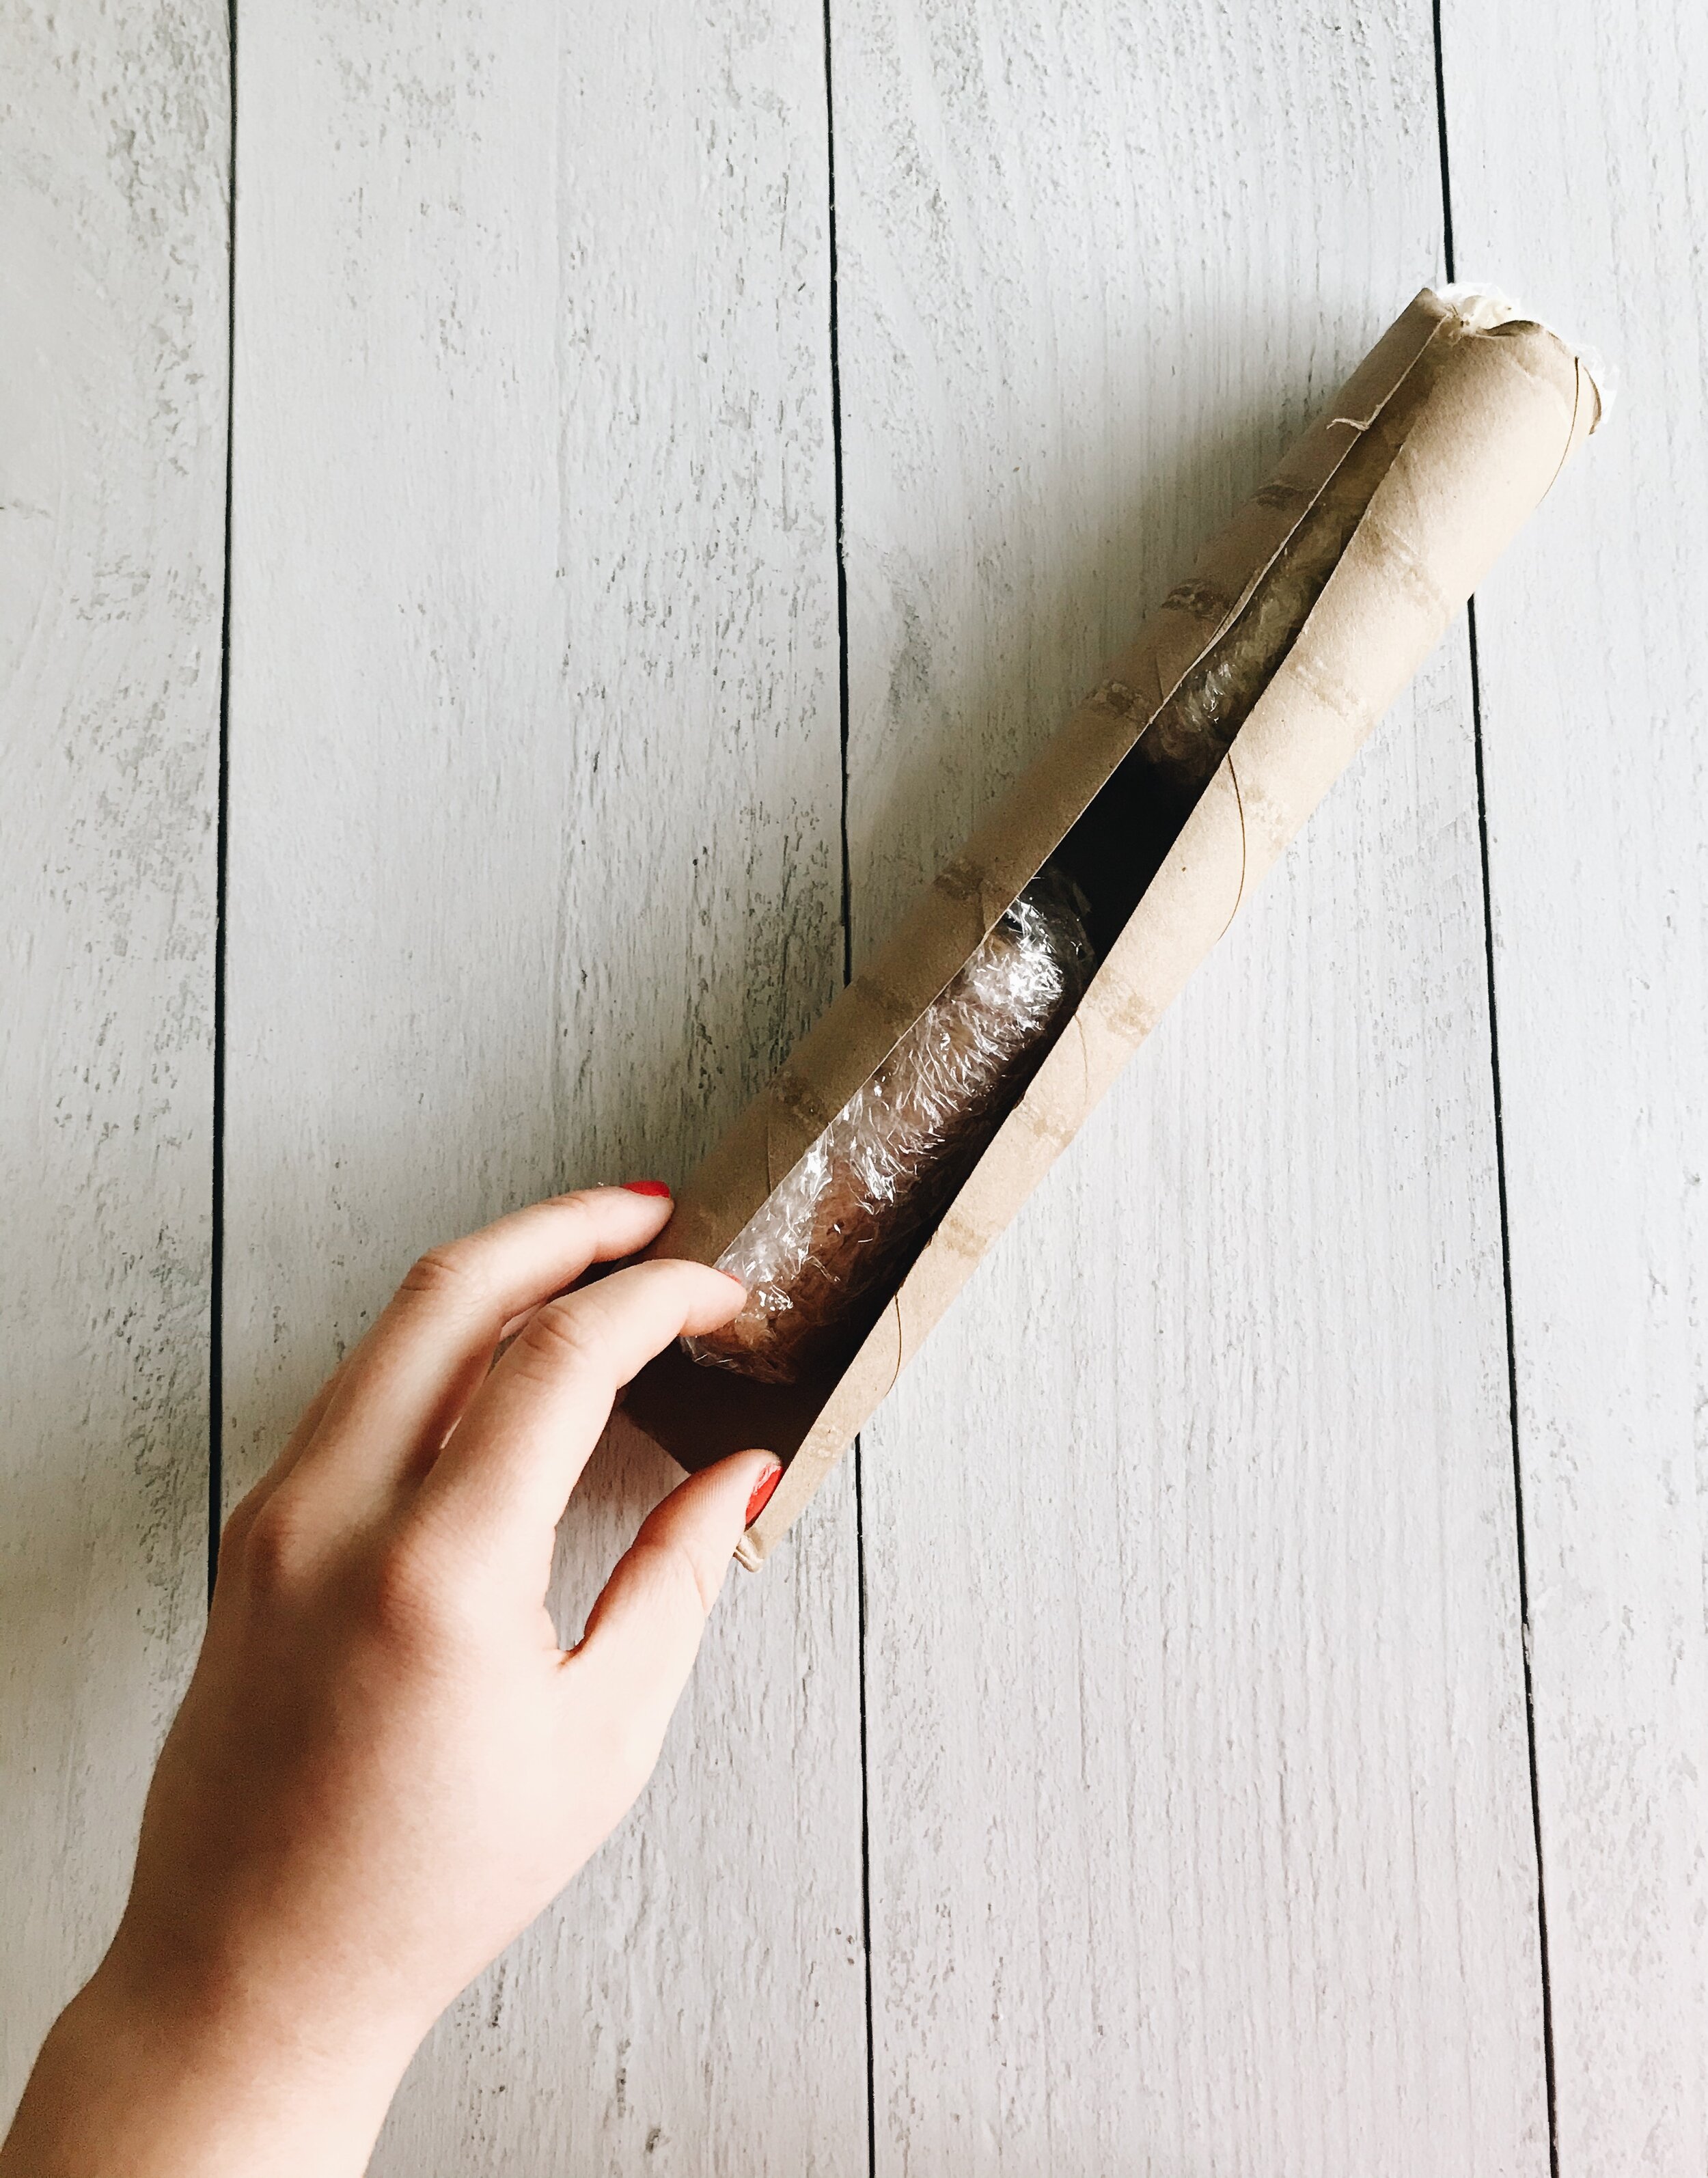
To make compound butter you need four things: unsalted butter, a spoon or rubber spatula, your flavorings, and plastic wrap. That’s it! Simply let your unsalted butter soften at room temperature (at least 3 hours), then gently mix it together with your additives until well combined. When you’re done, grab a sheet of plastic wrap, place it flat on the counter, pour your butter mixture into the center of it, and fold the ends of the plastic wrap around it until it’s sealed. With your butter sealed, gently start shaping the butter into a log. To help shape your log more efficiently, take this trick I learned from reading Joanne Chang’s cookbook, Flour: take the inner tube of a paper towel roll and cut open one side lengthwise. Place the wrapped butter inside the open part of the tube and gently roll it around on a flat surface to create a log shape. I also like to refrigerate the log in the tube to make sure it never loses shape.

Recipe: How to Make Compound Butter - Seasoned with Sydney blog

Refrigerate for at least 5 hours, but best overnight, until the butter has re-hardened and gotten cold, and your butter is ready to go!

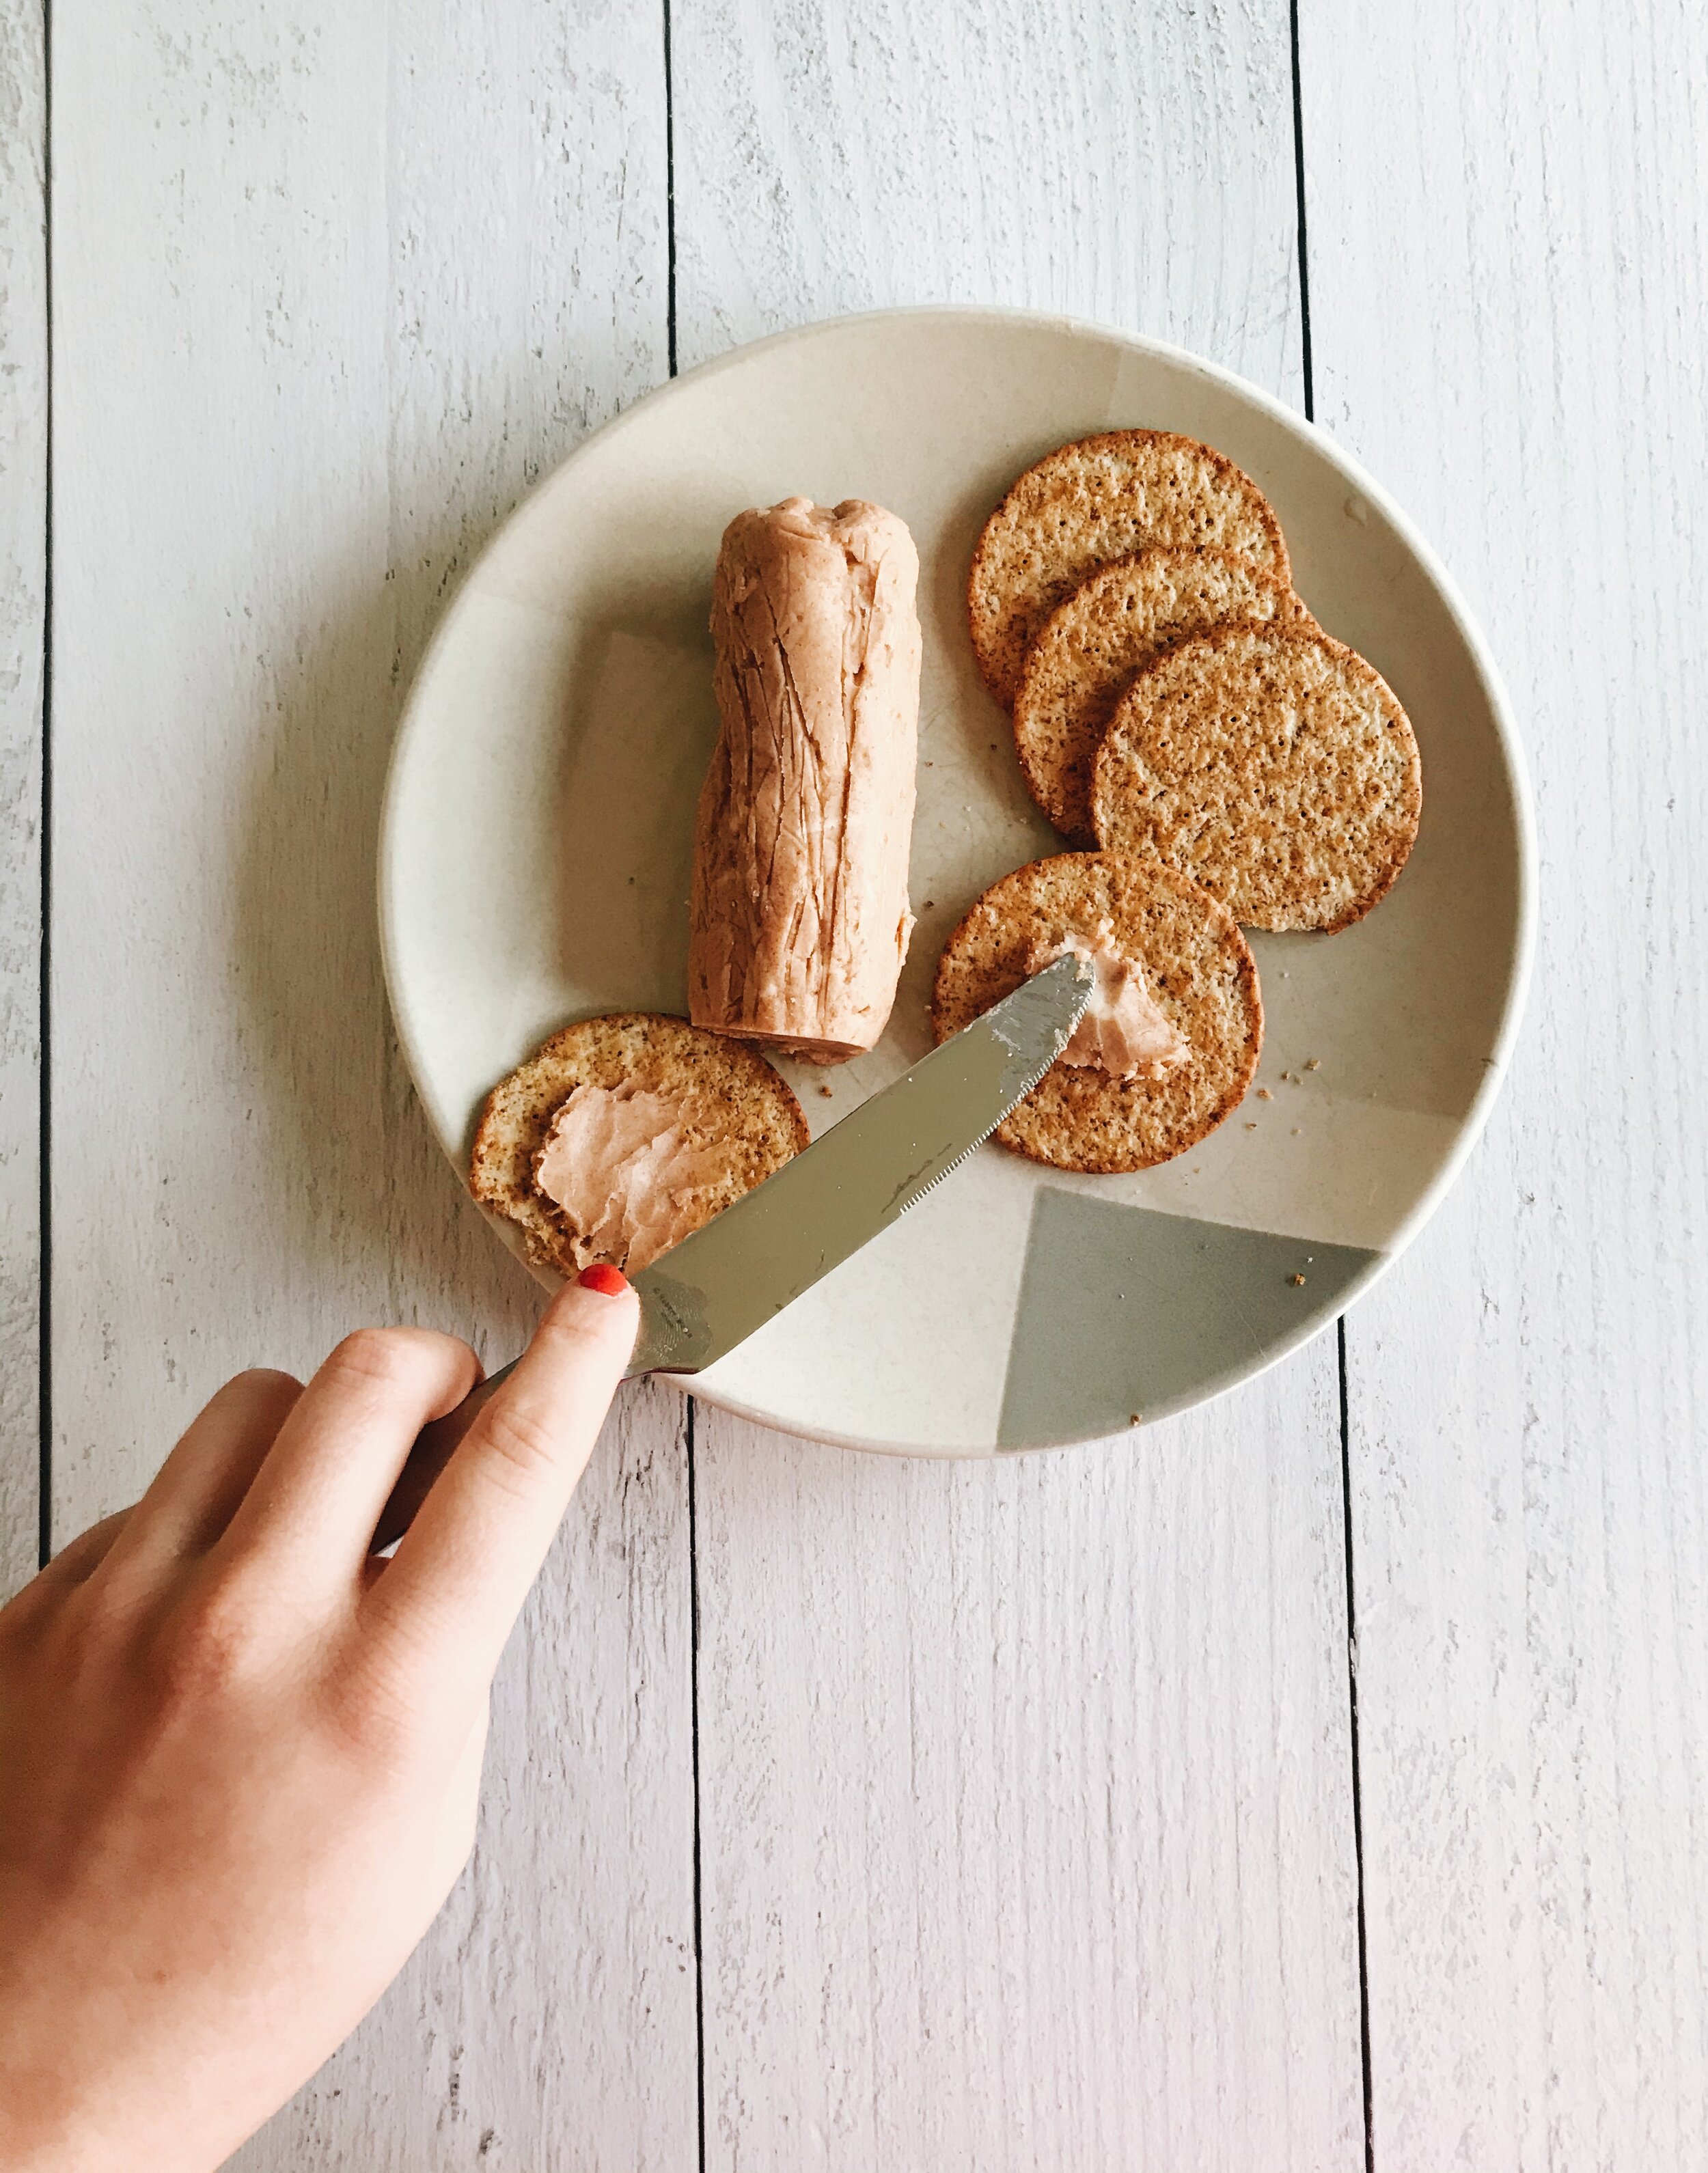
Great for cooking with, baking with, or even spreading on crackers, scones, and biscuits, compound butter is incredibly versatile.

Scroll down for two easy compound butter combinations!

Cinnamon-Maple Compound Butter

What You’ll Need:

  • 1 stick unsalted butter, softened at room temperature

  • 3/4 teaspoon cinnamon

  • 1/2 teaspoon maple syrup

  • Pinch of fine sea salt

Directions

Combine all ingredients in a small bowl and mix together using a spoon or rubber spatula until well-combined. Taste and adjust flavorings as desired.

Place a sheet of plastic wrap on your work surface. Pour all of the contents of the bowl into the center of the plastic wrap. Gently fold the ends of the plastic wrap together until the butter is sealed.

Gently shape the sealed butter together into a log using your hands. For extra help shaping the log, cut one side of a paper towel tube lengthwise. Place the butter log into the tube and gently roll it around on your work surface a few times. Take the butter log out of the tube to examine its shape, then repeat the rolling process if necessary.

Refrigerate the butter log for at least 5 hours (or overnight) until the log has re-hardened and gotten cold. I like to keep the log in the paper towel tube to ensure it keeps its shape in the fridge.

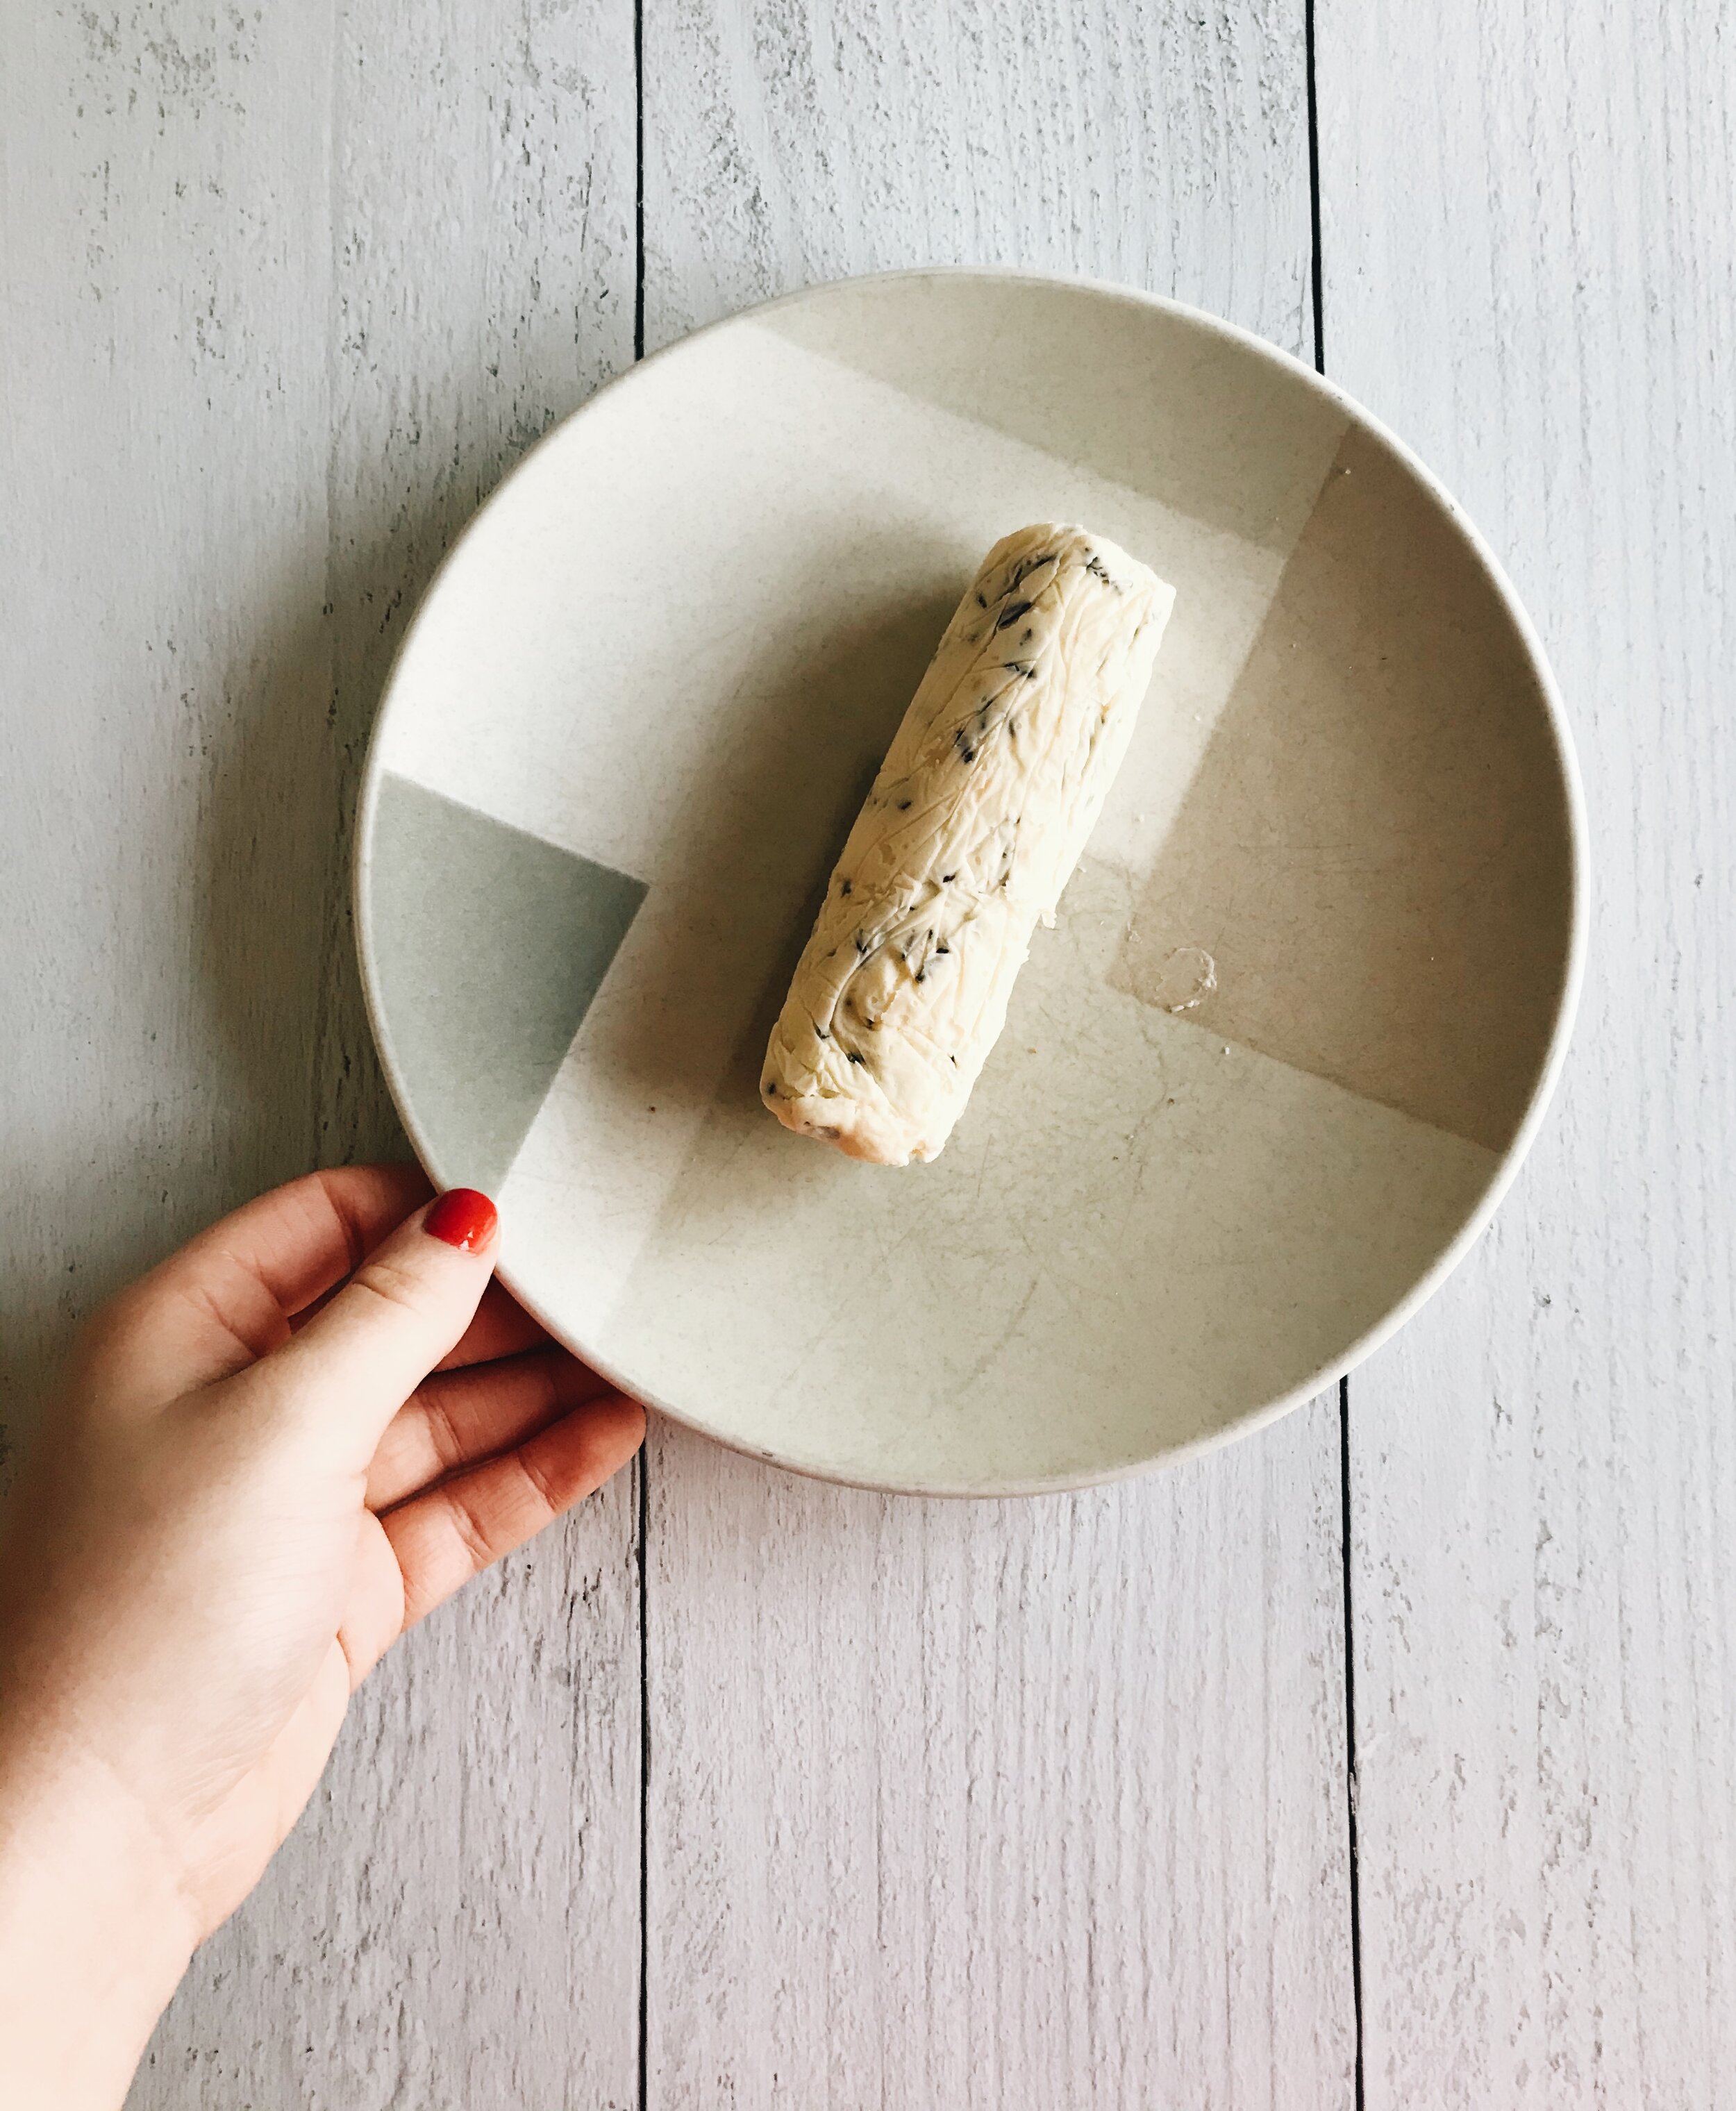
Garlic-Rosemary Compound Butter

What You’ll Need:

  • 1 stick unsalted butter

  • 1 teaspoon fresh rosemary, finely chopped

  • 1/2 teaspoon dried minced garlic

  • Pinch of fine sea salt

Directions

Combine all ingredients in a small bowl and mix together using a spoon or rubber spatula until well-combined. Taste and adjust flavorings as desired.

Place a sheet of plastic wrap on your work surface. Pour all of the contents of the bowl into the center of the plastic wrap. Gently fold the ends of the plastic wrap together until the butter is sealed.

Gently shape the sealed butter together into a log using your hands. For extra help shaping the log, cut one side of a paper towel tube lengthwise. Place the butter lug into the tub and gently roll around on your work surface a few times. Take the butter log out of the tube to examine its shape, then repeat the rolling process if necessary.

Refrigerate the butter log for at least 5 hours (or overnight) until the log had re-hardened and gotten cold. I like to keep the log in the paper towel tube to ensure it keeps its shape in the fridge.

Baked Feta, Tomato, and Spinach Pasta

Recipe: Baked Feta, Tomato, and Spinach Pasta - Seasoned with Sydney blog

If you spend even half as much time as I do on the Internet every day, then you’ve probably seen the latest (and most delicious-looking) trend to hit social media: drizzling blocks of feta cheese and loose tomatoes with wonderful, generous glugs of extra virgin olive and baking them at moderately-high heat until the tomatoes have ripened to the point of almost bursting, and the cheese has gotten so soft that when mixed with pasta, it melts like a dream. The original recipe was developed two years ago by Finnish food blogger Jenni Häyrinen, but it wasn’t until this year, thanks to TikTok, that it went super viral. In fact, the recipe got so huge that Finland actually had a brief but significant shortage of feta cheese nationwide! I’ve seen countless videos floating around Youtube and Instagram in the last two weeks, and though I tend to be extremely particular when it comes to jumping on the latest trends, I knew this was one I desperately had to try.

Recipe: Baked Feta, Tomato, and Spinach Pasta

In all the videos I watched, the basic breakdown of the dish was this: drizzle the feta and tomatoes with olive oil, season with black pepper, and sprinkle a liberal amount of oregano (usually fresh) on top. Roast everything in the oven, then mix in cooked pasta. It just doesn’t get any simpler - or more hands-off - than that.

The final product looked amazing every time, but I wanted to take things up a notch. What other seasonings would go well with salty cheese, sweet tomatoes, and earthy olive oil? Then it hit me: za’atar, my favorite Middle Eastern spice blend that consists of sesame, thyme, marjoram, oregano, and sumac! Oregano, a key ingredient in the original recipe, would still be present, and joined by some other stellar spices blended together in perfect harmony. And because I sometimes need to trick myself into eating vegetables: I threw in some spinach, too! When it came to pasta, I wanted to keep things pretty simple. In some videos, I saw cavatappi being used. In others, classic macaroni. But there was something about a small, long pasta shape that appealed to me, so I went with penne rigate.

The result was, and I’m not exaggerating, one of the best pasta dishes I have EVER had. This Baked Feta, Tomato, and Spinach Pasta is earthy from the za’atar, slightly sweet from the roasted tomatoes, and perfectly creamy, briny, and a little tangy from the baked feta. Though the spinach takes a backseat to the other flavors, just a few minutes of being tossed into the still-warm pasta makes it pleasantly tender and a great supporting character to the main act. And the best part is, dinner was ready in 35 minutes, with very little clean-up at the end.

Internet trends come and go at the speed of light, but this Baked Feta, Tomato, and Spinach Pasta was born from a social media moment that I know is here to stay!

Baked Feta, Tomato, and Spinach Pasta

What You’ll Need:

  • 1 pint grape tomatoes

  • One 8 oz block of feta cheese

  • Extra virgin olive oil

  • Za’atar

  • Freshly ground black pepper

  • Salt

  • 16 oz penne rigate pasta

  • 3 oz baby spinach

Directions

Preheat the oven to 375 degrees Fahrenheit.

Place the feta cheese and tomatoes in a 9x13 inch baking dish. Drizzle the feta and tomatoes liberally with extra-virgin olive oil, za’atar, and freshly ground black pepper. Bake in the oven for 35 minutes.

While the feta and tomatoes are in the oven, cook the pasta in a heavy-bottomed pot filled with well-salted boiling water (the water should taste like the ocean). Follow package instructions for al dente. Just before the pasta is done, reserve 1 cup of pasta water. Drain the pasta.

As soon as the feta and tomatoes are out of the oven, add the pasta, spinach, and 1/4 cup of the reserved pasta water to the baking dish and stir until the ingredients are well-combined. Add more freshly ground black pepper to taste. Serve warm.

TO STORE: Pasta can be kept in an airtight container in the refrigerator for up to 1 week.

Chocolate Chai Truffles

Recipe: Chai Spice Truffles - Seasoned with Sydney blog

I’m not that into Valentine’s Day, and I can’t decide if it’s because there’s just way too much pressure to not be single, or because I’ve never had a particularly good one. The worst Valentine’s Day, by far, was the spring semester of my sophomore year of college when a guy I’d been seeing for a while decided for the both of us that we were going to bypass the holiday altogether; it was just going to be a regular Tuesday. The only problem with that? He forgot to fill me in on it. So there I was the night before, burning a CD filled with happy songs (a few of them my own), and carefully cutting out a homemade card with a track listing on the back. We hadn’t been dating that long, so I knew to avoid the “L” word at all costs, but I thought a nice little gift would let him know that he was appreciated.

Since our colleges were within walking distance of each other, we had plenty of opportunities to spend time together. Twice a week, we had a standing coffee date at a new shop right downtown, and as luck would have it, that fateful V-Day happened to fall on one of them. I couldn’t wait to see him, and even got my hopes up that maybe, even though we hadn’t talked about how we were going to handle the holiday, he’d surprise me, too. And boy, was I surprised. The look on this guy’s face when I gave him the card and CD would make anyone beg the floor to open up wide and swallow them whole. “I…didn’t think we were doing anything special today,” he said, with a voice filled with gentle caution generally reserved for calming spooked horses. “I’m sorry, I didn’t get you anything.” And because we were freshly an item, I tried with all my might to brush off my utter embarrassment, and act like his gift was just one of MANY I was handing out that day, and that the playlist HADN”T taken me a full hour to curate because I wanted to get the flow just right. I think I mumbled something about how it was totally fine, then tried to finish my piping-hot coffee as quickly as possible without completely eviscerating my taste buds.

So did this incident sour Valentine’s Day for me forever? Not really. I don’t blame him for what happened - we were brand new, young, and in the end, not emotionally mature enough to properly communicate. And in case you’re wondering whatever happened to our dear friend, the Valentine’s Day Dodger, I heard he got married a few years ago and had a kid. So all’s well that ends well.

At any rate, Valentine’s Day isn’t all bad. The new movies and books that come out around this time are usually heartwarming, and It’s one of the biggest days of the year to celebrate everything sweet. I can’t think of anything sweeter than making homemade Chocolate Chai Truffles.

Recipe: Homemade Chai Spice Truffles - Seasoned with Sydney blog

Making truffles might seem intimidating at first. For quite some time, I believed that it took a certain amount of mastery before you could even attempt such a delicious and professional-looking act of confectionery, but it’s just not true! When it all boils down, chocolate truffles consist of just two things: heavy cream, and pure chocolate. Put those two together in the correct ratio, give your mixture plenty of time to set, and you’ve got yourself the perfect, chocolate-y canvas for whatever decorations your heart desires. And while simple chocolate truffles are amazing on their own, why not take it up a notch? I love chocolate, and I love chai, so let’s put them together!

Recipe: Homemade Chai Spice Truffles - Seasoned with Sydney blog

These Chocolate Chai Truffles are by far some of my favorite things to make. They’re incredibly chocolate-forward with floral, spicy notes of star anise, black tea, cardamom, and cinnamon, finished beautifully with just a hint of sea salt. These feel perfectly weighted in the hand, but aren’t so solid that when you bite into them, you break your teeth. Quite the opposite actually! Each bite melts in the mouth into nothing but decadent creaminess, making it totally impossible to have just one.

Whether you’re celebrating Valentine’s Day with a long-term partner, a virtual Zoom date, or just yourself, these Chocolate Chai Truffles guarantee that the day will be nothing but sweet (and a little pleasantly spicy)!

Chocolate Chai Truffles

What You’ll Need:

  • 8 oz (two 4 oz bars, NOT chocolate chips) semi-sweet chocolate, finely chopped

  • 10 cardamom pods

  • 5 whole star anise pieces

  • 2 cinnamon sticks

  • 5 chai tea bags

  • 2/3 cup heavy cream

  • 1/4 teaspoon fine sea salt

  • 1/2 cup unsweetened coca powder

Directions:

Place the chocolate in a medium, heatproof bowl. Set aside.

Using a mortar and pestle, or the side of a knife, gently crush the cardamom pods. Place the cardamom pods, star anise, cinnamon sticks, and heavy cream in a small saucepan. Set the saucepan over medium-low heat, and bring the cream to a simmer (be careful not to burn the cream).

Take the saucepan off the heat, add the tea bags, then cover the saucepan and let it sit for 10 minutes.

Remove the tea bags, then place the saucepan over medium-low heat again and bring the cream back up to a simmer. Remove from heat and strain the cream into the bowl with the chocolate. Discard the spices.

Let the cream and chocolate sit in the bowl for three minutes until the chocolate has softened, then slowly begin to whisk the chocolate and cream together, starting in the center and working your way to the edges of the bowl. Whisk until completely smooth. Add the sea salt, then whisk to combine. You’ve just made ganache!

Place a sheet of plastic wrap directly on top of the ganache, making sure no air can come through, then chill the ganache in the refrigerator for 2-3 hours until it has set.

Just before you’re ready to roll your truffles, place a piece of parchment paper on a cookie sheet and set aside. Next, fill a small bowl with the unsweetened cocoa powder.

Remove the plastic wrap from on top of your ganache and discard. Using a melon baller the size of a teaspoon, a teaspoon cookie scoop, or an actual teaspoon measuring spoon, roll two teaspoons of the ganache at a time, then mold, shape, and roll them together until you have a smooth truffle. Roll the truffle in the coca powder, then place on the cookie sheet. Repeat this process until you have run out of ganache. You should have about 20 truffles at the end.

Transfer the cookie sheet to the refrigerator and let the truffles set for at least 1 hour.

TO STORE: Truffles can be kept in an airtight storage container in the refrigerator for one week.

Everything Bagel Soft Pretzels (2 Ways!)

IMG_8213.jpg

There was a brief moment in time when I cared very deeply about football. It was my sophomore year of college, and I was thousands of miles away from Wisconsin and anyone who would even remotely care about the Dairy State. Feeling homesick and finding it hard to relate to people whose hometowns never saw temperatures dip below 60 degrees Fahrenheit, I turned to football. I longed to catch a glimpse of people in the stands wearing foam rectangular hats shaped like cheese, and shirtless men whose naked chests were yellow and green from body paint, and bright red from the negative wind chill. There/s just no place like home.

And so, right at the start of the 2010s, I sat alone in my shared dorm room every Sunday to watch a Green Bay Packers game, regardless of the fact that I didn’t yet know all the rules. When Packer fans cheered, I cheered. When booing started, I’d find myself quietly chiming in. As the season progressed and hopes of making it to the playoffs rose, I managed to pick up a few friends along the way who would fill me in on what I still didn’t understand and celebrate wins with me, especially as their favorite teams failed to deliver. At the end of 2010 I considered myself a full-on football fan, even going so far as to order gear for when the Packers, in a game that was quite unforgettable, clinched the NFC title and became eligible for the Super Bowl for the first time in 14 years. It certainly felt incredible to be backing a winning team, and I finally understood why people were so fervent about sports. When you win, directly or indirectly, you feel like you’re part of something bigger than yourself. And when you lose, you have a million shoulders to cry on. Plus, trash-talking can be kind of fun (and useful if you’re trying to flirt with a guy in your media class who’s cheering for the other team…but that’s a story for another day). Long story short, the Packers won the Super Bowl that year, and with every celebratory status update I saw on Facebook, I felt closer to home.

Though my interest in football lasted only a few years after that, switching from professional to collegiate along the way, it didn’t hold the same power for me when I moved back home. Football and following the Packers had been my way of staying connected, but once my feet hit frozen soil again, I no longer needed it. And I still don’t to this day, despite the fact that I find myself away from home anew. But that doesn’t mean that I don’t occasionally tune in to a game now and then when I’m channel surfing. And I always, ALWAYS, watch the Super Bowl. Sure, I could say that I actively participate in Super Bowl Sunday because I love the game, but that just wouldn’t be telling the truth. I love watching the Super Bowl for one reason and one reason only: the SNACKS!

IMG_8211.jpg

I won’t lie, I kind of miss going to live sporting events because the snacks are always on point: nachos covered in creamy, melted cheese, hot dogs/bratwurst with all the fixings, cotton candy the size of a human head, and, of course, soft pretzels, a personal favorite of mine. A few years ago, around this time, I tried my hand at making mini soft pretzels. They were pretty good for a first attempt, and would definitely fit in on any party table, but this year, I wanted to up the ante a little bit. The only thing better than a perfectly-salted soft pretzel? One with everything on it. Or, well, Everything Bagel Seasoning, anyway.

IMG_8220.jpg

I’m going to level with you for a second: shaping baked goods is not yet my forte. Give me a mold and I’m golden, but if I have to do it freehand? Well, let’s just say some of the first pretzels I attempted to roll and twist and fold into their classic shape came out looking a little…off. That’s why I’m offering you not one, but TWO ways to make these pretzels. If you, like me, struggle with the decoration aspect of baking, consider abandoning the pretzel shape altogether and instead, make pretzel bites! It’s much easier, requires less shaping, and if you’ve got a larger immediate family, there’s plenty more to go around! You just can’t go wrong either way.

Here’s what I love about these Everything Bagel Soft Pretzels: they’re delightfully yeasty and chewy, and with every bite, you get the perfect hits of salt, garlic, onion, and sesame, with the extra crunch of poppy seeds. Best served warm, these pretzels will be gobbled up by halftime!

Everything Bagel Soft Pretzels

What You’ll Need:

  • 1 and 1/2 cups lukewarm water

  • 1 package active dry yeast

  • 1 teaspoon salt

  • 1 tablespoon dark brown sugar

  • 1 tablespoon unsalted butter, melted and cooled slightly

  • 3 cups flour, plus 3/4 cups more, and more for dusting the work surface

  • 1/2 cup baking soda

  • 9 cups water

  • Everything Bagel Seasoning (store-bought, or you can make your own!)

Directions:

Place oven racks in the middle and lower third of the oven. Preheat the oven to 400 degrees Fahrenheit.

Line two baking sheets with parchment paper. Set aside.

In a large bowl, whisk the yeast and lukewarm water. Let sit for five minutes until foamy and bubbles are on the surface. Whisk in the salt, dark brown sugar, and melted butter.

Working with one cup at a time, add 3 cups of flour to the bowl, mixing thoroughly after each addition with a wooden spoon (the best way to measure flour is by carefully spooning flour into a measuring cup and leveling off the excess with a knife). At this point, the dough will be very sticky. Add more flour to the dough one tablespoon at a time (up to 3/4 cups) and mix well until the dough is no longer sticky to the touch). The dough is ready to be kneaded when it becomes bouncy to the touch.

Turn the dough out onto a clean work surface that has been floured. Using lightly floured fingers, knead the dough for 5 minutes, then shape it into a ball. Let the dough rest, covered with a clean cloth or paper towel, for 10 minutes.

While the dough is resting, fill a heavy-bottomed pot with nine cups of water and add the baking soda. Stir well, then bring the mixture to a boil.

After 10 minutes, uncover the dough and carefully shape it into a 12-inch log with your hands. Using a sharp knife or bench scraper, cut the log into 12 equal pieces.

For Traditional Pretzels:

Roll out a piece of dough into a long rope (about 20 inches long). Take each end of the rope and bring them together so they form a ring, then twist the ends together. Next, bring the ends down so they are touching the inner center of the bottom of the circle, ensuring that everything is attached securely. (Depending on how it goes, you may have to use your fingers to more clearly define the pretzel shape. There’s no shame in it!) Repeat the steps until you have twelve pretzels of equal-ish size.

For Pretzel Bites:

Roll out a piece of dough into a long rope (about 20 inches long). Using a sharp knife or bench scraper, cut the rope into small, bite-sized pieces. Roll each cut piece into a ball. Repeat until all the pieces have been rolled into balls.

When You’re Ready

Once your pretzels or pretzel bites are shaped and ready, drop 1-2 pretzels, or 2-4 pretzel bites, into the pot of boiling baking soda water for 20 seconds. Remove immediately using a slotted spoon or spatula and let excess water drip back into the pot. Gently set the pretzels on one of the prepared baking sheets with parchment paper, spacing them a half-inch apart. Once all pretzels or pretzel bites have been taken out of the water and placed onto the baking sheets, generously sprinkle each with the Everything Bagel Seasoning.

Bake the pretzels in the oven for 12-15 minutes, switching the baking sheets from top to bottom halfway through, until the pretzels are golden brown.

Serve pretzels warm with your preferred dipping sauce (though I eat mine as-is!)

TO STORE: Allows pretzels to cool, then place them in an airtight storage container for up to 3 days. When ready to serve, warm the pretzels in a 350 degree Fahrenheit oven for 5-10 minutes.

SOURCE: Adapted from Sally’s Baking Addiction

Conchiglie with Sweet Chicken Sausage, Parmesan, and Spinach

Recipe: Conchiglie with Sweet Chicken Sausage, Parmesan, and Spinach - Seasoned with Sydney blog

I live for two things now that I’m in my late twenties: quick meals, and abundant leftovers.

When I was a kid, I hated leftovers, but never really understood why. The food usually looked and tasted the same, and was always on the table by 7:00 PM. I think maybe it was because at school, hot lunch options were always rotated, so you felt like you were getting a different meal every day. And as a sweet but very naive child with no comprehension of how long it might take a working mother to throw together a meal from scratch after a full day, I thought something new and different (or, at least different for the day) would be placed in front of me at home as well. Now, as an adult who’s had hectic workdays and super long commutes, I not only like leftovers, I cherish them.

Recipe: Conchiglie with Sweet Chicken Sausage, Parmesan, and Spinach - Seasoned with Sydney blog

This Conchiglie with Sweet Chicken Sausage, Parmesan, and Spinach, a new weeknight favorite, comes together so fast, and is the perfect two-pot meal to make for big and small families alike. If you’ve got a bigger family, there’s plenty of pasta, protein, and veggies for everyone. Or, if your family’s like mine and on the smaller side, you’ll have leftovers for days!

What I love about this pasta dish is the rich meatiness of the chicken sausage (the kind I get is beautifully pre-seasoned with sweet red peppers and fennel seeds), spiciness of the garlic, deep herbaceous flavor of the spinach, and just a hint of saltiness and cheesiness from the Parmesan cheese, which is generously sprinkled on top at the end.

Just 30 minutes is all you need to make this magical pasta dish happen. And if you don’t have conchiglie (better known as seashell pasta) in the pantry, don’t fret - boil whatever small pasta you’ve got on-hand and I promise you it’ll be golden!

Conchiglie with Sweet Chicken Sausage, Parmesan, and Spinach

What You’ll Need:

  • 16 oz conchiglie

  • 2 tablespoons extra virgin olive oil

  • 1.5 ibs sweet (or mild) chicken sausage

  • 4 tablespoons salted butter

  • 4 cloves garlic, minced

  • 9 ounces (1 bag) fresh spinach

  • 1/2 cup grated Parmesan cheese

  • Coarse kosher salt

  • Freshly-ground black pepper

Directions:

Cook the conchiglie according to the package instructions for al dente. Just before the timer goes off, reserve about 1 cup of pasta water. Once finished cooking, drain the conchiglie.

While the conchiglie is cooking, carefully cut the chicken sausage into bite-sized pieces. Set aside.

Set a large-bottomed pot such as a dutch oven over medium heat and add the olive oil. Next, add the sausage and cook until the pieces have started to brown, about 5 minutes.

Add the butter and minced garlic and stir frequently to ensure the butter melts fully and the garlic does not burn, about 1-2 minutes.

Turn the heat to medium-low, then add the spinach and 1/3 cup of the reserved pasta water and stir frequently until the spinach has shrunken significantly in size, about 2 minutes.

Turn off the heat and add the conchiglie, stirring continuously to release any steam from the spinach and to make sure the ingredients in the pot are thoroughly combined. Season with kosher salt and freshly-ground black pepper to taste.

After about five minutes, sprinkle the Parmesan over the top and serve warm.

TO STORE: Once cool, pasta can be kept in an airtight container in the refrigerator for up to one week.

SOURCE Adapted from Budget Bytes.

Review: Great Jones The Dutchess

The Duttchess Great Jones Review - Seasoned with Sydney blog

More than any appliance or gadget you’ve got in your kitchen, the dutch oven is your workhorse because its versatility makes it perfect for a myriad of cooking tasks. Soup, stew, broth, jam, jelly, bread - you name it, you can make it in a dutch oven. In fact, if you buy nothing else for your kitchen, let the one thing you do splurge on be a dutch oven…and maybe a rubber spatula or two.

I remember the day I first got one, during a routine trip to Marshall’s on Boylston Street in Boston when I wasn’t ready for a long T ride home. It was in October, and around that time every year, as the leaves begin to change and the chill starts to set in, the store switches over from summer offerings to fall fare, complete with ornately-painted plates and charming autumn holiday tchotchkes. It’s all adorable and somewhat unnecessary, but what caught my eye that year was the Cuisinart dutch oven placed front and center on a table in the home section. My interest in food had by that time developed into a passion, and I was watching every cooking show and tutorial I could get my hands on. In many videos, the host had a dutch oven either in front of them or on display on an open shelf in the background. Of course, with massive budgets and the justification for such an expense, the dutch ovens I saw were top-of-the-line Le Creuset, always in perfect condition. Le Creuset dutch ovens are gorgeous enameled cast iron pots, made in France, with brightly-colored exteriors and cream-colored interiors. They’re meant to last you a lifetime, but lifetime-quality ain’t cheap - a brand new 6-quart Le Creuset dutch oven will set you back almost $400.

Still, the 5-quart dutch oven at Marshall’s that fall day was just as beautiful, and with a $60 price tag - a far cry from $400 - I just couldn’t help myself. So that little oven, with its glossy maroon exterior and sturdy body went home with me. Seven years later, my go-to pot, which looks pretty close to brand new thanks to meticulous upkeep, is still going strong. But with a smaller body and temperature limitations (I can’t cook anything past medium on the stove and 350 degrees Fahrenheit in the oven) it’s time for an upgrade. So, meet my new love, The Dutchess by Great Jones.

review: great jones dutchess dutch oven seasoned with sydney blog

If you’re unfamiliar with Great Jones, it is a direct-to-customer cookware company that was founded in 2017 by Sierra Tishgart and Maddy Moelis, childhood best friends who set out on a mission to make quality cookware that’s not only aesthetically-pleasing, but offered at an affordable price point. With so many DTC cookware companies saturating the market at the moment, it can be hard for any brand to set themselves apart, but Great Jones has a not-so-secret weapon that blows everyone else out of the water: The Dutchess.

review: Great Jones the dutchess seasoned with sydney blog

Designed to rival high-end brands like Le Creuset and Staub, The Dutchess is 6 3/4 quarts of enameled cast iron with a smooth coating on the inside and thrice-fired matte enamel finish on the outside. It’s currently available in 7 colors, and retails for $155.

Review: Great Jones The Dutchess dutch oven seasoned with sydney blog

What I love:

  • Sturdiness: This thing has HEFT! At 15 pounds it’s not the lightest pot out there, but I feel confident that it’s sturdy enough to withstand any cooking project I throw at it.

  • Size and shape: With its unique oval shape and nearly 7-quart volume, The Dutchess’ size is great for making big batches of stews as well as roasting large cuts of meat, and baking bread. The website even says that it’s big enough to roast an entire chicken!

  • Price: While $155 is still a lot to spend on one kitchen item, it is massively more affordable than higher-end dutch ovens with the exact same capabilities.

  • Color selection: My first introduction to The Dutchess was via Instagram when a large, pink dutch oven in a photo caught my eye. I wasn’t familiar with the logo, but based on the color I knew I had to learn more. Sadly, the pink color has been discontinued, but there are still several brilliant colors to choose from! When making my selection, I vacillated between the red (Marinara), and green (Broccoli) before ultimately deciding on yellow (Mustard). As soon as I opened the box I knew I’d made the right decision!

  • Interior color: When making jams, sauces, or even browning butter, it’s important to be able to see what you’re doing to ensure you don’t end up with a burnt mess. Some brands, like Staub, sell dutch ovens with cast iron interiors. That’s perfectly fine for soups and bread, but not ideal for other tasks in which the food might blend in. Le Creuset sells dutch ovens with cream-colored enamel interiors that make it easy to see, but after extended use, the inside tends to discolor. The Dutchess offers the best of both worlds: a gray interior that’s light enough for proper color detection and dark enough to hide slight discoloration.

  • High oven temperature tolerance: One major setback of my old Cuisinart is that I can’t cook anything in the oven past 350 degrees Fahrenheit. That means bread-baking is out, as well as finishing off dishes in the oven that require 375 degrees or higher. The Dutchess is oven-safe up to 500 degrees, and that is MARVELOUS.

  • Stove-top agnosticism: Whether you have a gas range, electric stove, or induction cook top, The Dutchess can be safely used. This is especially helpful if you move house and find yourself working with a new burner system.

What I don’t love:

  • Matte finish: One thing that bothered me right away was the matte finish on The Dutchess. All other dutch ovens I own or have looked at have a glossy finish that feels smooth to the touch. The matte finish on this oven feels slightly rough, and on more than one occasion, I’ve feared that any accidental slide on the gas range or bump from another pot on the stove is going to leave a huge scratch. So far, all marks have wiped off quickly and easily, but without the gloss, the outside has a bit of an “unfinished” look and feel.

  • Weight: As mentioned above, this dutch oven is HEAVY. The weight makes it feel sturdy, but carrying this thing around can be a bit of a struggle, and cleaning with one hand almost impossible. If you’re making a soup, make sure to use your ladle for as long as you can because it’s difficult to hold this pot with one hand while trying to scrape out food with the other for longer than a few seconds.

I’ve had The Dutchess for just over a month and have thoroughly enjoyed my time with it so far. Even with the heat off for long periods of time, my food has stayed piping hot, and clean-up has been a DREAM. Like any cookware, how well you take care of it will determine how long you’ll have it, but I can tell that this is a quality piece that will be with me through many of my future kitchen ups and downs. And did I mention that I love the color? Yellow is the happiest hue on Earth, so even if you’ve burned that stew to the point of no return, at least the sunny color will put a smile on your face!

Learn more about The Dutchess by Great Jones HERE!


Lightly Spiced + Everything Nice Christmas Cookies

This year, I am the Christmas Queen. SERIOUSLY. I am so incredibly proud of myself because I have NOT waited until the very last minute for my gifts. Usually, things get pretty down to the wire for me and I wind up finding myself staring at the impossibly long line at the post office praying that I can get things out on-time, then paying an arm and a leg to insure that possibility becomes a reality. But not this year, friends. This year, your girl started shopping a full TWO (2) months in advance. Granted, that first purchase was actually for myself (holiday cards), and I didm't buy anything else for a month, but it COUNTS. I will say this though: I've been behind on my holiday cookie making/ consumption. Only ONE batch of classically-Christmas cookies (oo alliteration) has made it out of the kitchen, and it's already December 21st! I'm ashamed. BUT, I plan to make up for this in the coming weeks. First up: these very lightly spiced (+ everything nice) Christmas cookies!

These are very, very simple cookies meant for when you want a taste, but you don't have a ton of time to fuss. The base is a classic sugar dough recipe, but with a hint of every single spice you have ever associated with Fall/winter.

These cookies are crispy, buttery and a bit little crunchy from the optional topping of Demerara sugar, which I recommend because not only does it add an extra layer of texture,  it also makes your cookies sparkle like they're supposed at Christmas time. And although these cookies do have spice, it's only a hint. I like it because it elevates your sugar cookie, and gives it a little more oomph. These cookies are for sugar cookie purists looking to fray a little from the pack. Go crazy, but not too crazy, know what I mean?

Try some!


LIGHTY SPICED + EVERYTHING NICE CHRISTMAS COOKIES

What You'll Need:

1/4 teaspoon ground cinnamon

1/4 teaspoon ground ginger

1/8 teaspoon ground cloves

1/8 teaspoon ground allspice

3/4 teaspoon kosher salt

1/2 teaspoon baking powder

3 cups all-purpose flour, plus more for rolling

2 1/2 sticks unsalted butter, chilled and cut into cubes

1 cup sugar

1 large egg

1 large egg yolk

1 teaspoon vanilla extract

Demerara sugar for topping, optional


DIRECTIONS 

Whisk the spices, salt, baking powder, and 3 cups flour in a small bowl. Set aside.

Using an electric mixer with the paddle attachment (or a hand mixer, or a wooden spoon), beat the butter and sugar on high speed until well-combined. Next, add the egg, egg yolk, and vanilla extract, and beat until combined. Scrape the sides and the bottom of the bowl if necessary.

Reduce the speed to low, then add about half of the dry ingredients until just combined. Then, add the rest and mix until combined; be careful not to over mix.

Form the dough into two 3/4 inch thick disks (you should see flecks of spices throughout the dough), wrap each disk in plastic wrap, then chill in the refrigerator for at least 2 hours, or overnight.

Place racks in the upper and lower thirds of the oven. Preheat the oven to 325 degrees F. Line two cookie sheets with parchment paper.

Let one disk of dough come to room temperature on the counter for 5-10 minutes so that is softens slightly. On a sheet of parchment paper that has been lightly floured, roll out the first disk of dough to 1/4 inch thickness, dusting with flour if it gets too sticky. Make sure to also flour your rolling pin, and cookie cutters. Cut out shapes with your cookie cutters, then transfer to the cookie sheets. Leave about 1 inch of space between each cookie.

Bake cookies about 12-16 minutes, rotating from front to back and top to bottom halfway through baking, until the edges are lightly golden brown. If using, immediately sprinkle Demerara sugar liberally on the tops of each cookie, then let them sit for five minutes on the baking sheet before transferring them to wire racks to cool completely. Repeat with the remaining cookie dough.

TO STORE: Cookies will last for at least a week if kept in an airtight container.


SOURCE: Adapted from Bon Appetit and Dorie's Cookies

Mini Atlantic Beach Pies

Living a stone's throw away from the Atlantic Ocean now has gotten me thinking about beach town culture. The locals around these parts are very set in their ways when the sun is shining and you haven't seen a thermometer drop past 80 degrees in a week. They get up when the sun rises, slather on a healthy coating of sport sunblock, then set up shop at the beach until the sun goes down. And once the sun goes down, if they've planned correctly, they'll have a bonfire on that very same beach. Lather, rinse, repeat.

They're fueled by frozen lemonades and hot dogs, and vow to be olympic-level good at beach volleyball and sailing everyday until their feet hit the pavement and reality sets in. Every minute is water, sand, and sun, and it's all incredibly new to me. Sure, in the town I grew up in, in the Midwest, we were lucky enough to live right by the Lake with beautiful beaches and our own fair share of summertime rituals, but it's just not the same. In the Midwest, fairs and festivals are the name of the game, and stuffing yourself to the very brim with authentic foods of many cultures is how you play to win. But not here. Here, ne'er a pretty Summer day is squandered indoors, and every moment a bull is taken by the horns and ridden all the way to where life begins and ends: the beach. I'll tell you what, it'll certainly take a little getting used to (first things first, I'll have to order a vat of SPF 70 off Amazon), but I plan to be alll about that life one day. Provided there are snacks. And the weather stays between 75 and 79 degrees, as I am prone to fits of hot weather-related complaining.

Can you believe that Summer is unofficially officially over?? Three months just whizzed past. If the humidity hadn't had its way with my hair from May to present day, I could almost tell you that it never happened at all. And while I'm more than delighted to welcome in my favorite season, Fall, with as many apple cider doughnuts, hay rides, pie baking, and cardigans and flannel as my lil' heart can take, I'm also a sucker for goodbyes. Why, it wasn't a mere seven months ago that I was tightly bundled up in a heavy winter coat, greedily bathing my face in the glow of a sun that only gave a whisper of warmth. And the days were short and dark, and I wished for Summer with every breath I took. But you can never appreciate or miss something until it's gone, so it's time for Summer to TTFN so I can remember what it was like to love it once more. To give it a proper adieu, I chose to make my favorite dessert: pie, in miniature form because who doesn't love a PERSONAL PIE, with a little wink and nod to my new-ish new home. Hello, Atlantic Beach Pie.

At its core, this Atlantic Beach Pie is the baby of a Key Lime pie and a Lemon Meringue pie. It has both lemon and lime juice, a saltine cracker crust, and delicious, over-the-top, fluffy and puffy meringue; if so you choose to whip up a batch and use it. (P.S. You'll have so many egg whites leftover. Make the meringue.)

There are many, many things that I love about these baby Atlantic Beach pies. For starters, the saltine cracker crust, a detour from the usual graham cracker crust found in basic Key Lime and Lemon Ice Box pies, reminds me of the beach, and transports me to those sunny sand-filled days everyone from my neighbor to the bank teller are always raving about. I love the freshness and brightness that the just-squeezed citrus juices bring to the table. The pies are so fragrant that even a quick whiff of one in passing can wake me right up. And most of all, these are pies that I can not only give to those friends and loved ones who absolutely adore citrus desserts, but also to those friends who *GASP* aren't dessert people. They're sweetened by a few tablespoons of sugar in the crust, and the sweetened condensed milk, and that's it. There's enough sweetness to keep your sweet-tooth happy, but overly-sweet they are not. It's a win-win for every party, and I can go to bed at night knowing that even the most savory-oriented people can compromise every once in a while. Plus, and I've said it before but I'll say it again: WHO DOESN"T LOVE PERSONAL PIES? They're just too cute to resist.

In conclusion, now is the time to raise our forks to a lovely, hot, and humid summer by digging into petite summer-tastic citrusy pies, and reminiscing about the good times. Cheers, Summer '16. It's been real.


Now, pass me that can of pumpkin, would ya? We've got work to do.


MINI ATLANTIC BEACH PIES

Makes 4 6-inch pies (these are the ones I use from WS!) 

What You'll Need:

For the crust:

  • About 2 1/2 sleeves of salted saltine crackers, or about 120 crackers
  • 1 cup unsalted butter, softened
  • 6 tablespoons granulated sugar

For the pies:

  • Two 14-ounce cans of Eagle Brand sweetened condensed milk
  • 8 egg yolks (save the whites to make a tasty meringue!)
  • 1/2 cup lime juice, freshly squeezed
  • 1/2 cup lemon juice, freshly squeezed
  • Lime zest, for garnish

DIRECTIONS 

Preheat your oven to 350 degrees F. Take out two baking sheets, set them aside.

Finely hand-crush the saltine crackers in a large bowl, but be careful not to crush them so much that they become cracker dust. Add the sugar and stir to mix. Next, add the butter and knead it in until the cracker crumbs come together like a dough. Take out your four mini pie plates, then press the dough evenly into each. (Note: You may end up with more pie dough than pie plates to press it into, and that's perfectly fine. Better to have too much than not enough when it comes to mini pies!)

Chill in the refrigerator for 15 minutes, or freeze for 10-12. Once your pies have chilled, place two on each baking sheet and bake in the oven for 18-20 minutes, or until the crusts have gotten nice and golden brown. Let them cool slightly.

While your pie crusts are cooling, it's time to make the filling. Start off by beating the egg yolks into the milk until everything is completely combined. Next, add the citrus juice. At first, the  juice may sit right on the top and make your custard look very thin and watery. It is very, VERY important that you stick with it and carefully stir it (it tends to splash all around at first) until all of your ingredients are completely combined. You'll start to see it thicken to a normal consistency again, just give it a little time.

Once your custard has come together, pour it into each pie plate, making sure to avoid overfilling them. Carefully set your pie plates (if you haven't already) back on their baking sheets, then bake the pies for 16 minutes until the filling has set.

Let your pies cool on cooling racks for 15-20 minutes, then pop them into the fridge to chill completely (they must be absolutely cold in order to be sliced.)

When you're ready to serve, top each with a lovely meringue using your leftover egg whites (here's a great tutorial from The Kitchn!), or freshly whipped cream, then top with a lemon or lime wedge, citrus zest, or coarse sea salt as a garnish.


SOURCE: Adapted from Food52

NYT Blueberry Muffins

SINCE THE DAWN OF TIME (...the early 1990s...) blueberry muffins have been a staple in my life. They're the go-to treat when I'm in an airport and want something sweet in a hurry. They're my pick-me-up when I have them on-hand and I've had a rough day. They've been in the Special Sunday Breakfast rotation at my house for two whole decades. They're just the epitome of classic baked goods in my book.

Before I became a baker and didn't truly know what a difference home-baking could make in a person's life, my go-to if I wanted blueberry muffins was the store-bought boxed mix. You know which one I'm talking about, don't you? The one with a  cellophane  bag full of flour mix and chemicals, and a slim tin can full of tiny, preserved blueberries swimming in syrup. Then you just had to add a few eggs and a cup of milk, and you were on your way. At the time, those muffins, always served still-warm from the oven and a bit crispy (if not a little dry to be honest) on the outsides tasted great, but it hasn't been until I was the age and stage that I am now that I realized I could've been having it so much better all this time.  Don't get me wrong; those mixes definitely have their place...somewhere, but, my friend, fresh is always best. Sure, it may take a little longer to measure out all the ingredients when you're making blueberry muffins from scratch, but really, how much time are you actually  saving by using boxed cake mix? Not as much as you think.

Despite the fact that blueberry muffins are such a classic, there are perhaps dozens of ways that you can prepare them. And believe me, as someone who has had her fair share of muffins, I've also tried a fair share of those recipes. One particular favorite of mine (and incidentally one of the first recipes I EVER tried) comes from Joy the Baker. She doesn't stray too far from the standard, but she takes things up a notch in her recipe with the inclusion of melted brown butter instead of regular-old softened and unsalted. It brings a sort of nuttiness and depth of flavor that I just absolutely love.

And while that recipe is definitely wayy up there on "Sydney's Favorite Baked Goods, Blueberry Muffin Category" list, something inside me was desperately seeking a recipe that stayed within tradition. If I'm going to have that perfect cup of coffee early on a Sunday morning, with the window shades opened and the glow of dawn seeping in, I want to capture that moment just-so. I want that feeling of being in a coffeehouse somewhere where they serve you cafe treats exactly the way they were intended to be served and consumed: no muss, no fuss, just something that tastes phenomenal. Enter: the New York Times Blueberry Muffins.

These muffins are the perfect celebration of summer blueberries (although, frozen and thawed blueberries will work perfectly well when it's off-season). It calls for two cups, which means that all twelve of these muffins are packed with plump antioxidant-rich blueberries just waiting to burst when you bite into them. And as much as I love a good crispy, crumbly topping made out of flour, sugar, and butter, sometimes a little coarse sugar will also do the trick of adding a bit of texture quite nicely.

Hey, blueberry muffins are a classic for a reason.


NYT BLUEBERRY MUFFINS

What You'll Need:

  • 1/2 cup butter, softened (I've been really into Irish butter lately! Have you heard about Kerrygold?)
  • 1 1/4 cups sugar
  • 2 eggs
  • 1 teaspoon vanilla extract
  • 2 cups flour
  • 2 teaspoons baking powder
  • 1/2 cup milk
  • 2 cups blueberries, washed, drained, and picked over
  • 3 teaspoons sugar

(Baker's Note: Some of the commenters suggested that the blueberries should be rolled in a bit of flour before being added to the batter to prevent them from sinking while baking. I tried it, and it's definitely something to consider!)


Find the recipe HERE from the New York Times!