Brown Butter and Vanilla Loaf Cake

I'm currently engaged in a fierce (but friendly) food gift war with my next door neighbor.

It all started with a piping hot pan of homemade peach cobbler on the hottest Sunday of the Summer. She appeared from out of nowhere with a dessert that made my heart sing, as we'd recently run out of anything sweet, and the dessert-obsessed part of my brain was getting desperate. We bonded over our similar experiences of living in the Midwest, and our mutual addiction to cookbooks. This had the potential to be a beautiful friendship, so I scoured my archives for a divine recipe for brown-butter Madelines (It may just pop up here!). I brought them over, she was surprised and thrilled, and we chatted for 45 minutes as only people blessed with the gift of nonstop gab can do. I thought that would be the end of it.

The very next week, while in my all-star loungewear (which is what I call the clothing that is too good to donate, but too hideous for any human that does not live in this house to see), I heard the chipper double-ring of the doorbell only to find my dear sweet neighbor with a Danish kringle in-tow from my hometown that is now an 18-hour drive away. It was a delicious surprise, so I knew I had to return the favor quickly.

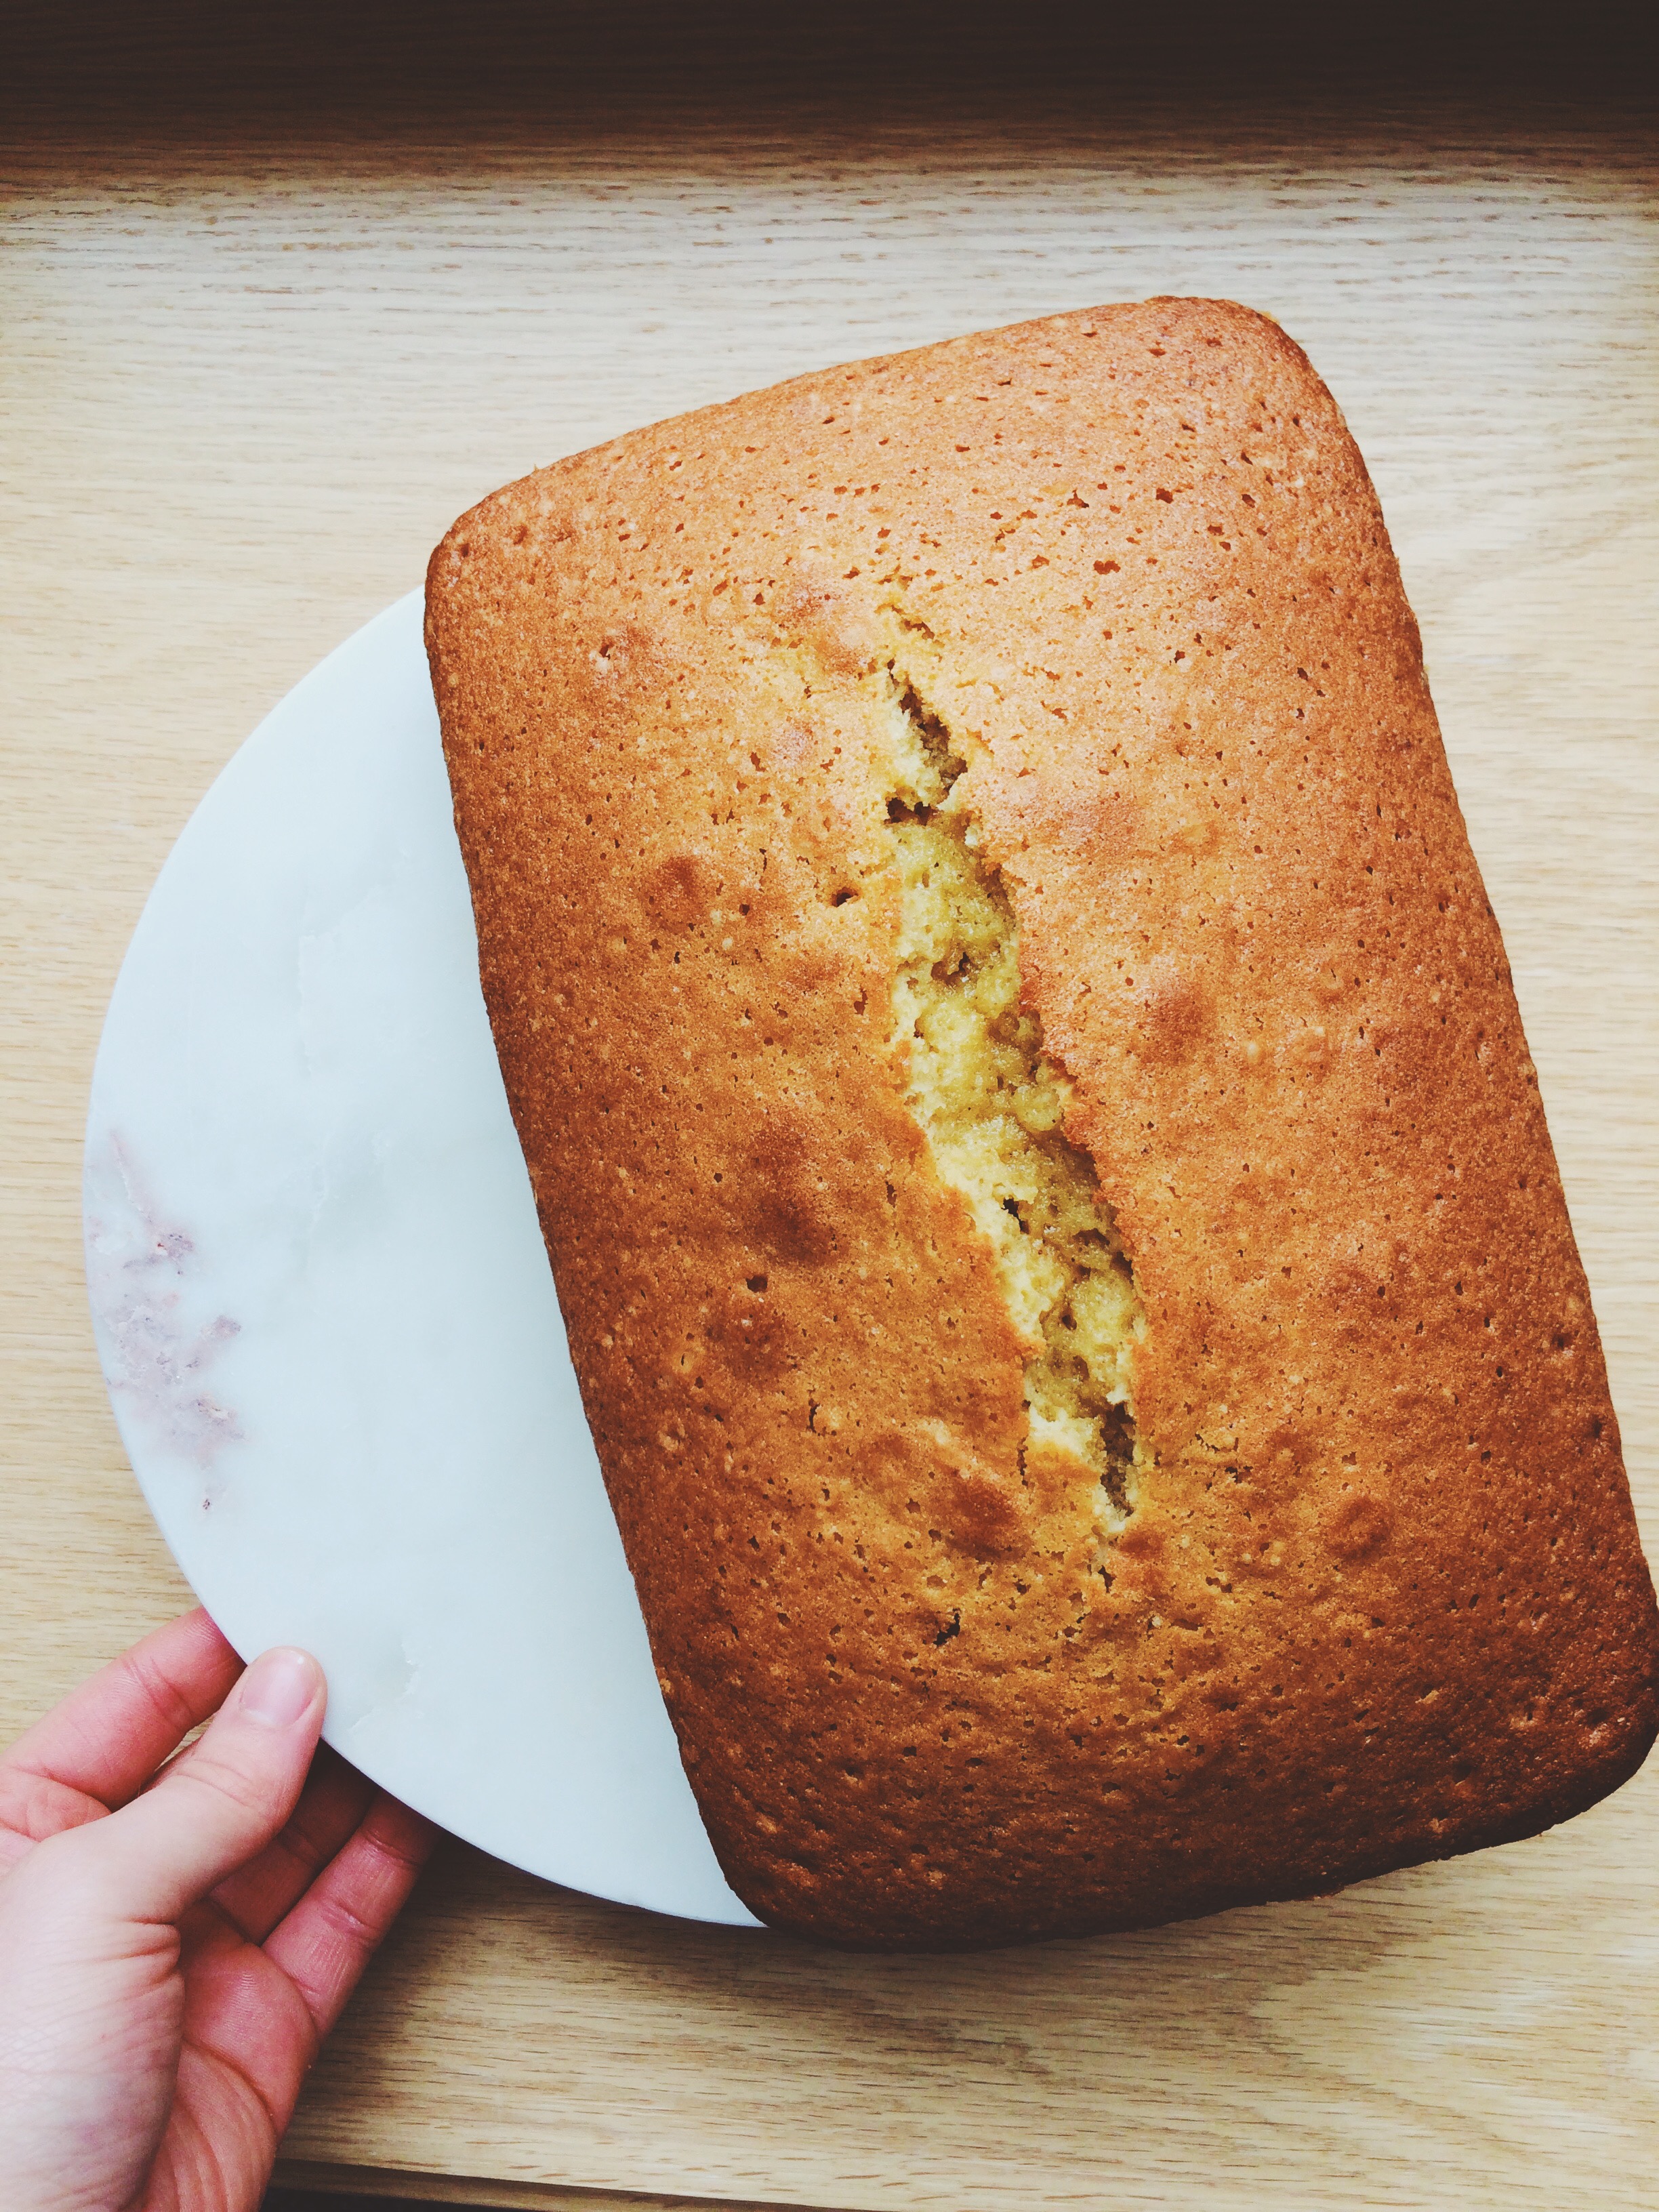
Here's something important to remember when you're caught in a gifting cycle: they don't all have to be showstoppers. Really, the whole point of giving a gift is to show the person that you appreciate them and that you care. So, do the three-tier cake if you want, but don't feel obligated. It's sometimes the simple things that are the most remembered. So, bearing that in mind, this time around I decided to do something very simple indeed: a loaf cake. Super vanilla-y, super buttery, super, super simple. She can have a slice for breakfast. She can have a slice while reading the Sunday paper. She can even have it with tea with a friend. It's super casual, and a gift that is right up both of our alleys.

Of course, this cake is also great for when you're craving a sweet treat, but you don't want to dirty every single bowl and pan in the house. It's quite straight-forward to make, and takes about 60ish minutes or so to bake. It's perfect for when you want to keep things really low-key. And did I mention how incredibly moist it is? So moist!

So, make this little cake as a gift, or keep it for yourself. The decision is yours. And it's tasty.

I've been promised a container of homemade soup as soon as the air starts to turn chilly, so the warm and fuzzy food war rages on...


BROWN BUTTER AND VANILLA LOAF CAKE 

What You'll Need:

  • 1 stick unsalted butter
  • 1 3/4 cups all-purpose flour
  • 1 1/2 teaspoons baking powder
  • 1/4 teaspoon fine sea salt
  • 1 1/4 cups granulated sugar
  • 4 teaspoons pure vanilla extract
  • 4 large eggs, room temperature
  • 1/3 cup heavy cream

DIRECTIONS

Place a rack in the center of the oven, then preheat the oven to 350 degrees F. Stack two baking sheets on top of each other, then line the top baking sheet with parchment paper. Butter a 9 x 5 inch loaf pan (mine was slightly larger and everything turned out fine!) generously with butter, then coat generously with flour, then lightly tap out the excess. Set the loaf pan on top of the baking sheets and set aside.

Melt the butter in a small saucepan set over medium heat and let it come to a boil. The butter will bubble vigorously for about 5-10 minutes. When the bubbles have subsided, the butter should turn a golden brown color, and start emitting a nutty smell. Watch your butter carefully as it is really, really easy to burn it. Once it has reached the golden brown stage with little flecks floating all around, your brown butter is done. Immediately remove from the heat.

In a medium bowl, whisk the flour, baking poser, and salt together. Set aside.

In a large bowl, add the sugar, then whisk in each egg one at a time, whisking for about 1 minute each until they are all well incorporated. Next, whisk in the vanilla, then the heavy cream. Whisk until everything is fully combined.

Using a whisk or a rubber spatula, gradually stir in the dry ingredients until the batter is thick and smooth. Next, add the melted butter in 2 or 3 additions. Pour the batter into the prepared loaf pan, and smooth out the top so that it is evenly distributed.

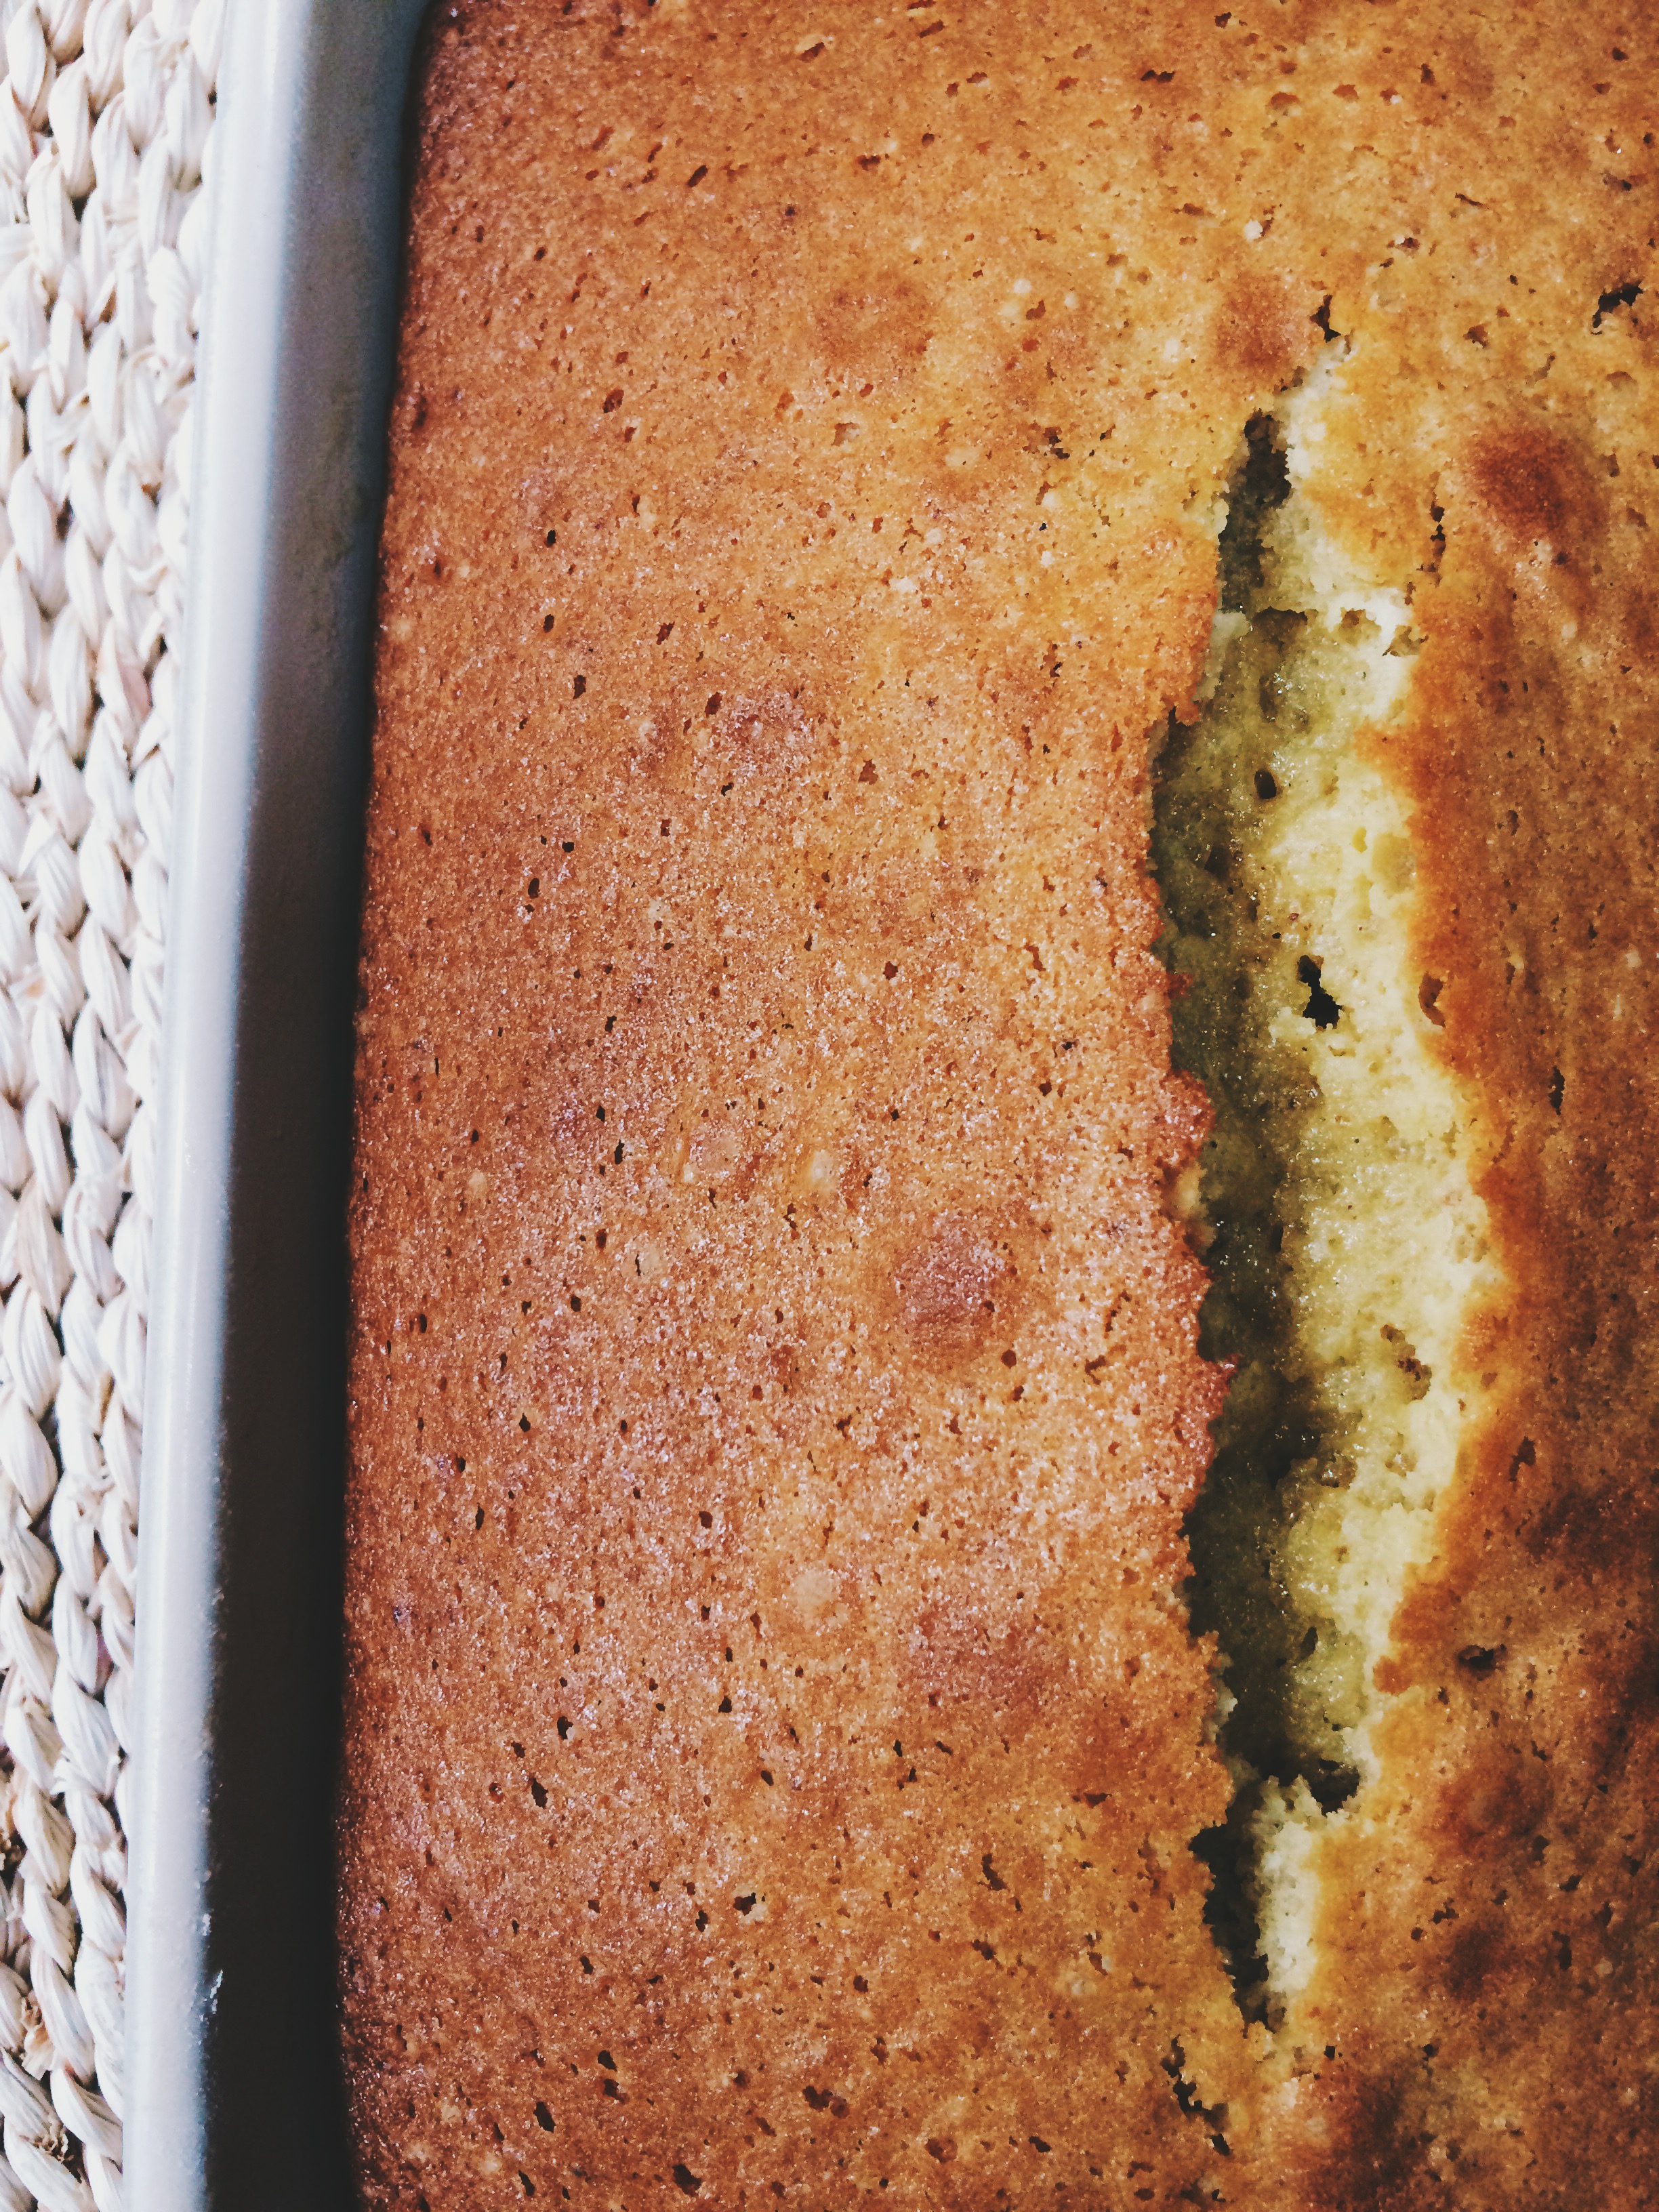
Bake the cake for 55-65 minutes, or until a skewer inserted into the center of the cake comes out clean. If the cake starts to brown too quickly at the 30-minute mark, gently place a little aluminum foil on the top, then continue baking.

When your cake is done, transfer it to a wire rack to cool for five minutes, then take it out of the pan and let it cool completely.

To store: Wrap tightly in plastic wrap for up to a week.


SOURCE: Baking Chez Moi 

Mini Atlantic Beach Pies

Living a stone's throw away from the Atlantic Ocean now has gotten me thinking about beach town culture. The locals around these parts are very set in their ways when the sun is shining and you haven't seen a thermometer drop past 80 degrees in a week. They get up when the sun rises, slather on a healthy coating of sport sunblock, then set up shop at the beach until the sun goes down. And once the sun goes down, if they've planned correctly, they'll have a bonfire on that very same beach. Lather, rinse, repeat.

They're fueled by frozen lemonades and hot dogs, and vow to be olympic-level good at beach volleyball and sailing everyday until their feet hit the pavement and reality sets in. Every minute is water, sand, and sun, and it's all incredibly new to me. Sure, in the town I grew up in, in the Midwest, we were lucky enough to live right by the Lake with beautiful beaches and our own fair share of summertime rituals, but it's just not the same. In the Midwest, fairs and festivals are the name of the game, and stuffing yourself to the very brim with authentic foods of many cultures is how you play to win. But not here. Here, ne'er a pretty Summer day is squandered indoors, and every moment a bull is taken by the horns and ridden all the way to where life begins and ends: the beach. I'll tell you what, it'll certainly take a little getting used to (first things first, I'll have to order a vat of SPF 70 off Amazon), but I plan to be alll about that life one day. Provided there are snacks. And the weather stays between 75 and 79 degrees, as I am prone to fits of hot weather-related complaining.

Can you believe that Summer is unofficially officially over?? Three months just whizzed past. If the humidity hadn't had its way with my hair from May to present day, I could almost tell you that it never happened at all. And while I'm more than delighted to welcome in my favorite season, Fall, with as many apple cider doughnuts, hay rides, pie baking, and cardigans and flannel as my lil' heart can take, I'm also a sucker for goodbyes. Why, it wasn't a mere seven months ago that I was tightly bundled up in a heavy winter coat, greedily bathing my face in the glow of a sun that only gave a whisper of warmth. And the days were short and dark, and I wished for Summer with every breath I took. But you can never appreciate or miss something until it's gone, so it's time for Summer to TTFN so I can remember what it was like to love it once more. To give it a proper adieu, I chose to make my favorite dessert: pie, in miniature form because who doesn't love a PERSONAL PIE, with a little wink and nod to my new-ish new home. Hello, Atlantic Beach Pie.

At its core, this Atlantic Beach Pie is the baby of a Key Lime pie and a Lemon Meringue pie. It has both lemon and lime juice, a saltine cracker crust, and delicious, over-the-top, fluffy and puffy meringue; if so you choose to whip up a batch and use it. (P.S. You'll have so many egg whites leftover. Make the meringue.)

There are many, many things that I love about these baby Atlantic Beach pies. For starters, the saltine cracker crust, a detour from the usual graham cracker crust found in basic Key Lime and Lemon Ice Box pies, reminds me of the beach, and transports me to those sunny sand-filled days everyone from my neighbor to the bank teller are always raving about. I love the freshness and brightness that the just-squeezed citrus juices bring to the table. The pies are so fragrant that even a quick whiff of one in passing can wake me right up. And most of all, these are pies that I can not only give to those friends and loved ones who absolutely adore citrus desserts, but also to those friends who *GASP* aren't dessert people. They're sweetened by a few tablespoons of sugar in the crust, and the sweetened condensed milk, and that's it. There's enough sweetness to keep your sweet-tooth happy, but overly-sweet they are not. It's a win-win for every party, and I can go to bed at night knowing that even the most savory-oriented people can compromise every once in a while. Plus, and I've said it before but I'll say it again: WHO DOESN"T LOVE PERSONAL PIES? They're just too cute to resist.

In conclusion, now is the time to raise our forks to a lovely, hot, and humid summer by digging into petite summer-tastic citrusy pies, and reminiscing about the good times. Cheers, Summer '16. It's been real.


Now, pass me that can of pumpkin, would ya? We've got work to do.


MINI ATLANTIC BEACH PIES

Makes 4 6-inch pies (these are the ones I use from WS!) 

What You'll Need:

For the crust:

  • About 2 1/2 sleeves of salted saltine crackers, or about 120 crackers
  • 1 cup unsalted butter, softened
  • 6 tablespoons granulated sugar

For the pies:

  • Two 14-ounce cans of Eagle Brand sweetened condensed milk
  • 8 egg yolks (save the whites to make a tasty meringue!)
  • 1/2 cup lime juice, freshly squeezed
  • 1/2 cup lemon juice, freshly squeezed
  • Lime zest, for garnish

DIRECTIONS 

Preheat your oven to 350 degrees F. Take out two baking sheets, set them aside.

Finely hand-crush the saltine crackers in a large bowl, but be careful not to crush them so much that they become cracker dust. Add the sugar and stir to mix. Next, add the butter and knead it in until the cracker crumbs come together like a dough. Take out your four mini pie plates, then press the dough evenly into each. (Note: You may end up with more pie dough than pie plates to press it into, and that's perfectly fine. Better to have too much than not enough when it comes to mini pies!)

Chill in the refrigerator for 15 minutes, or freeze for 10-12. Once your pies have chilled, place two on each baking sheet and bake in the oven for 18-20 minutes, or until the crusts have gotten nice and golden brown. Let them cool slightly.

While your pie crusts are cooling, it's time to make the filling. Start off by beating the egg yolks into the milk until everything is completely combined. Next, add the citrus juice. At first, the  juice may sit right on the top and make your custard look very thin and watery. It is very, VERY important that you stick with it and carefully stir it (it tends to splash all around at first) until all of your ingredients are completely combined. You'll start to see it thicken to a normal consistency again, just give it a little time.

Once your custard has come together, pour it into each pie plate, making sure to avoid overfilling them. Carefully set your pie plates (if you haven't already) back on their baking sheets, then bake the pies for 16 minutes until the filling has set.

Let your pies cool on cooling racks for 15-20 minutes, then pop them into the fridge to chill completely (they must be absolutely cold in order to be sliced.)

When you're ready to serve, top each with a lovely meringue using your leftover egg whites (here's a great tutorial from The Kitchn!), or freshly whipped cream, then top with a lemon or lime wedge, citrus zest, or coarse sea salt as a garnish.


SOURCE: Adapted from Food52

NYT Blueberry Muffins

SINCE THE DAWN OF TIME (...the early 1990s...) blueberry muffins have been a staple in my life. They're the go-to treat when I'm in an airport and want something sweet in a hurry. They're my pick-me-up when I have them on-hand and I've had a rough day. They've been in the Special Sunday Breakfast rotation at my house for two whole decades. They're just the epitome of classic baked goods in my book.

Before I became a baker and didn't truly know what a difference home-baking could make in a person's life, my go-to if I wanted blueberry muffins was the store-bought boxed mix. You know which one I'm talking about, don't you? The one with a  cellophane  bag full of flour mix and chemicals, and a slim tin can full of tiny, preserved blueberries swimming in syrup. Then you just had to add a few eggs and a cup of milk, and you were on your way. At the time, those muffins, always served still-warm from the oven and a bit crispy (if not a little dry to be honest) on the outsides tasted great, but it hasn't been until I was the age and stage that I am now that I realized I could've been having it so much better all this time.  Don't get me wrong; those mixes definitely have their place...somewhere, but, my friend, fresh is always best. Sure, it may take a little longer to measure out all the ingredients when you're making blueberry muffins from scratch, but really, how much time are you actually  saving by using boxed cake mix? Not as much as you think.

Despite the fact that blueberry muffins are such a classic, there are perhaps dozens of ways that you can prepare them. And believe me, as someone who has had her fair share of muffins, I've also tried a fair share of those recipes. One particular favorite of mine (and incidentally one of the first recipes I EVER tried) comes from Joy the Baker. She doesn't stray too far from the standard, but she takes things up a notch in her recipe with the inclusion of melted brown butter instead of regular-old softened and unsalted. It brings a sort of nuttiness and depth of flavor that I just absolutely love.

And while that recipe is definitely wayy up there on "Sydney's Favorite Baked Goods, Blueberry Muffin Category" list, something inside me was desperately seeking a recipe that stayed within tradition. If I'm going to have that perfect cup of coffee early on a Sunday morning, with the window shades opened and the glow of dawn seeping in, I want to capture that moment just-so. I want that feeling of being in a coffeehouse somewhere where they serve you cafe treats exactly the way they were intended to be served and consumed: no muss, no fuss, just something that tastes phenomenal. Enter: the New York Times Blueberry Muffins.

These muffins are the perfect celebration of summer blueberries (although, frozen and thawed blueberries will work perfectly well when it's off-season). It calls for two cups, which means that all twelve of these muffins are packed with plump antioxidant-rich blueberries just waiting to burst when you bite into them. And as much as I love a good crispy, crumbly topping made out of flour, sugar, and butter, sometimes a little coarse sugar will also do the trick of adding a bit of texture quite nicely.

Hey, blueberry muffins are a classic for a reason.


NYT BLUEBERRY MUFFINS

What You'll Need:

  • 1/2 cup butter, softened (I've been really into Irish butter lately! Have you heard about Kerrygold?)
  • 1 1/4 cups sugar
  • 2 eggs
  • 1 teaspoon vanilla extract
  • 2 cups flour
  • 2 teaspoons baking powder
  • 1/2 cup milk
  • 2 cups blueberries, washed, drained, and picked over
  • 3 teaspoons sugar

(Baker's Note: Some of the commenters suggested that the blueberries should be rolled in a bit of flour before being added to the batter to prevent them from sinking while baking. I tried it, and it's definitely something to consider!)


Find the recipe HERE from the New York Times!

Coffee Stracciatella

For my birthday last year, I decided that the gift that I wanted to give myself the most was an ice cream maker. I love ice cream. I love how versatile it is. I love how it can be eaten a million different ways. Most of all, I just loved that there was a (relatively) inexpensive appliance out there that could help me make a treat that I seek out at various life stages (monthly mood swings, breakups, summer giddiness, etc. etc.)

The day it arrived my brain danced with all the different recipes that I could toss into my little white ice cream/gelato/sorbet/frozen yogurt maker, but, like with literally every single new thing I ever buy, I deemed it too nice to use just then and promptly put it back in its box to "rest" until an occasion momentous enough arose for me to finally break it out and use it. Classic Sydney move. My ice cream maker sat new, empty, and alone in its original packaging for 1.3 years.

Finally, friends, an occasion momentous enough arose: I found a recipe, and I wanted ice cream. Groundbreaking stuff, guys.

I am far and away a morning person. Always have been. When I was in college I woke up at 6:30 for my 8 AM classes with a pep in my step whilst my roommates couldn't even utter a syllable without first groggily shoving a mug under the coffe-maker and taking a few sips. But there was one class that even I couldn't wake myself up for and thus had to turn to those beyond delicious frappe drinks that Starbucks sells in grocery stores. My go-to was always "vanilla mocha." Did it totally wake me up? Not really. Was it delicious? Totally!

And so, as I spooned this decadent coffee stracciatella into my mouth, all of a sudden the memories of my vanilla mocha frappe days came rushing back. I was there again, in that 8 AM, sipping away at my creamy, milky, choclatey coffee drink which was perfectly cold and perfectly delicious. And it of course makes perfect sense: Stracciatella is milk-based, mixed with heavy cream, sugar, vanilla, and egg yolks. Add in two heaping tablespoons of espresso powder, plus a drizzling of melted bittersweet chocolate (the latter is added whilst the ice cream is churning), and you've got the frozen vanilla mocha treat of dreams. It's rich, creamy, decadent, and so velvety smooth. The coffee flavor is concentrated and completely complimented by the flecks of chocolate that, while being churned, freeze instantly and disperse throughout the entire ice cream. This particular ice cream is special, and I'm so glad it was my first homemade.


Have an ice cream maker? You've GOT to try this coffee stracciatella


COFFEE STRACIATELLA 

What You'll Need:

  • 1 1/2 cups heavy cream
  • 1 cup whole milk
  • Pinch of kosher salt
  • 1/2 cup sugar, divided
  • 1 teaspoon vanilla extract
  • 5 large egg yolks
  • 2 teaspoons instant espresso powder (I like Cafe Bustelo)
  • 3 ounces bittersweet chocolate, melted


DIRECTIONS 

In a medium saucepan, combine the cream, milk, salt, and 1/4 cup sugar. Next add the vanilla extract and stir to combine. Bring your mixture just to a simmer, stirring often to dissolve the sugar. Once the sugar has dissolved, remove from heat.

Whisk egg yolks and the remaining 1/4 cup sugar in a medium bowl until pale, which should take about 2 minutes. Very carefully whisk in about 1/2 cup of the warm cream mixture to temper the eggs, then whisk the yolk mixture into the remaining cream mixture. Cook the mixture over medium heat, stirring constantly, until the mixture is thick enough to coat the back of a wooden spoon. This should take about 2-3 minutes. Remove from heat.

Strain the custard into a medium bowl set over a large bowl of ice water. Next, stir in the espresso powder until dissolved. Let the mixture cool, stirring every so often.

Process your custard in an ice cream maker according to manufacturer's instructions (Make sure to read them VERY carefully!). Once custard is frozen to your desired consistency in the ice cream maker, gradually pour in the melted chocolate (this is best to do when the machine is on, so you won't get any frozen clumps). Process until the ice cream is flecked with chocolate, about 2-3 minutes longer.

At this stage, your ice cream will probably be at soft-serve consistency. If you prefer a harder consistency, go ahead and pop your ice cream into a freezer-safe storage container and into the freezer for another hour or two. The longer you keep it in, the more solid it will become. Enjoy!!


SOURCE: Bon Appetit 

Vanilla Chai Chocolate Truffles

On this episode of "Sydney Makes Easy Things That Impress Her Friends," we're talkin' 'bout chocolate truffles. But not just any regular chocolate truffles, oh no, we're throwing vanilla chai into the mix. Essentially, they're chocolate balls, but doesn't the word "truffle" just make it sound much fancier? Ya, I agree.

The bond that a woman of color has with her hairdresser is one that is sacred, and must be fostered and nurtured. I do this by surprising mine with edible treats at least once a month. And since the hot cross buns that I made a few weeks back were given to family and church members, I decided that my beloved beautician should get something specifically made JUST for her. And like many, many women that I know, she looooooooooves  chocolate. So, I thought, what better treat than just straight-up homemade truffles?

During the holiday season my television basically stays on Food Network and Cooking Channel, and I watched a special episode of Giada at Home in which she made chocolate truffles for some "guests" (more likely the production crew, but ya know, TV magic and all that) who were stopping by for a holiday party. She stepped it up by brewing a bunch of bags chai  in heavy cream, then taking it off the heat and pouring it over chocolate to melt it. Then she stirred it all together until it turned into chocolate ganache, refrigerated it for a few hours until it set, then scooped out the mixture by the tablespoon, rolled it into a ball, coated it in cocoa powder, and then wrapped a little gold leaf around each for a classy touch. They were so cute and elegant, so I logged the recipe away for an occasion when I would really, really want to make them. But when it came time to make these truffles, wouldn't you know it, I didn't have any gold leaf on hand (I'm not workin' with a Food Network budget here), and instead of brewing with classic chai, I decided to switch it up with my favorite bundling of vanilla chai tea bags. Was it a success? Oh yeah. She loved them!

These truffles are perfect for anyone who has a semi-sweet tooth. They've got a bit of an edge to them, with just the hint of sweetness to balance everything out. Basically, you get this intensely rich, deep chocolatey flavor, mixed with the warmth of spices that you find in classic chai, and finished off with the subtle hint of vanilla. The vanilla may just be a gentle whisper, but it definitely won't let you ever forget that it's there.

Best of all, they can be made wayyyy in advance, which works perfectly for me because I can enjoy leftover truffles that didn't fit in the gifted container for weeks to come.

Vanilla Chai Chocolate Truffles: Good for friendship, good for random chocolate cravings.


VANILLA CHAI CHOCOLATE TRUFFLES 

What You'll Need:

  • 1 1/2 cups heavy cream
  • 7 bags vanilla chai tea (I like Bigelow)
  • 1/4 teaspoon salt
  • 9 oz dark chocolate, finely chopped
  • 2/3 cup cocoa powder


DIRECTIONS

Before you begin, tie all of your tea bag strings together in a knot. This makes it much easier to fish them out when you've finished with them.

Pour the heavy cream into a small saucepan, then add your tea bags. Place the pan over medium-low heat, warming the cream slowly; stir occasionally. You'll know when your mixture is heated through when you see little bubbles start to form around the edges of the cream, about 5-7 minutes. Simmer for 3 minutes more, then remove from heat.

Remove the tea bags from the sauce pan. Place the finely chopped chocolate and salt in a medium bowl, then strain the cream mixture over it using a fine-mesh strainer. Let sit for 3 minutes so that the chocolate begins to melt on its own. Slowly whisk the melted chocolate into the cream starting in the center of the bowl, then slowly making your way outwards. Remember to do this slowly and carefully so that the chocolate doesn't seize up! Continue whisking until the mixture is smooth and completely blended. Place a piece of plastic wrap DIRECTLY on top of the ganache, and press down gently to make sure the surface is completely covered.  Let set in the  refrigerator for AT LEAST 3 hours, but the best is overnight. The mixture should be firm by that time, but still easy to work it.

Measure your coca powder, then place in a small, shallow bowl. With a tablespoon cookie scoop (or just a tablespoon measuring spoon), scoop even rounds of ganache into your palm, then very quickly but gently roll into a ball.  Next. roll the ball in the coca powder to coat; gently shake off any excess.. Repeat this process until you've run out of ganache. Place your truffles in an airtight container and refrigerate until you are ready to serve.

Make Ahead: The truffles can be made several weeks ahead of time, kept refrigerated in an airtight container. On the day of serving, roll each in the cocoa powder.


SOURCE: Very, very slightly adapted from Giada De Laurentis 


Hot Cross Buns

Hiiiiiiiiiiiii, how was your Easter??  Mine was epic and uplifting, and full of food. Simply the best.

Have you ever had hot cross buns? This was my first year. Before that, my only knowledge of them began and ended with the song of the same name that I was forced to learn on the recorder in 7th grade. That was it. (Fun fact: I haven't picked up the recorder since.) But when you're young, it's almost a necessity that you start your own traditions and/or jump on holiday-specific bandwagons, so here we are. And I have to tell you: I can't believe I've lived my life up until now without hot cross buns. I mean, it's crazy. I can honestly say, in the four years that I have been baking, hot cross buns are the best things to ever come out of my oven. BY. FAR. Easter Sunday's breakfast was just EXCELLENT, you guys.

Best served warm, these buns are yeasty, squishy, icing-topped perfection. Traditionally, hot cross buns are filled with dried fruit like raisins, currants, cherries, or dates, but my grocery store was serisouly lacking in the traditional dried mixed fruit bags. What I found instead was a mix of dried strawberries, blueberries, cherries, and cranberries, and I LOVED that combination when paired with the warmed apricot jam and blend of cardamom and cinnamon spices. And while I enjoyed the little bursts of strawberries I got, next time 'round, I'll try to make my own fruit mix because the cardamom-cinnamon was practically begging for raisins. Either way, fruit in yeast rolls just WORKS.

You may see these most often on Easter, but something tells me these would work extremely well around Christmas time...or just all-year-round in general.


It's never too late for Hot Cross Buns.


Find the recipe HERE from Bon Appetit! 


Dark Chocolate and Anise Biscotti

There are two sides to me. One side has this need to bake things all the time. The other side is aware that if I bake all the time, then I will feel obligated to eat everything I've made in the event that I don't have anyone to share the wealth with. It's very complicated. That's why I love, love, love biscotti. They're crunchy, they're sturdy, and they last for WEEKS at a time.  I have the freedom to nibble (or not nibble) at my leisure without the looming pressure to not waste a single crumb. It's beautiful.

Biscotti are tough cookies in the best way. The longevity of them is fantastic, but they're also the perfect option for care packages. As much as I love the Midwest (especially now that I can walk outside without a parka), most of the people I care about live in completely different parts of the country. You know that I am a big fan of sending and receiving gifts in the mail. but the edible options for packages are limited. Biscotti are PERFECT for this task.

This week I whipped up a quick batch of Buttery-Cayenne Pecans, then made these Dark Chocolate Anise Biscotti, wrapped everything in half a roll of bubble wrap, threw in a couple of heartfelt cards, then sent them on their way. Two days later, I got a "thank you" text, and a very warm heart. Care packages are my jam. And one of these days, you and I are going to make one together, step-by-step.

As you're well aware by now, I am a huge fan of deceptively easy recipes. Making biscotti? Wayyyy easier than you think. All you have to do is keep up with the time. The rest is a total breeze.

What I love most about this recipe is that it's a lot like having a chocolate chip cookie, but with a hint of licorice. And if you aren't a black licorice fan (I'm not,), have no fear, you'll still love these The anise seeds bring a subtle flavor of licorice that does nothing but completely compliment the oodles of dark chocolate chunks throughout. And I will never turn down a crispy cookie that brings a little texture to the game. If a little softness is more of what you're after, you totally have my permission to dunk a couple of these babies in a steaming cup of coffee.

Eat some biscotti.

Send some to your friends.

Do your thing.


DARK CHOCOLATE AND ANISE BISCOTTI 

What You'll Need:

  • 2 cups all purpose flour
  • 1 1/2 teaspoons anise seeds, slightly crushed
  • 1 teaspoon baking powder
  • 1/4 teaspoon salt
  • 6 tablespoons unsalted butter, softened
  • 1 cup granulated sugar, plus more for sprinkling
  • 2 large eggs
  • 1 large egg yolk
  • 4 oz chocolate, roughly chopped

DIRECTIONS

Place oven racks in the center and upper third of the oven, then preheat to 325 degrees F. Line two cookie sheets with parchment paper. Set aside.

Whisk together the flour, slightly crushed anise seeds, baking powder, and salt in a medium bowl, then set aside.

In the bowl of a stand mixer fitted with the paddle attachment (or with a hand mixer, or with a wooden spoon), cream together the butter and sugar on medium speed until light and fluffy; about 5 minutes.

Reduce mixer speed to low, then add one egg and the egg yolk, then beat until well combined; about 3 minutes.

Add the flour mixture all at once to the stand mixer, and beat on low until well combined. The dough may seem a bit crumbly. Next, add the chocolate chunks and make sure they are evenly distributed throughout.

Divide the dough in half, then place each half on a parchment-lined cookie sheet. Gently knead the dough a few times, just to get it to come together a little more. Next, shape each dough into logs about 8 inches long, and 1 1/2 inches wide. Beat the remaining egg, then generously brush it over each log. Next, sprinkle sugar liberally over each log.

Bake the biscotti on both racks for 20 minutes, then swap racks and bake for an additional 15-20 minutes, until the biscotti are golden brown and baked all the way through.

Take your cookie sheets out of the oven, and let the biscotti rest for a few minutes. Once the biscotti logs are cool enough to handle, cut into 1-inch slices using a serrated knife, cutting in a swift motion.

Place the cookies cut side up onto the baking sheets, then put back in the oven for another 15-25 minutes, depending on how crisp you'd like your biscotti to be. (I prefer mine on the crispier side, so I kept an eye on mine for 25 minutes.)

For an even crispiness, flip your biscotti over and bake for another 2-5 minutes.

Let cool, then store in an airtight container for up to 2 weeks. 


SOURCE: Adapted from Joy the Baker Cookbook: 100 Simple and Comforting Recipes 

Classic Chocolate Pie

There's something very special about being a Northerner with deep connections to the South: tradition. Whether you are up North or down South, there is nothing more sacred than tradition. I love that.

These days in the culinary world, it's about finding the next big innovation. It's about blowing peoples' minds with the new and the shocking. It's about re-inventing the already re-invented. Everything has to be bigger and better and larger than life. But, isn't it nice to sometimes just take a quick step back to honor the classics? Isn't it important to acknowledge the things that have lasted the test of time? I think so. I think that, along with apple pie, chocolate pie is about as classic as they come.


What I love about this chocolate pie is that it really is a classic in more than one sense of the word. It's easy, which the best pies always are. And it's just straight-up what it is: super. super chocolatey.

No fuss, no frills, just supreme fudginess and an utterly buttery, flaky pie crust. And don't forget a generous slathering of homemade whipped cream on top; that's a must-have.


CLASSIC CHOCOLATE PIE  

What You'll Need:

  • 1 Flaky Pie Crust 
  • 1 1/2 cups sugar
  • 3 tablespoons unsweetened cocoa powder
  • 4 tablespoons unsalted butter, melted
  • 2 large eggs, beaten
  • 3/4 cup evaporated milk
  • 1 teaspoon pure vanilla extract
  • 1/4 teaspoon salt
  • homemade whipped cream, for serving (optional)
  • 1 ounce dark chocolate, for shaving (optional)


Find the recipe on Food and Wine.

Heart-Shaped Jammy Sammy Cookies

I know February 14th is long-gone, but I subscribe to Valentine's Day-cutesienss 365 days out of the year.

By the way, how was your Valentine's Day? Mine was surprisingly fun this year, which has freed me from the cycle of weird/awkward/disastrous scenes of Valentine's Day past. I volunteered at the an annual Sweetheart Dinner (last year I made this French Silk Pie), and had a BLAST. There were several courses involved, and no time to take a breath as we were each cooking over our respective dishes (I was on dessert duty but got roped into making seafood Alfredo once we got there). Lots of "behind"-s, and "this is ready to go out!"-s, and "We need more ginger ale for the punch!"-s were thrown out, and it reminded me of how much I love being in a busy kitchen. I live for that hustle and bustle sometimes. I mean, I've never dried so many dishes, or continuously scrubbed the same countertops so many times in my entire life, but MAN was it worth it. It was a really classy affair.

Would you like to know the best bit? These cookies were a BIG HIT!

"Jammy Sammie Cookies" is just the name that I wrote to be cute/slightly annoying. You're probably more familiar with the name "Linzer," because of the filling and shape cut out of the center. I generally see Linzer cookies the most during the Holiday Season, but if you ask me, the cookie cutout + filling pairing should be a yearlong affair. And what goes better with a heart shape on Valentine's Day than fresh strawberry jam? Red is like the official unofficial color of V-Day, so the filling of these cookies were required to match accordingly.

Quick question: how do you feel about homemade jam? Me? I'm all about it. I feel like there's nothing that makes me feel cozier than when I'm making jam from scratch. Sure, it takes way less time to just pick a jar off the shelf at your local grocery store, but when you make it yourself you: A) Know exactly what has gone into it, and B) MADE. IT. YOURSELF. Helloooooooo! It's (relatively) fast, (totally) easy, (unbelievably) fresh, and you know it's always made with love.

Now pair that sweet, sweet jam with some deliciously soft shortbread plus a liberal sprinkling of powdered sugar for good measure, and you've got the stuff of dreams, kids. What could be better?

Since you'll definitely have jam left over after filling the cookies, might I make a few suggestions as to what to use it on?

  1. Biscuits
  2. Scones
  3. Toast
  4. Fingers dipped in
  5. By the spoonful
  6. etc. etc.

And let's just quickly talk about the versatility of these cookies, shall we? Yes, they were made for February 14th, but they can go wayyy beyond that. We're talkin' tea parties, birthday parties, bridal showers, picnics, breakfasts, coffee breaks, dates, etc. etc. Cookie hearts filled with homemade jam never go out of season.

It's a beautiful thing.


HEART-SHAPED JAMMY SAMMY COOKIES

What You’ll Need:

For the shortbread:

2 sticks unsalted butter, at room temperature

1 cup granulated sugar

1/4 teaspoon salt

1 large egg + 1 large egg yolk, room temperature

1 teaspoon vanilla extract

2 1/2 cups all-purpose flour

Powdered sugar for sprinkling

For the jam:

32 oz (two 16 oz containers) strawberries

1/2 cup + 1 tablespoon  brown sugar

Pinch of salt

Zest of 1 whole lemon + juice of half a lemon


DIRECTIONS:

First, let’s make the shortbread cookie dough:

 In the bowl of a stand mixer fitted with the paddle attachment (or a hand mixer, or a wooden spoon), add the butter, sugar, and salt and beat until light and fluffy, about 3-5 minutes. Add the egg and egg yolk one at a time, making sure each addition is well combined. Next, add the vanilla extract. Add the flour in three batches, making sure each addition is well combined (but don’t over-mix), before adding more flour. When necessary, scrape down the sides of the bowl using a rubber spatula.

Once your dough has just come together, lay your dough out on a plastic sheet, then divide it in half. Wrap each half tightly in plastic wrap, then shape to form discs. Refrigerate the discs for at least one hour, but best is overnight.

Ok, dough’s done, now let’s make the jam:

Rinse strawberries before using, and let drain completely before getting started.

Once your strawberries have been washed, hull each strawberry, then cut into quarters. Place all of your cut up strawberries in a medium sauce pan. Next, add your brown sugar, pinch of salt, lemon zest, and lemon juice. Using a potato masher (or the back of a wooden spoon), muddle all of your ingredients together, making sure that the berries’ juices are starting to release, and your sugar and salt have started to dissolve.

Cook your fruit compote, stirring frequently, over medium-high heat until your jam has thickened, and it passes the line test (a line can be drawn down the center of the spoon without the juices running); On my stove, that takes about 30-35 minutes. Along the way, make sure to give your jam a few taste tests, and adjust the flavors to your liking. The mixture will bubble quite a bit and juice may jump out of the pan occasionally, so watch out for that!

When your jam has come together, take it off the heat and let it cool completely before transferring it to a mason jar or tupperware container.

This jam will last for several weeks refrigerated.

VERY IMPORTANT: DO NOT leave the stove whilst you’re making your jam. One minute it can still be too runny, then the next you’re cleaning burnt strawberry syrup out of the pan until your arms fall off. Trust me. Stay put. Keep stirring.

Ok, my dough has rested. Time to make some cookies!

Preheat the oven to 375 degrees F, and line two baking sheets with parchment paper. Set aside.

Remove the first disc of dough and let sit on a counter for ten minutes; this allows it to come to room temperature, thus making it much easier to roll out.

Liberally flour a rolling pin and work surface.

Roll the cookie dough out to a 1/8 inch thickness, then, using a floured heart-shaped cookie cutter, cut out shapes. Transfer the hearts to the cookie sheets lined with parchment paper, about 1-inch apart. Stamp a hole out of the center of half the cookies using the tip of a circle piping tip. Repeat the process with any remaining scraps, and with the second disc of dough.

Bake the cookies one sheet at a time for 7-10 minutes (depending on your oven),  or until the cookies have started to lightly brown around the edges. Allow the cookies to cool for five minutes on the baking sheet before transferring them to wire racks to cool completely.

Transfer the cookies with the holes cut out of the center to one of the cool baking sheets (keep the parchment paper on). Sprinkle a generous amount of powdered sugar over them using a sifter, mesh strainer, or powdered sugar shaker. (Aren’t you glad you have the parchment paper now to catch the excess sugar?) Flip the bottom cookies (no holes in them) over so that the underside is facing you, then apply about a teaspoon of jam right in the center of each. Place the tops on, then lightly press down so that you create a sandwich. The jam should spread evenly to the edges and through the center hole without overflowing. Enjoy!

To Store: Refrigerate in an airtight container for up to a week.


SOURCE: Adapted from A Cozy Kitchen

Cappuccino-Chocolate Sandwich Cookies

I have a question for all the Martha Stewart fans out there: Are you watching Martha Bakes?? If not, go. GO RIGHT NOW. GO SET YOUR DVR! I'll wait here.

OK, did you do it? Good. You won't regret it.

You know what's so rare? Baking shows without all the bells and whistles. Shows these days so are heavily edited for "drama," and condensed so much that you don't really feel like you could belong in that world. When I tune into a baking/cooking show, I want to feel like I'm actually in your kitchen as you TEACH ME SOMETHING! I don't want to be dazzled if it means that whatever has dazzled me is so unattainable that I shouldn't even bother to try. That's why I love Martha Bakes. Martha gets down to the nitty gritty. Whatever she makes, she makes in full. And yeah, there is a bit of "TV Magic"; sometimes what she's just made is already baked, but for the most part, the step--by-step, no matter how long it takes, is there. It's perfect. It's attainable.

This week, while going through the collection of MBs on my DVR, I discovered that Martha had done an episode entirely dedicated to coffee. Yes and yes. I was completely on board. She made cakes, she made ice cream, she made pie. It was all quite divine. But what really caught my eye (and I'll be honest: for all the thousands of hours spent watching cooking and baking shows, I hardly ever make anything from the episodes I've watched), was the cappuccino-chocolate sandwich cookies. They were cute and little, so deliciously chocolatey-looking, and a seemingly easy project to take on on a whim. I have an entire mason jar full of ground espresso beans, and I've been looking for ways to lighten the load a little bit. These sandwich cookies did very nicely indeed.

Processed with VSCOcam with s2 preset

You know, it's funny, I feel like a person who can really take or leave coffee. I have friends who have to have it first thing in the morning, and truly treat it like gold. To me, it's nice, but it holds very little significance in my life. (That significance is reserved for Mexican Coca-Cola I think.) But there are times when I positively NEED the taste of coffee as soon as possible. Usually that comes in the form of an emergency trip to a local coffeehouse, but I think it's good to broaden one's horizons to solid forms of coffee as well. And BOY are these cookies  the jolt of caffeine you need to brighten up your day.

Having one of these cookies is like having a quick cup of espresso with a dash of cream. But instead of those sweet little cups, you have a sweet and chocolately three-bite cookie. The dough alone had me breathing deeply, so when it came time to taste-test, OBVIOUSLY I was on cloud nine. I couldn't stop nibbling for ages, so you KNOW the final result was going to be delicious.

The taste of coffee is very present, but not overwhelming. The balance of the two chocolates just enhances the overall pleasure of the ground espresso. And the chocolate cream? OHHHHHHHH so good. Buttery and choclately, and addictive. And since there are two whopping tablespoons of straight-up ground espresso beans in the cookie part, plus a little more  in the chocolate drizzle, I think you can safely swap out that third cup of coffee for one or two of these lil guys.

If you couldn't tell by now, Sydney is allllllll about these cookies. I bounced off the walls and I loved it.

I think you'll love these, too.


CAPPUCCINO-CHOCOLATE SANDWICH COOKIES

What You'll Need:

  • 1 1/3 cups heavy cream
  • 10 oz milk chocolate, finely chopped (I only had chocolate chips, so if that's what you have, use it!)
  • 1 1/3 cups all-purpose flour
  • 2 tablespoons finely ground espresso beans
  • 1/4 teaspoon coarse kosher salt
  • 12 tablespoons (1 1/2 sticks) unsalted butter, softened at room temperature
  • 1/2 cup confectioner's sugar
  • 1 teaspoon vanilla extract
  • 2 oz bittersweet chocolate, for drizzling + 1/8 teaspoon finely ground espresso beans

DIRECTIONS

First, let's make the chocolate ganache filling

Bring heavy cream to a simmer in a small saucepan, then pour over milk chocolate in a bowl. Stir until smooth and there are no lumps left. Place a sheet of plastic wrap directly onto the surface (placing the plastic wrap directly on top prevents it from developing a skin), then let it set in the refrigerator for 4 hours, or overnight.

While the ganache is setting, let's make the cookie dough

In a medium bowl, whisk together the flour, espresso, and salt. Set aside.

In the bowl of a mixer with the paddle attached, beat together butter and sugar on medium-high speed until pale and fluffy, about 5 minutes. Make sure to scrape down the sides of the bowl, Next, add the vanilla.

Add flour mixture to the mixer in two additions, and mix on medium-high speed until the dough JUST comes tougher. Do not over mix. Turn out dough onto a sheet of plastic wrap, and form a disc. Once the disc is formed, tightly wrap it in plastic. Place in the refrigerator for at least 30 minutes. Alternatively, you can freeze the dough for 15-20 minutes if you're running a little short on time.

OK, everything's set, so we should bake the cookies!

Preheat the oven to 350 degrees F, and line two baking sheets with parchment paper.

Take the dough out of the refrigerator, and let come to room temperature for about 10 minutes. Once the dough has softened a bit at room temperature, place it between two sheets of parchment paper, and roll out to about 1/8 inch thickness. Using a floured 2-inch cookie cutter, cut out rounds, then transfer them to the lined cookie sheets, placing them about 1/2 inch apart. Re-roll the scraps, and repeat the process. (Note: If the dough gets too soft, wrap it in plastic wrap, then throw it back in the fridge for 5-10 minutes or so.)

Freeze your cookies for 10 minutes to make sure they keep their shape in the oven.

Bake until your cookies are set, but not browned, about 7-9 minutes depending on your oven. Once out of the oven, let cool for 5 minutes on the baking sheets, then transfer the cookies to a wire rack to cool completely.

While your cookies are cooling, it's time to whip some ganache! 

Whisk the chilled ganache filling by hand until soft peaks have formed, about 20 minutes. It might be hard to do at first, but with a little elbow grease, you can whip this heavy cream mixture by hand! YOU CAN DO IT! (Or, you can totally use a mixer if you want.)

Alright, time to put it all together

Transfer the mixture to a pipping bag fitted with a 1/4 inch round piping tip (OR, transfer to a plastic bag with the end snipped off). Turn half of the cookies over so that the bottoms of the cookies are facing you, then pipe about 2 teaspoons  of mixture on top of each. Place the other half of the cookies on top to create sandwiches.

Melt the drizzle chocolate!

Melt the 2 ox of bittersweet chocolate, then mix in the 1/8 teaspoon of espresso. Using a spoon (or another small plastic bag) drizzle chocolate over each cookie sandwich in any pattern you'd like! Let chocolate drizzle set for about 10 minutes. Enjoy!

To store: Place cookies in a single layer in an airtight container for up to 5 days.

SOURCE: Adapted from Martha Stewart via Martha Bakes