Lightly Spiced + Everything Nice Christmas Cookies

This year, I am the Christmas Queen. SERIOUSLY. I am so incredibly proud of myself because I have NOT waited until the very last minute for my gifts. Usually, things get pretty down to the wire for me and I wind up finding myself staring at the impossibly long line at the post office praying that I can get things out on-time, then paying an arm and a leg to insure that possibility becomes a reality. But not this year, friends. This year, your girl started shopping a full TWO (2) months in advance. Granted, that first purchase was actually for myself (holiday cards), and I didm't buy anything else for a month, but it COUNTS. 
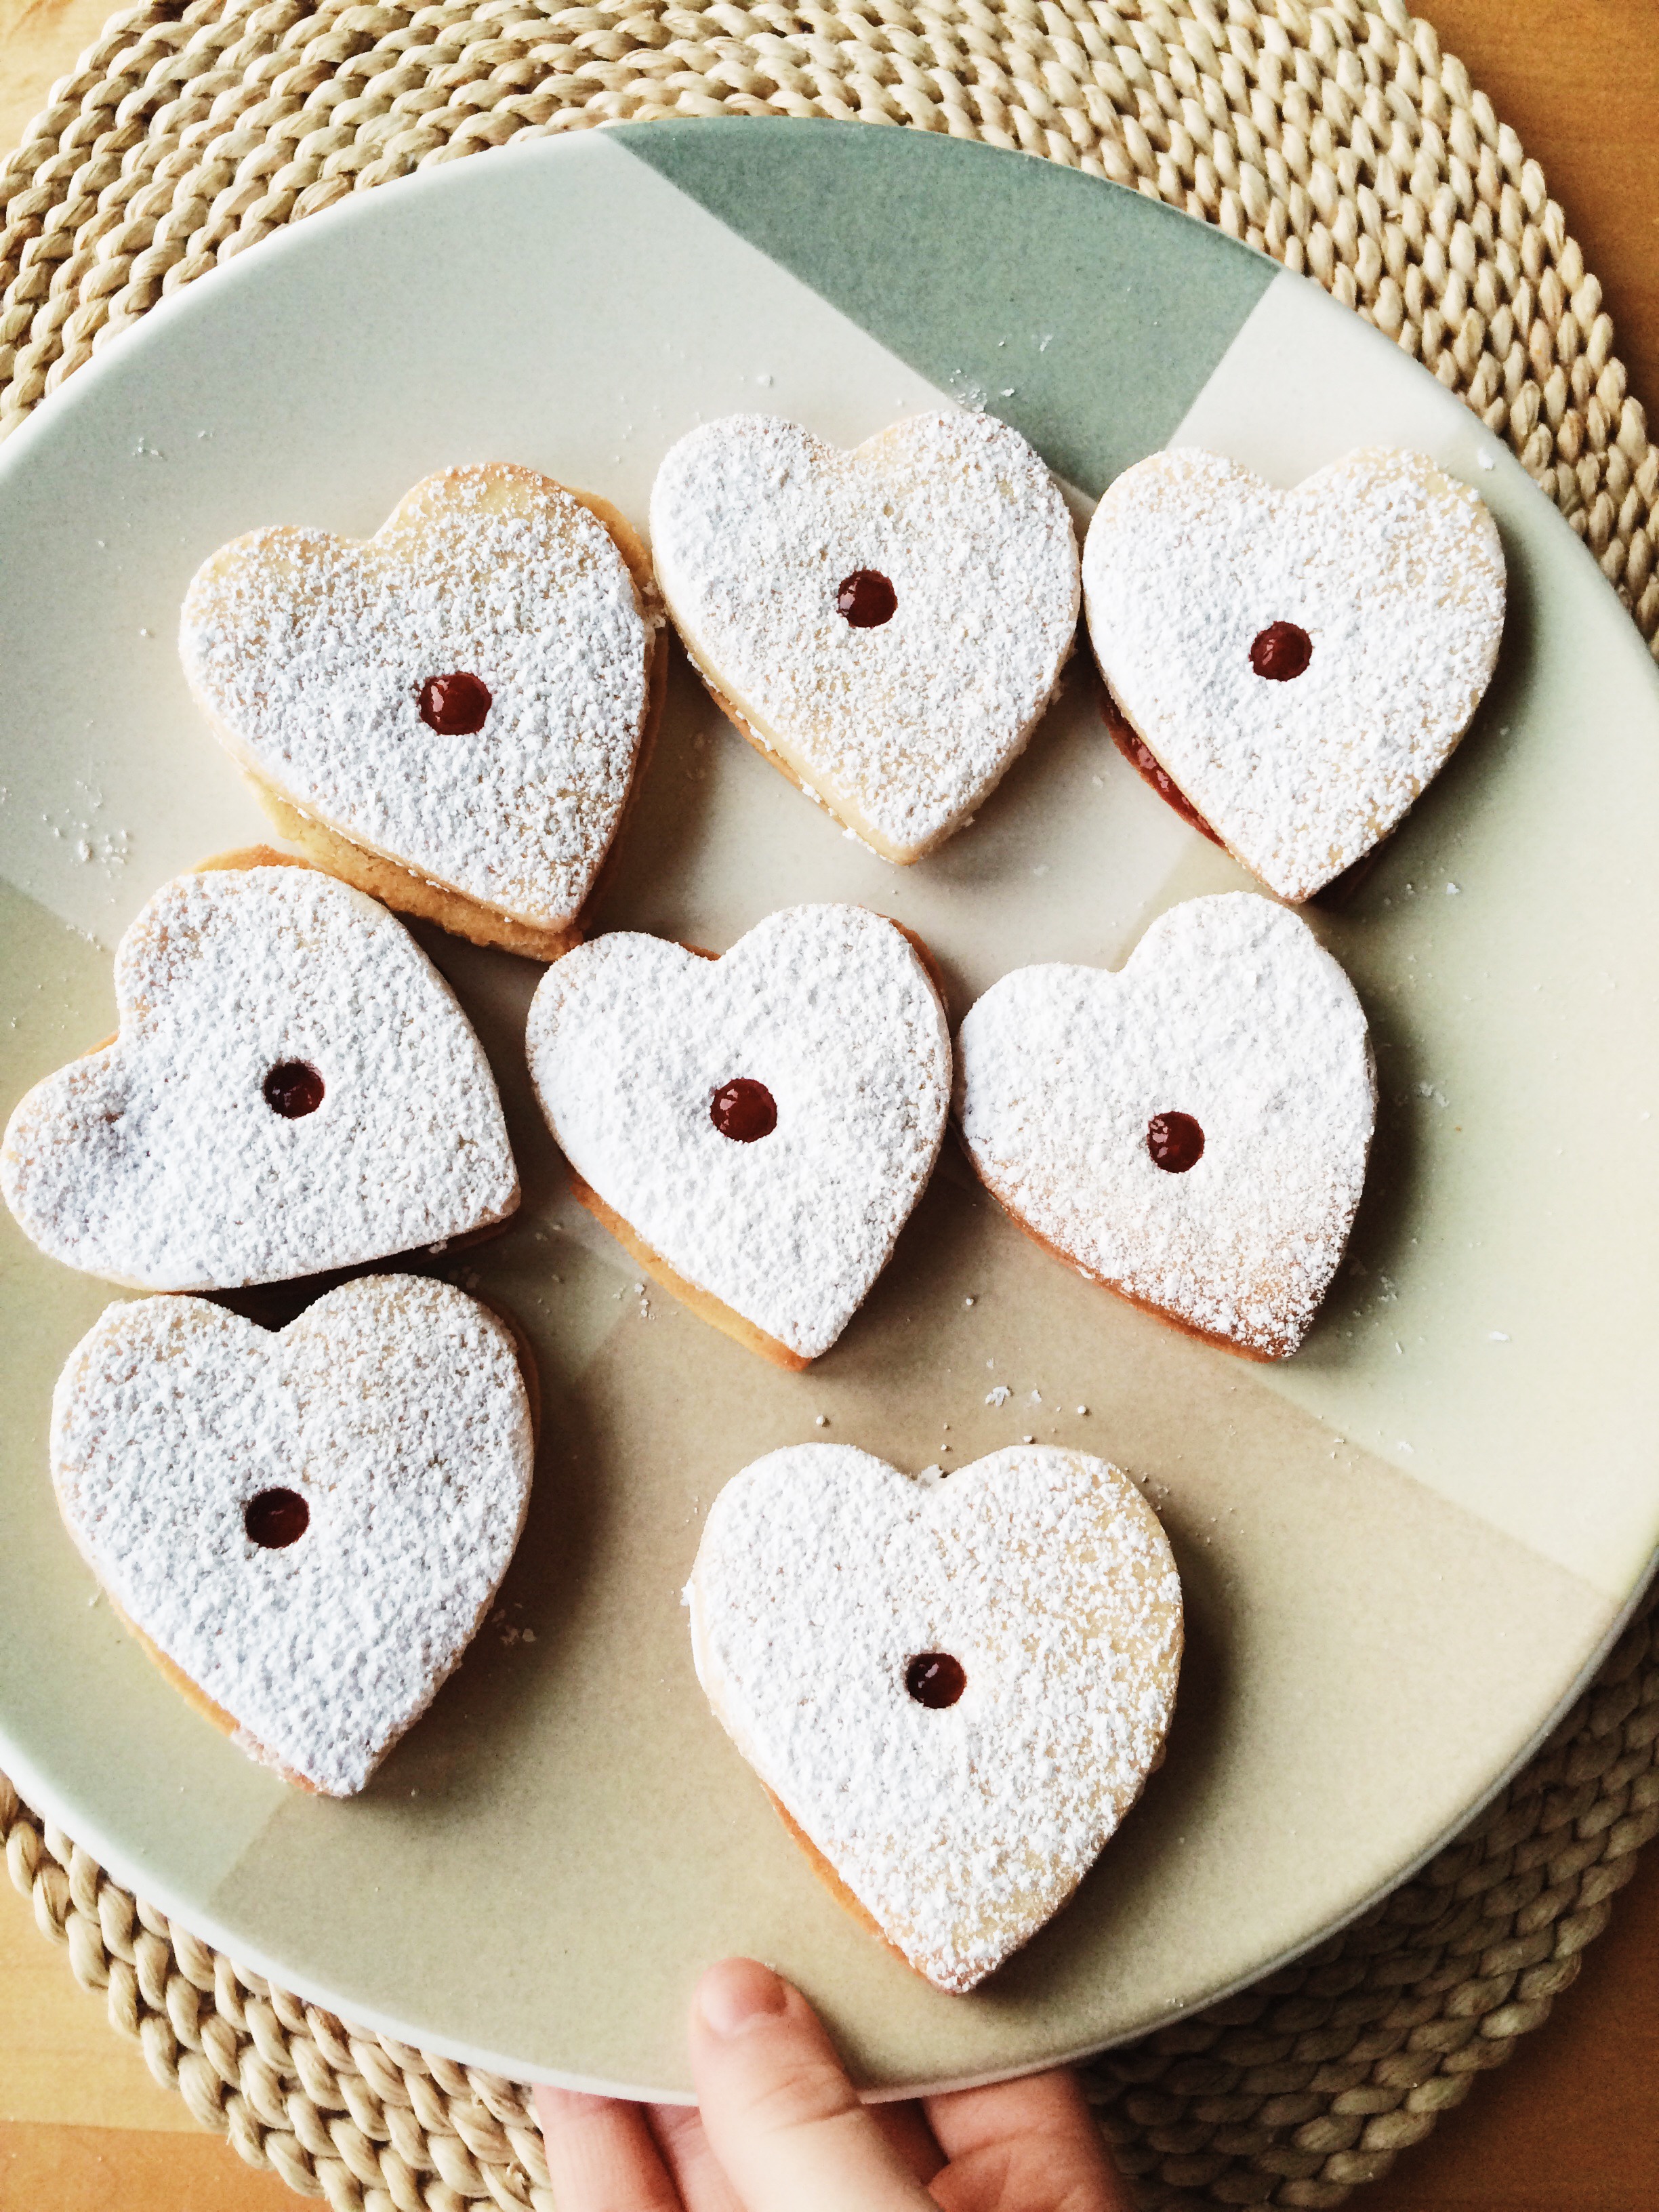
I will say this though: I've been behind on my holiday cookie making/ consumption. Only ONE batch of classically-Christmas cookies (oo alliteration) has made it out of the kitchen, and it's already December 21st! I'm ashamed. BUT, I plan to make up for this in the coming weeks. First up: these very lightly spiced (+ everything nice) Christmas cookies!

These are very, very simple cookies meant for when you want a taste, but you don't have a ton of time to fuss. The base is a classic sugar dough recipe, but with a hint of every single spice you have ever associated with Fall/winter.

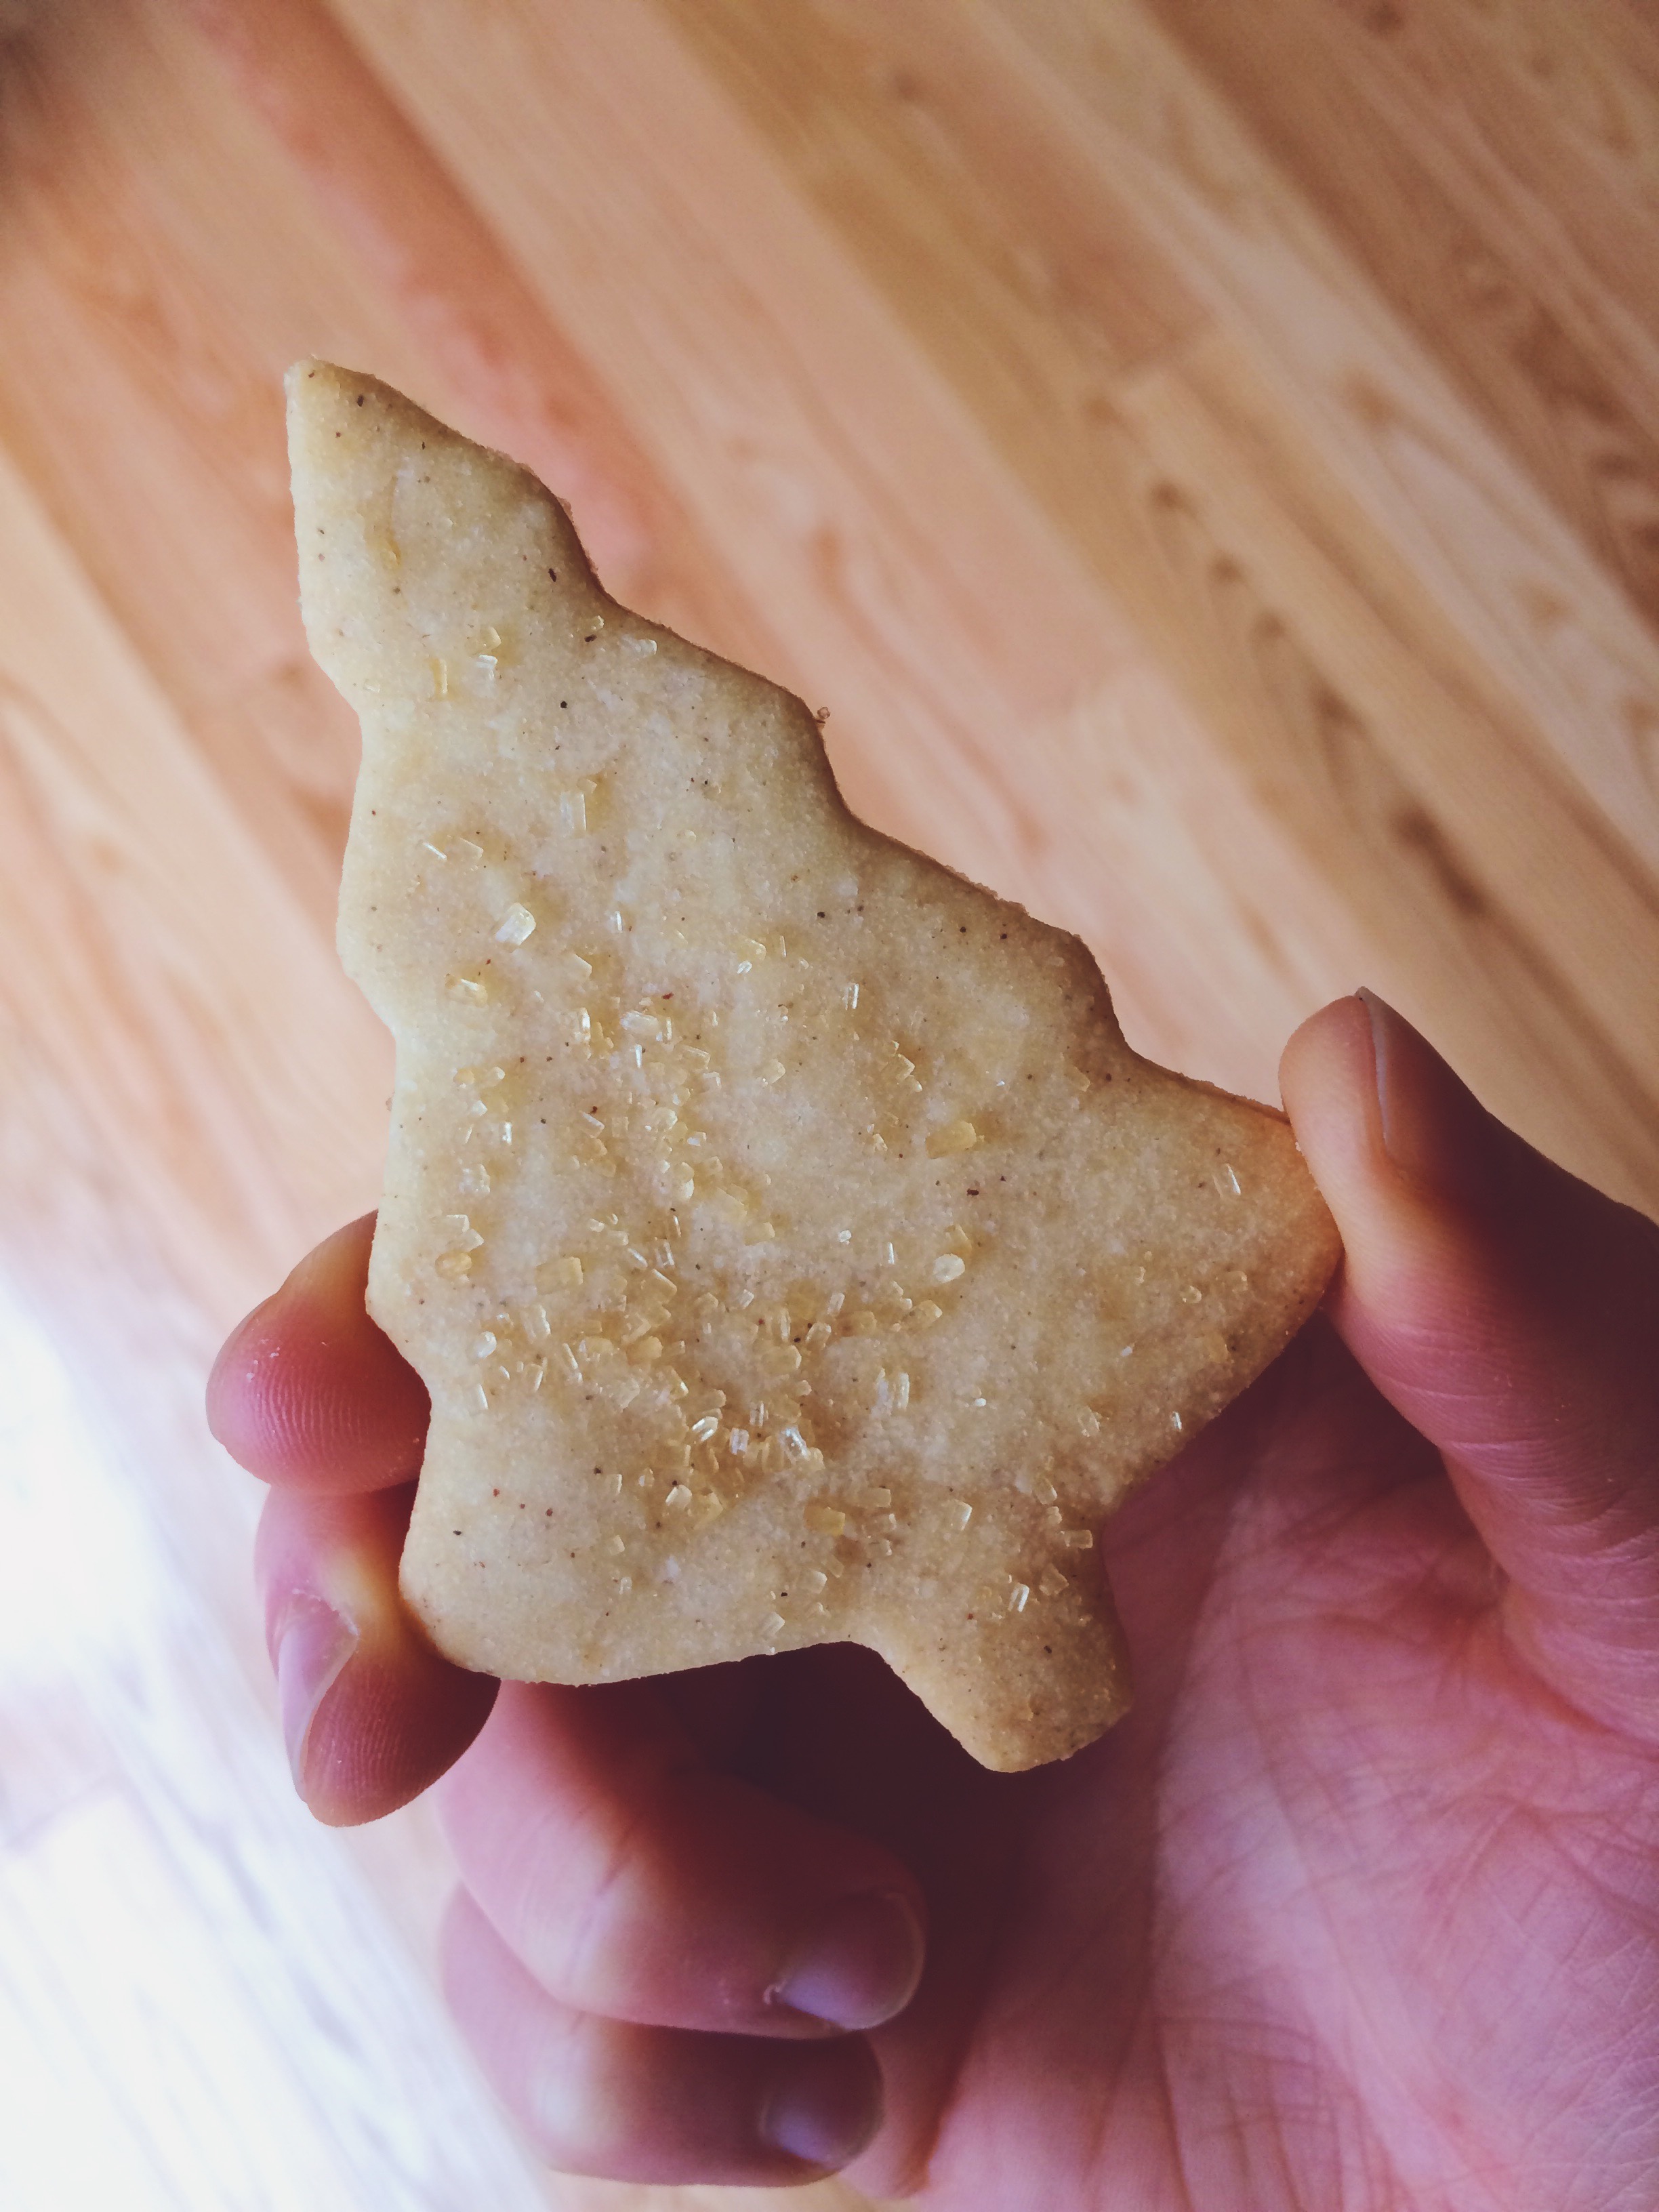
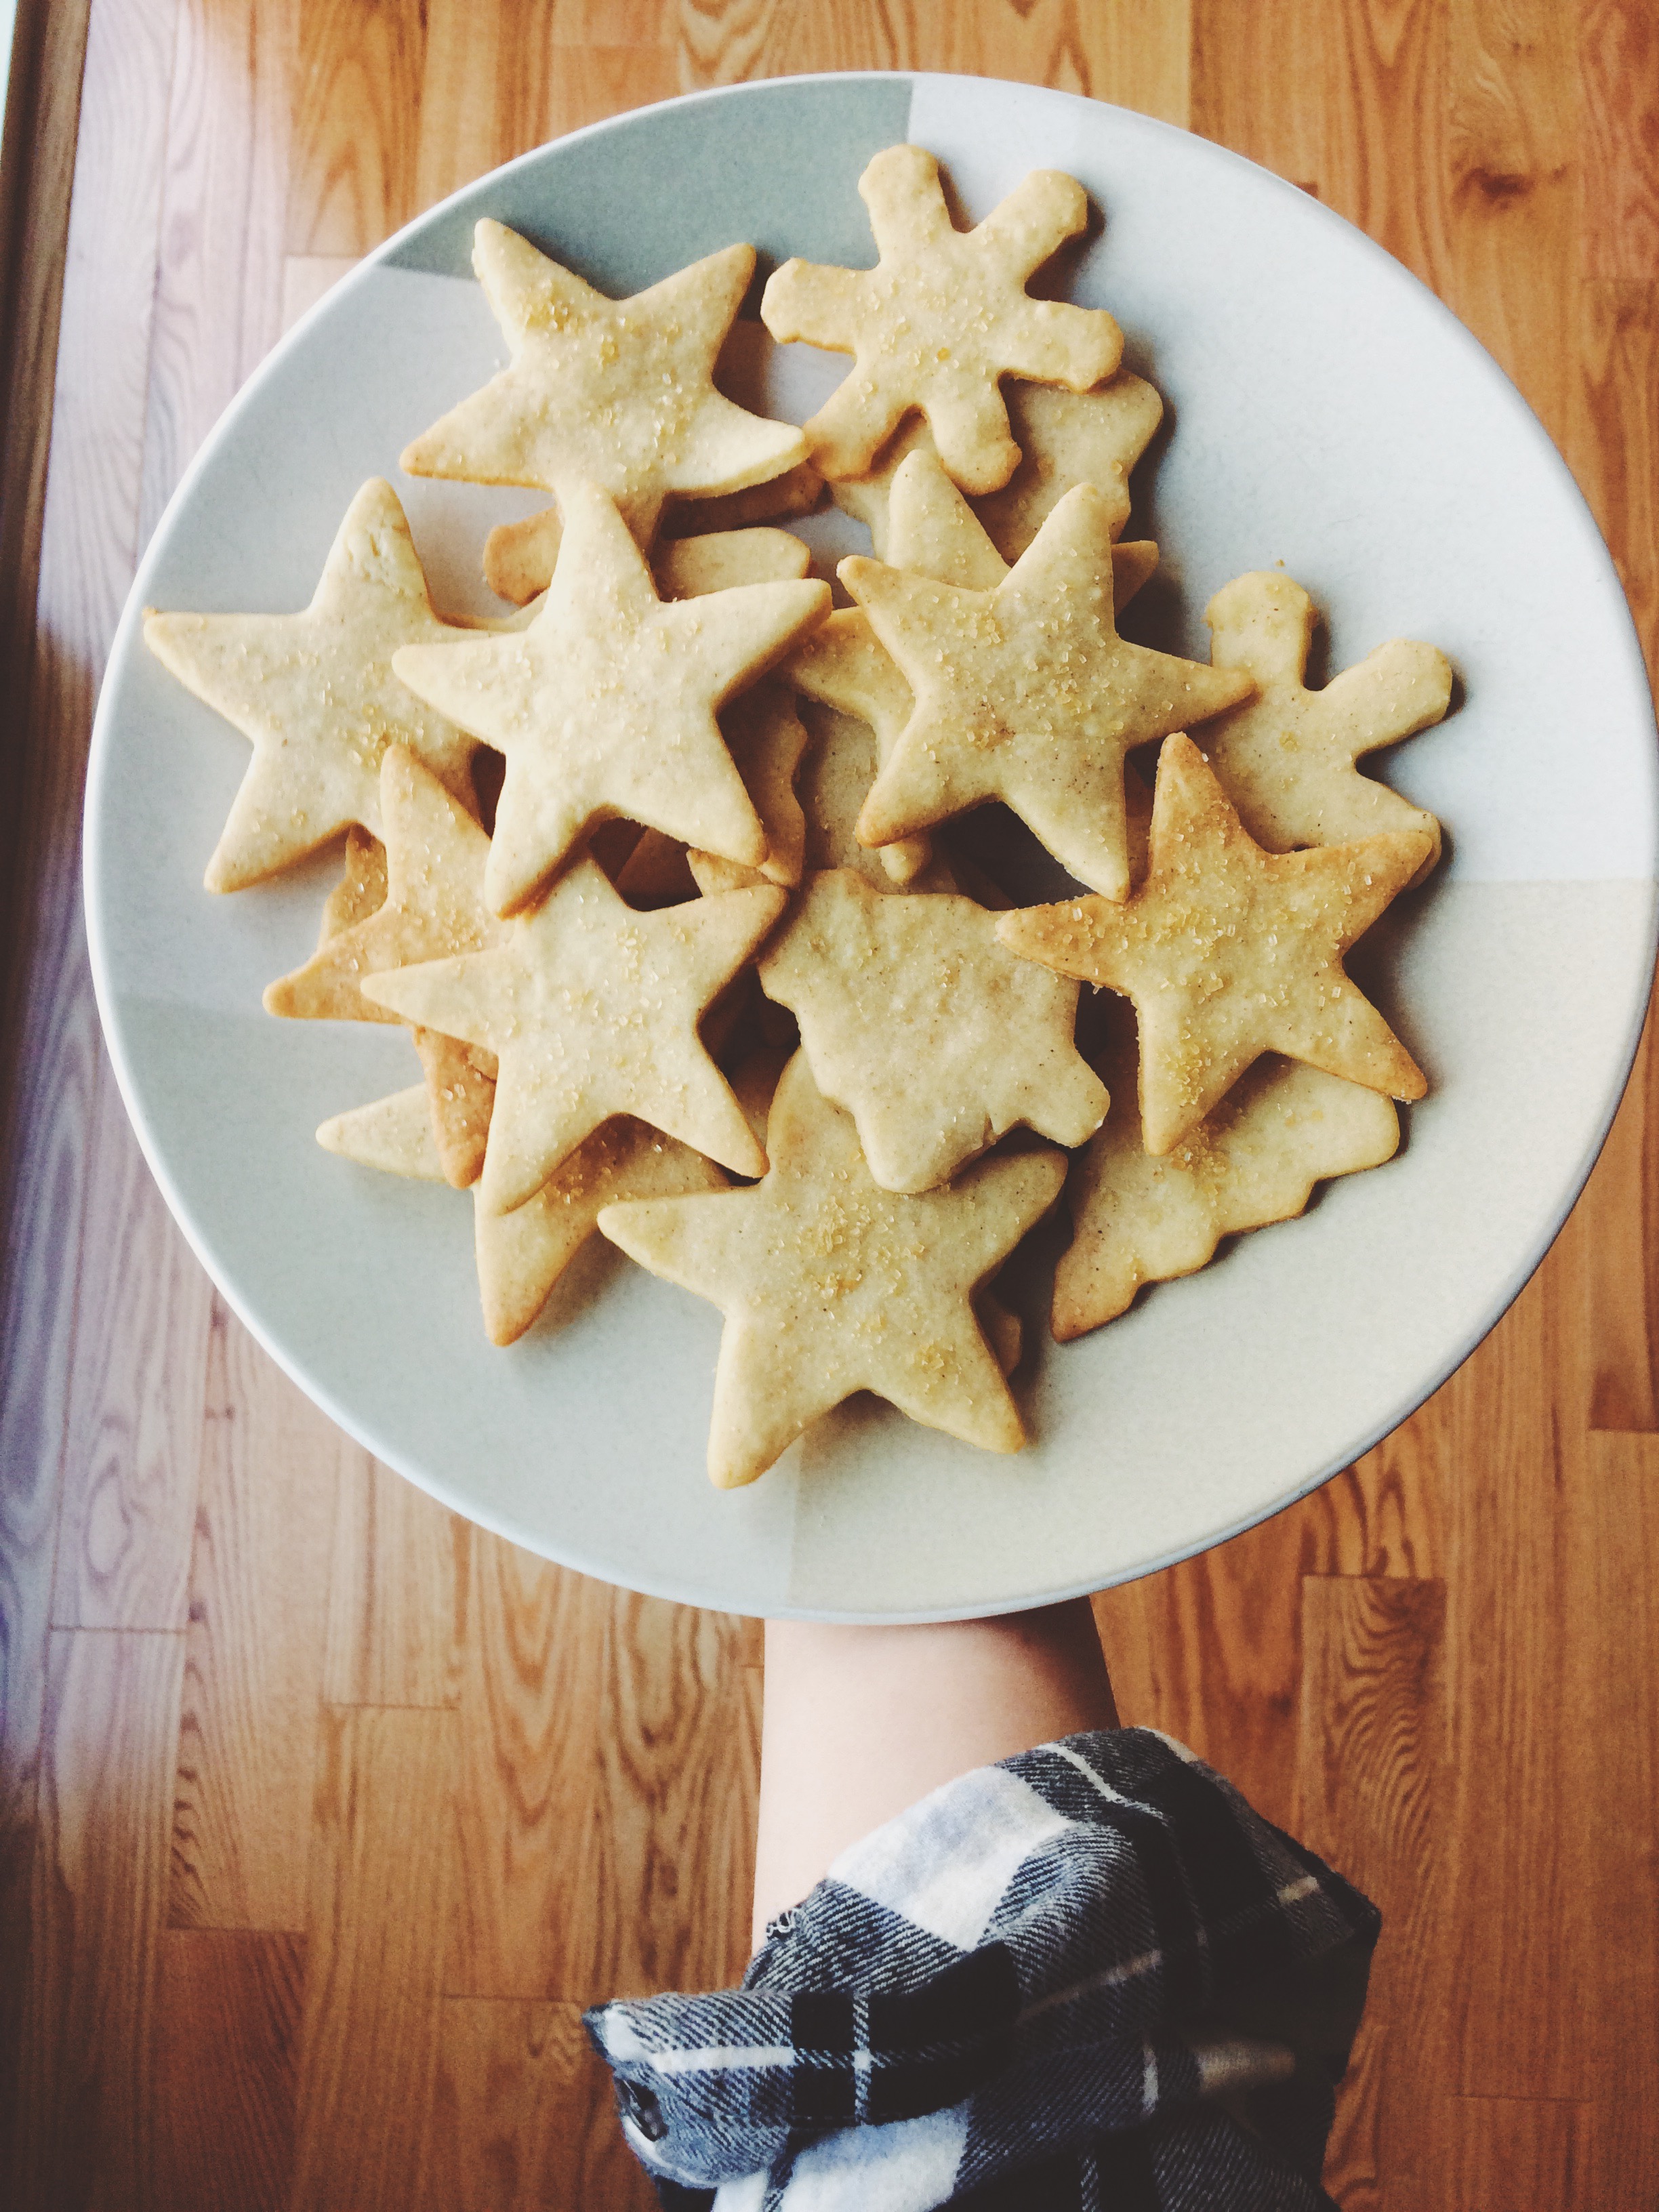
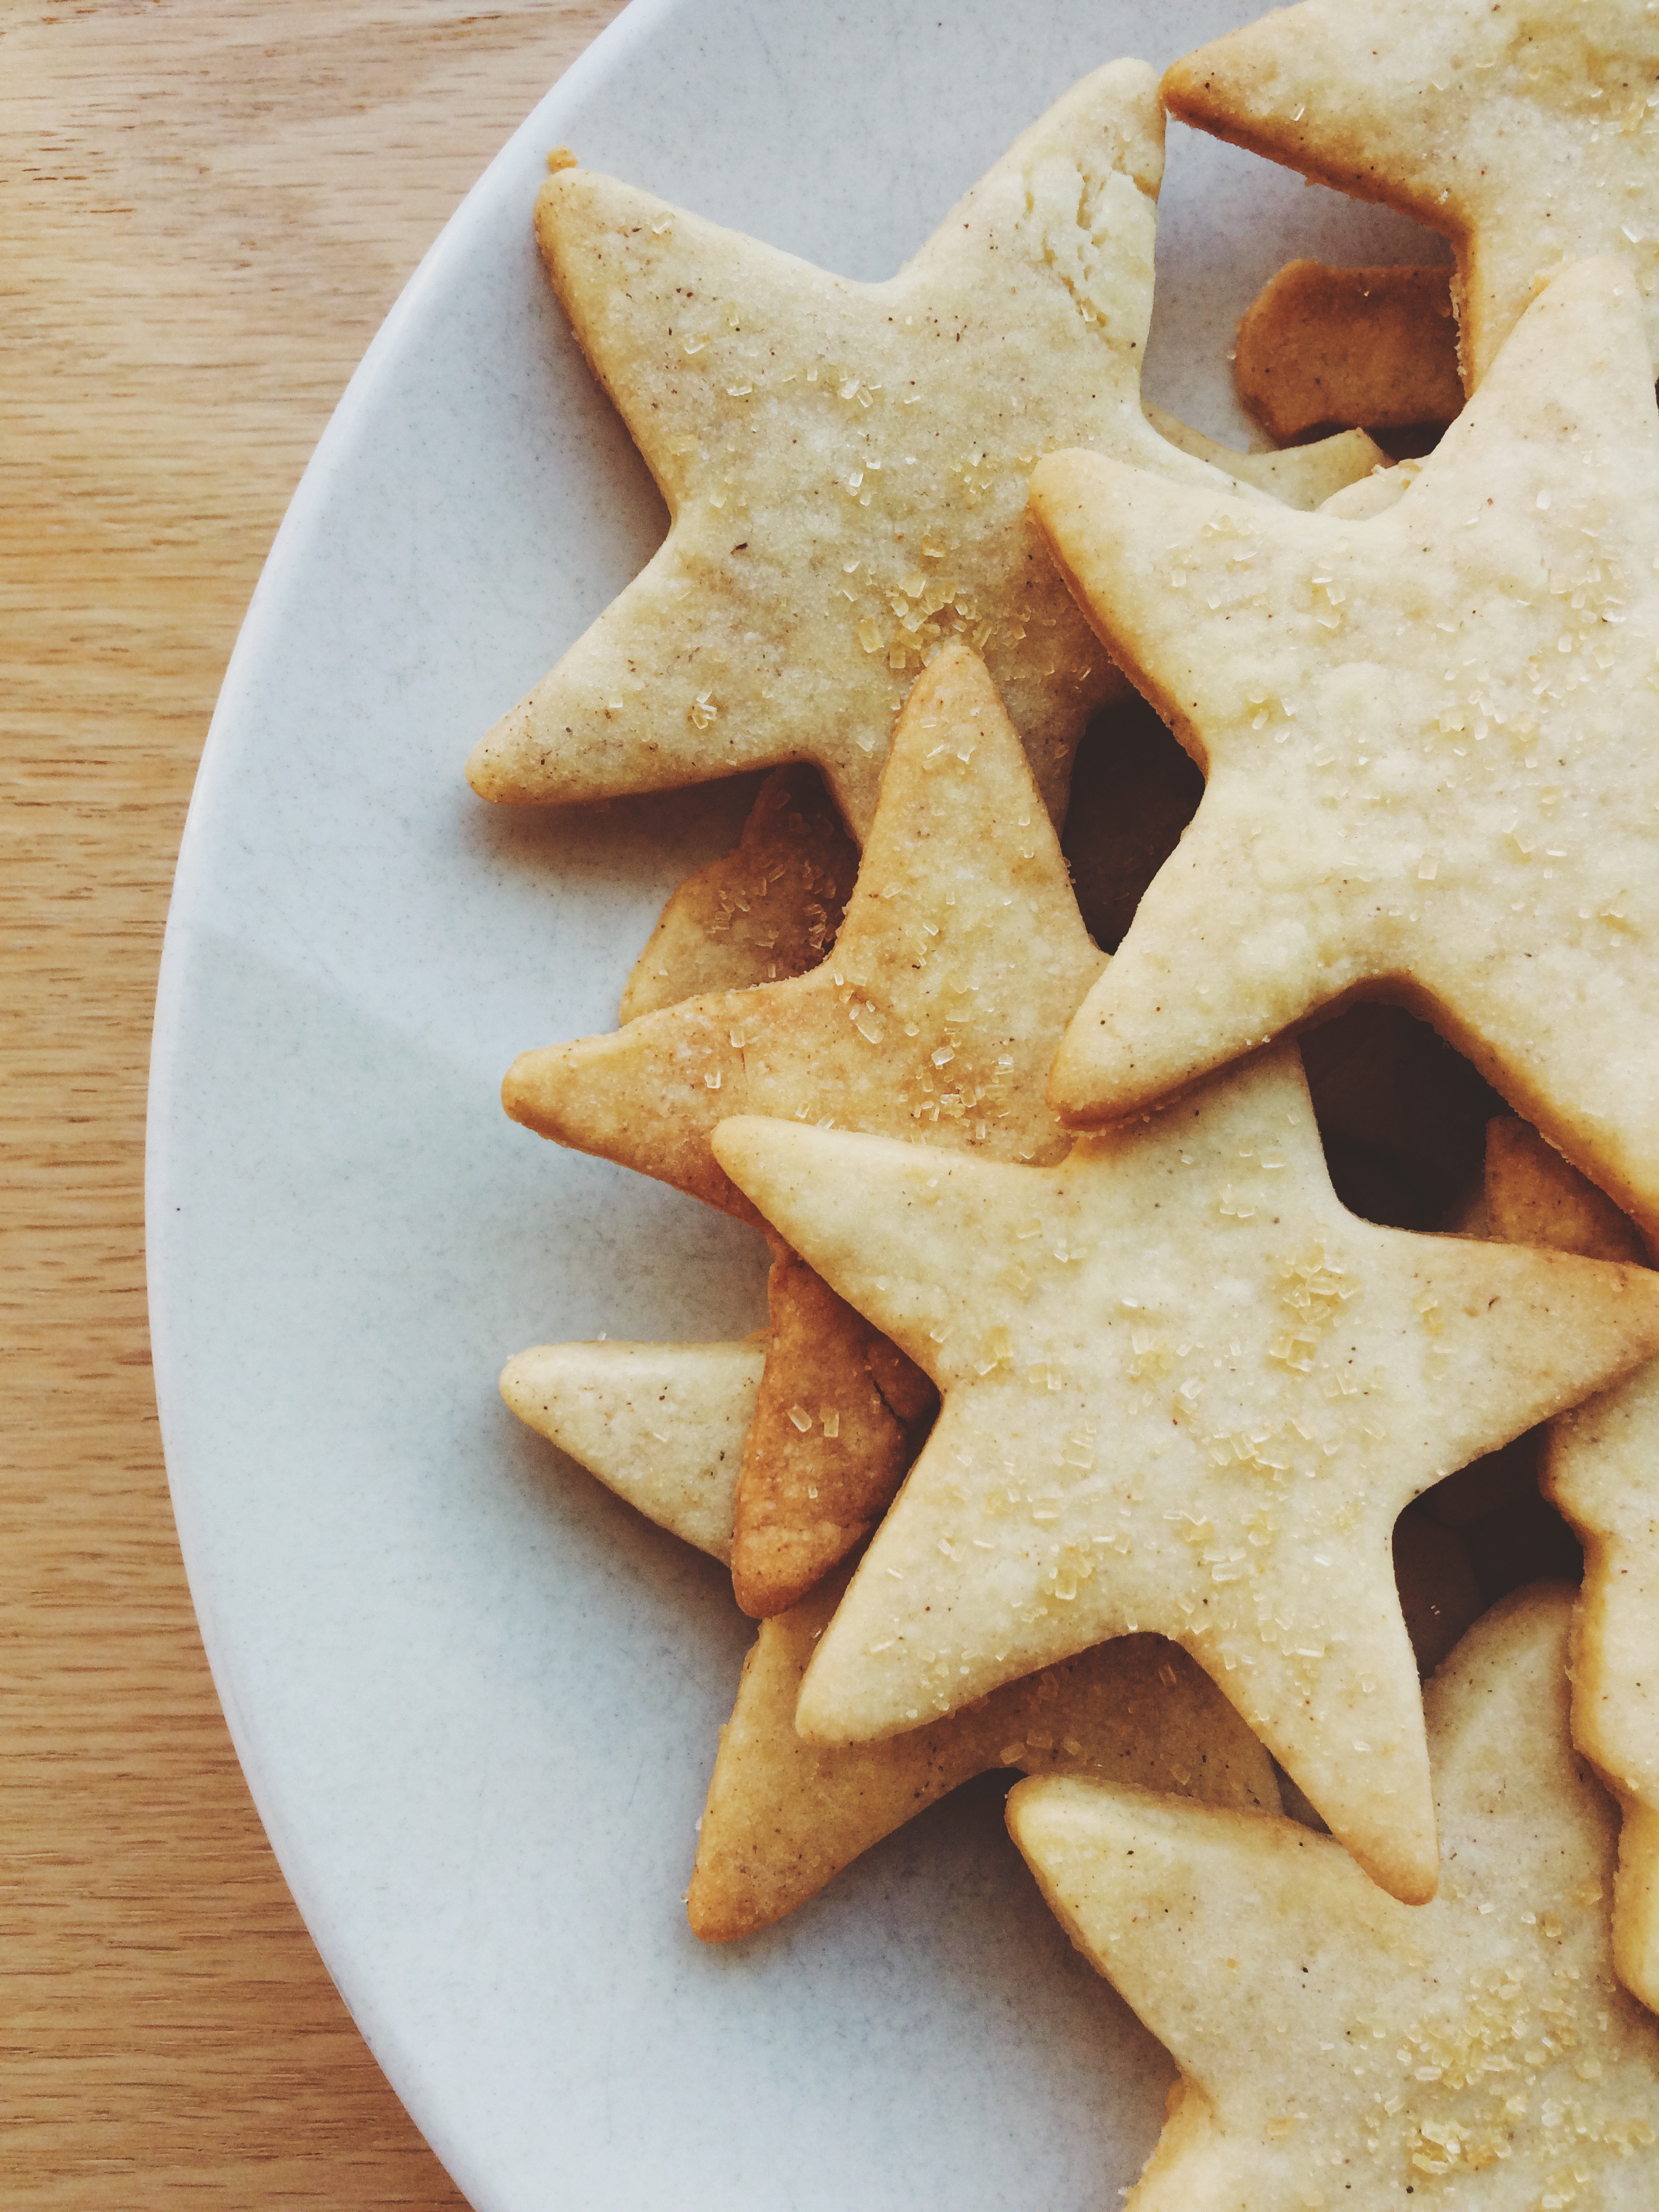
These cookies are crispy, buttery and a bit little crunchy from the optional topping of Demerara sugar, which I recommend because not only does it add an extra layer of texture,  it also makes your cookies sparkle like they're supposed at Christmas time. And although these cookies do have spice, it's only a hint. I like it because it elevates your sugar cookie, and gives it a little more oomph. These cookies are for sugar cookie purists looking to fray a little from the pack. Go crazy, but not too crazy, know what I mean?

Try some!


LIGHTY SPICED + EVERYTHING NICE CHRISTMAS COOKIES

What You'll Need:

1/4 teaspoon ground cinnamon

1/4 teaspoon ground ginger

1/8 teaspoon ground cloves

1/8 teaspoon ground allspice

3/4 teaspoon kosher salt

1/2 teaspoon baking powder

3 cups all-purpose flour, plus more for rolling

2 1/2 sticks unsalted butter, chilled and cut into cubes

1 cup sugar

1 large egg

1 large egg yolk

1 teaspoon vanilla extract

Demerara sugar for topping, optional


DIRECTIONS 

Whisk the spices, salt, baking powder, and 3 cups flour in a small bowl. Set aside.

Using an electric mixer with the paddle attachment (or a hand mixer, or a wooden spoon), beat the butter and sugar on high speed until well-combined. Next, add the egg, egg yolk, and vanilla extract, and beat until combined. Scrape the sides and the bottom of the bowl if necessary.

Reduce the speed to low, then add about half of the dry ingredients until just combined. Then, add the rest and mix until combined; be careful not to over mix.

Form the dough into two 3/4 inch thick disks (you should see flecks of spices throughout the dough), wrap each disk in plastic wrap, then chill in the refrigerator for at least 2 hours, or overnight.

Place racks in the upper and lower thirds of the oven. Preheat the oven to 325 degrees F. Line two cookie sheets with parchment paper.

Let one disk of dough come to room temperature on the counter for 5-10 minutes so that is softens slightly. On a sheet of parchment paper that has been lightly floured, roll out the first disk of dough to 1/4 inch thickness, dusting with flour if it gets too sticky. Make sure to also flour your rolling pin, and cookie cutters. Cut out shapes with your cookie cutters, then transfer to the cookie sheets. Leave about 1 inch of space between each cookie.

Bake cookies about 12-16 minutes, rotating from front to back and top to bottom halfway through baking, until the edges are lightly golden brown. If using, immediately sprinkle Demerara sugar liberally on the tops of each cookie, then let them sit for five minutes on the baking sheet before transferring them to wire racks to cool completely. Repeat with the remaining cookie dough.

TO STORE: Cookies will last for at least a week if kept in an airtight container.


SOURCE: Adapted from Bon Appetit and Dorie's Cookies

Mini Atlantic Beach Pies

Living a stone's throw away from the Atlantic Ocean now has gotten me thinking about beach town culture. The locals around these parts are very set in their ways when the sun is shining and you haven't seen a thermometer drop past 80 degrees in a week. They get up when the sun rises, slather on a healthy coating of sport sunblock, then set up shop at the beach until the sun goes down. And once the sun goes down, if they've planned correctly, they'll have a bonfire on that very same beach. Lather, rinse, repeat.

They're fueled by frozen lemonades and hot dogs, and vow to be olympic-level good at beach volleyball and sailing everyday until their feet hit the pavement and reality sets in. Every minute is water, sand, and sun, and it's all incredibly new to me. Sure, in the town I grew up in, in the Midwest, we were lucky enough to live right by the Lake with beautiful beaches and our own fair share of summertime rituals, but it's just not the same. In the Midwest, fairs and festivals are the name of the game, and stuffing yourself to the very brim with authentic foods of many cultures is how you play to win. But not here. Here, ne'er a pretty Summer day is squandered indoors, and every moment a bull is taken by the horns and ridden all the way to where life begins and ends: the beach. I'll tell you what, it'll certainly take a little getting used to (first things first, I'll have to order a vat of SPF 70 off Amazon), but I plan to be alll about that life one day. Provided there are snacks. And the weather stays between 75 and 79 degrees, as I am prone to fits of hot weather-related complaining.

Can you believe that Summer is unofficially officially over?? Three months just whizzed past. If the humidity hadn't had its way with my hair from May to present day, I could almost tell you that it never happened at all. And while I'm more than delighted to welcome in my favorite season, Fall, with as many apple cider doughnuts, hay rides, pie baking, and cardigans and flannel as my lil' heart can take, I'm also a sucker for goodbyes. Why, it wasn't a mere seven months ago that I was tightly bundled up in a heavy winter coat, greedily bathing my face in the glow of a sun that only gave a whisper of warmth. And the days were short and dark, and I wished for Summer with every breath I took. But you can never appreciate or miss something until it's gone, so it's time for Summer to TTFN so I can remember what it was like to love it once more. To give it a proper adieu, I chose to make my favorite dessert: pie, in miniature form because who doesn't love a PERSONAL PIE, with a little wink and nod to my new-ish new home. Hello, Atlantic Beach Pie.

At its core, this Atlantic Beach Pie is the baby of a Key Lime pie and a Lemon Meringue pie. It has both lemon and lime juice, a saltine cracker crust, and delicious, over-the-top, fluffy and puffy meringue; if so you choose to whip up a batch and use it. (P.S. You'll have so many egg whites leftover. Make the meringue.)

There are many, many things that I love about these baby Atlantic Beach pies. For starters, the saltine cracker crust, a detour from the usual graham cracker crust found in basic Key Lime and Lemon Ice Box pies, reminds me of the beach, and transports me to those sunny sand-filled days everyone from my neighbor to the bank teller are always raving about. I love the freshness and brightness that the just-squeezed citrus juices bring to the table. The pies are so fragrant that even a quick whiff of one in passing can wake me right up. And most of all, these are pies that I can not only give to those friends and loved ones who absolutely adore citrus desserts, but also to those friends who *GASP* aren't dessert people. They're sweetened by a few tablespoons of sugar in the crust, and the sweetened condensed milk, and that's it. There's enough sweetness to keep your sweet-tooth happy, but overly-sweet they are not. It's a win-win for every party, and I can go to bed at night knowing that even the most savory-oriented people can compromise every once in a while. Plus, and I've said it before but I'll say it again: WHO DOESN"T LOVE PERSONAL PIES? They're just too cute to resist.

In conclusion, now is the time to raise our forks to a lovely, hot, and humid summer by digging into petite summer-tastic citrusy pies, and reminiscing about the good times. Cheers, Summer '16. It's been real.


Now, pass me that can of pumpkin, would ya? We've got work to do.


MINI ATLANTIC BEACH PIES

Makes 4 6-inch pies (these are the ones I use from WS!) 

What You'll Need:

For the crust:

  • About 2 1/2 sleeves of salted saltine crackers, or about 120 crackers
  • 1 cup unsalted butter, softened
  • 6 tablespoons granulated sugar

For the pies:

  • Two 14-ounce cans of Eagle Brand sweetened condensed milk
  • 8 egg yolks (save the whites to make a tasty meringue!)
  • 1/2 cup lime juice, freshly squeezed
  • 1/2 cup lemon juice, freshly squeezed
  • Lime zest, for garnish

DIRECTIONS 

Preheat your oven to 350 degrees F. Take out two baking sheets, set them aside.

Finely hand-crush the saltine crackers in a large bowl, but be careful not to crush them so much that they become cracker dust. Add the sugar and stir to mix. Next, add the butter and knead it in until the cracker crumbs come together like a dough. Take out your four mini pie plates, then press the dough evenly into each. (Note: You may end up with more pie dough than pie plates to press it into, and that's perfectly fine. Better to have too much than not enough when it comes to mini pies!)

Chill in the refrigerator for 15 minutes, or freeze for 10-12. Once your pies have chilled, place two on each baking sheet and bake in the oven for 18-20 minutes, or until the crusts have gotten nice and golden brown. Let them cool slightly.

While your pie crusts are cooling, it's time to make the filling. Start off by beating the egg yolks into the milk until everything is completely combined. Next, add the citrus juice. At first, the  juice may sit right on the top and make your custard look very thin and watery. It is very, VERY important that you stick with it and carefully stir it (it tends to splash all around at first) until all of your ingredients are completely combined. You'll start to see it thicken to a normal consistency again, just give it a little time.

Once your custard has come together, pour it into each pie plate, making sure to avoid overfilling them. Carefully set your pie plates (if you haven't already) back on their baking sheets, then bake the pies for 16 minutes until the filling has set.

Let your pies cool on cooling racks for 15-20 minutes, then pop them into the fridge to chill completely (they must be absolutely cold in order to be sliced.)

When you're ready to serve, top each with a lovely meringue using your leftover egg whites (here's a great tutorial from The Kitchn!), or freshly whipped cream, then top with a lemon or lime wedge, citrus zest, or coarse sea salt as a garnish.


SOURCE: Adapted from Food52

Dark Chocolate and Anise Biscotti

There are two sides to me. One side has this need to bake things all the time. The other side is aware that if I bake all the time, then I will feel obligated to eat everything I've made in the event that I don't have anyone to share the wealth with. It's very complicated. That's why I love, love, love biscotti. They're crunchy, they're sturdy, and they last for WEEKS at a time.  I have the freedom to nibble (or not nibble) at my leisure without the looming pressure to not waste a single crumb. It's beautiful.

Biscotti are tough cookies in the best way. The longevity of them is fantastic, but they're also the perfect option for care packages. As much as I love the Midwest (especially now that I can walk outside without a parka), most of the people I care about live in completely different parts of the country. You know that I am a big fan of sending and receiving gifts in the mail. but the edible options for packages are limited. Biscotti are PERFECT for this task.

This week I whipped up a quick batch of Buttery-Cayenne Pecans, then made these Dark Chocolate Anise Biscotti, wrapped everything in half a roll of bubble wrap, threw in a couple of heartfelt cards, then sent them on their way. Two days later, I got a "thank you" text, and a very warm heart. Care packages are my jam. And one of these days, you and I are going to make one together, step-by-step.

As you're well aware by now, I am a huge fan of deceptively easy recipes. Making biscotti? Wayyyy easier than you think. All you have to do is keep up with the time. The rest is a total breeze.

What I love most about this recipe is that it's a lot like having a chocolate chip cookie, but with a hint of licorice. And if you aren't a black licorice fan (I'm not,), have no fear, you'll still love these The anise seeds bring a subtle flavor of licorice that does nothing but completely compliment the oodles of dark chocolate chunks throughout. And I will never turn down a crispy cookie that brings a little texture to the game. If a little softness is more of what you're after, you totally have my permission to dunk a couple of these babies in a steaming cup of coffee.

Eat some biscotti.

Send some to your friends.

Do your thing.


DARK CHOCOLATE AND ANISE BISCOTTI 

What You'll Need:

  • 2 cups all purpose flour
  • 1 1/2 teaspoons anise seeds, slightly crushed
  • 1 teaspoon baking powder
  • 1/4 teaspoon salt
  • 6 tablespoons unsalted butter, softened
  • 1 cup granulated sugar, plus more for sprinkling
  • 2 large eggs
  • 1 large egg yolk
  • 4 oz chocolate, roughly chopped

DIRECTIONS

Place oven racks in the center and upper third of the oven, then preheat to 325 degrees F. Line two cookie sheets with parchment paper. Set aside.

Whisk together the flour, slightly crushed anise seeds, baking powder, and salt in a medium bowl, then set aside.

In the bowl of a stand mixer fitted with the paddle attachment (or with a hand mixer, or with a wooden spoon), cream together the butter and sugar on medium speed until light and fluffy; about 5 minutes.

Reduce mixer speed to low, then add one egg and the egg yolk, then beat until well combined; about 3 minutes.

Add the flour mixture all at once to the stand mixer, and beat on low until well combined. The dough may seem a bit crumbly. Next, add the chocolate chunks and make sure they are evenly distributed throughout.

Divide the dough in half, then place each half on a parchment-lined cookie sheet. Gently knead the dough a few times, just to get it to come together a little more. Next, shape each dough into logs about 8 inches long, and 1 1/2 inches wide. Beat the remaining egg, then generously brush it over each log. Next, sprinkle sugar liberally over each log.

Bake the biscotti on both racks for 20 minutes, then swap racks and bake for an additional 15-20 minutes, until the biscotti are golden brown and baked all the way through.

Take your cookie sheets out of the oven, and let the biscotti rest for a few minutes. Once the biscotti logs are cool enough to handle, cut into 1-inch slices using a serrated knife, cutting in a swift motion.

Place the cookies cut side up onto the baking sheets, then put back in the oven for another 15-25 minutes, depending on how crisp you'd like your biscotti to be. (I prefer mine on the crispier side, so I kept an eye on mine for 25 minutes.)

For an even crispiness, flip your biscotti over and bake for another 2-5 minutes.

Let cool, then store in an airtight container for up to 2 weeks. 


SOURCE: Adapted from Joy the Baker Cookbook: 100 Simple and Comforting Recipes 

Heart-Shaped Jammy Sammy Cookies

I know February 14th is long-gone, but I subscribe to Valentine's Day-cutesienss 365 days out of the year.

By the way, how was your Valentine's Day? Mine was surprisingly fun this year, which has freed me from the cycle of weird/awkward/disastrous scenes of Valentine's Day past. I volunteered at the an annual Sweetheart Dinner (last year I made this French Silk Pie), and had a BLAST. There were several courses involved, and no time to take a breath as we were each cooking over our respective dishes (I was on dessert duty but got roped into making seafood Alfredo once we got there). Lots of "behind"-s, and "this is ready to go out!"-s, and "We need more ginger ale for the punch!"-s were thrown out, and it reminded me of how much I love being in a busy kitchen. I live for that hustle and bustle sometimes. I mean, I've never dried so many dishes, or continuously scrubbed the same countertops so many times in my entire life, but MAN was it worth it. It was a really classy affair.

Would you like to know the best bit? These cookies were a BIG HIT!

"Jammy Sammie Cookies" is just the name that I wrote to be cute/slightly annoying. You're probably more familiar with the name "Linzer," because of the filling and shape cut out of the center. I generally see Linzer cookies the most during the Holiday Season, but if you ask me, the cookie cutout + filling pairing should be a yearlong affair. And what goes better with a heart shape on Valentine's Day than fresh strawberry jam? Red is like the official unofficial color of V-Day, so the filling of these cookies were required to match accordingly.

Quick question: how do you feel about homemade jam? Me? I'm all about it. I feel like there's nothing that makes me feel cozier than when I'm making jam from scratch. Sure, it takes way less time to just pick a jar off the shelf at your local grocery store, but when you make it yourself you: A) Know exactly what has gone into it, and B) MADE. IT. YOURSELF. Helloooooooo! It's (relatively) fast, (totally) easy, (unbelievably) fresh, and you know it's always made with love.

Now pair that sweet, sweet jam with some deliciously soft shortbread plus a liberal sprinkling of powdered sugar for good measure, and you've got the stuff of dreams, kids. What could be better?

Since you'll definitely have jam left over after filling the cookies, might I make a few suggestions as to what to use it on?

  1. Biscuits
  2. Scones
  3. Toast
  4. Fingers dipped in
  5. By the spoonful
  6. etc. etc.

And let's just quickly talk about the versatility of these cookies, shall we? Yes, they were made for February 14th, but they can go wayyy beyond that. We're talkin' tea parties, birthday parties, bridal showers, picnics, breakfasts, coffee breaks, dates, etc. etc. Cookie hearts filled with homemade jam never go out of season.

It's a beautiful thing.


HEART-SHAPED JAMMY SAMMY COOKIES

What You’ll Need:

For the shortbread:

2 sticks unsalted butter, at room temperature

1 cup granulated sugar

1/4 teaspoon salt

1 large egg + 1 large egg yolk, room temperature

1 teaspoon vanilla extract

2 1/2 cups all-purpose flour

Powdered sugar for sprinkling

For the jam:

32 oz (two 16 oz containers) strawberries

1/2 cup + 1 tablespoon  brown sugar

Pinch of salt

Zest of 1 whole lemon + juice of half a lemon


DIRECTIONS:

First, let’s make the shortbread cookie dough:

 In the bowl of a stand mixer fitted with the paddle attachment (or a hand mixer, or a wooden spoon), add the butter, sugar, and salt and beat until light and fluffy, about 3-5 minutes. Add the egg and egg yolk one at a time, making sure each addition is well combined. Next, add the vanilla extract. Add the flour in three batches, making sure each addition is well combined (but don’t over-mix), before adding more flour. When necessary, scrape down the sides of the bowl using a rubber spatula.

Once your dough has just come together, lay your dough out on a plastic sheet, then divide it in half. Wrap each half tightly in plastic wrap, then shape to form discs. Refrigerate the discs for at least one hour, but best is overnight.

Ok, dough’s done, now let’s make the jam:

Rinse strawberries before using, and let drain completely before getting started.

Once your strawberries have been washed, hull each strawberry, then cut into quarters. Place all of your cut up strawberries in a medium sauce pan. Next, add your brown sugar, pinch of salt, lemon zest, and lemon juice. Using a potato masher (or the back of a wooden spoon), muddle all of your ingredients together, making sure that the berries’ juices are starting to release, and your sugar and salt have started to dissolve.

Cook your fruit compote, stirring frequently, over medium-high heat until your jam has thickened, and it passes the line test (a line can be drawn down the center of the spoon without the juices running); On my stove, that takes about 30-35 minutes. Along the way, make sure to give your jam a few taste tests, and adjust the flavors to your liking. The mixture will bubble quite a bit and juice may jump out of the pan occasionally, so watch out for that!

When your jam has come together, take it off the heat and let it cool completely before transferring it to a mason jar or tupperware container.

This jam will last for several weeks refrigerated.

VERY IMPORTANT: DO NOT leave the stove whilst you’re making your jam. One minute it can still be too runny, then the next you’re cleaning burnt strawberry syrup out of the pan until your arms fall off. Trust me. Stay put. Keep stirring.

Ok, my dough has rested. Time to make some cookies!

Preheat the oven to 375 degrees F, and line two baking sheets with parchment paper. Set aside.

Remove the first disc of dough and let sit on a counter for ten minutes; this allows it to come to room temperature, thus making it much easier to roll out.

Liberally flour a rolling pin and work surface.

Roll the cookie dough out to a 1/8 inch thickness, then, using a floured heart-shaped cookie cutter, cut out shapes. Transfer the hearts to the cookie sheets lined with parchment paper, about 1-inch apart. Stamp a hole out of the center of half the cookies using the tip of a circle piping tip. Repeat the process with any remaining scraps, and with the second disc of dough.

Bake the cookies one sheet at a time for 7-10 minutes (depending on your oven),  or until the cookies have started to lightly brown around the edges. Allow the cookies to cool for five minutes on the baking sheet before transferring them to wire racks to cool completely.

Transfer the cookies with the holes cut out of the center to one of the cool baking sheets (keep the parchment paper on). Sprinkle a generous amount of powdered sugar over them using a sifter, mesh strainer, or powdered sugar shaker. (Aren’t you glad you have the parchment paper now to catch the excess sugar?) Flip the bottom cookies (no holes in them) over so that the underside is facing you, then apply about a teaspoon of jam right in the center of each. Place the tops on, then lightly press down so that you create a sandwich. The jam should spread evenly to the edges and through the center hole without overflowing. Enjoy!

To Store: Refrigerate in an airtight container for up to a week.


SOURCE: Adapted from A Cozy Kitchen

Quiche Lorraine

A while back, Williams-Sonoma was having a fantastic sale that I considered would be a crime not to participate in. Why scour the website daily if I'm not going to end up getting anything when the times comes to get it at a discounted rate (and with free shipping no less)? So, there I was, browsing the baking section when there IT was: a beautiful, french tart pan. Up until that point I could only bookmark all the tart recipes I came across and wonder, what if? But now, now was the time to take action, so in went the pan into my cart, with all the tart possibilities finally becoming attainable. And then it arrived and I said, "It's way too nice to use. Better save it for a special occasion. Back in the box you go!"

That was months ago.

Honestly, that always happens. I pine over something for what seems like forever, to the point where it's the only thing I can search for, and then I get it, and I deem it way too nice to use. "I NEED AN OCCASION TO BREAK IT IN," I'll insist. But then no occasion is ever good enough, so whatever it is waits and waits to be used. But that has to change, so I made Quiche Lorraine.

I love this tart pan, and I'm so excited that the first thing I decided to make was Quiche Lorraine for dinner. It's so good, and so simple to make. Plus, it can be served or cold depending on the setting. It may be getting a little chillier outside, but we've still got some warmish days in the forecast that are pretty perfect for a picnic. Trust me, take it from someone who lives in the Midwest, these are the golden weather days. Soon all we'll have is snow piles and distant memories of when the temperature was a steamy 50 degrees. And if given the choice to eat outside while the trees are beautiful hues of yellow, red, and orange, you take it.

Here's something that broke from tradition: I used pancetta instead of lardons. One because I love pancetta and will take any excuse to use it, and two, because lardons in 5 oz containers are a little hard to get my hands on around here. And as it turns out, pancetta really, really works. It still gives you the salty, crispiness that lardons give you, but it doesn't overpower. I may have to alter the salt levels in the egg mix, but I think it really all comes down to personal preference.

And remember: Quiche Lorraine is just egg, heavy cream, bacon, and a little salt and pepper. If you add anything else, it's no longer Quiche Lorraine. Still delicious, but no longer Quiche Lorraine.


QUICHE LORRAINE

What You'll Need:

For the Pastry

  • 6 tablespoons butter, softened and at room temperature
  • 1 teaspoon sugar
  • A pinch of salt
  • 1 1/2 cups AP flour
  • 2 eggs, separated
  • Cup of ice water

For the Quiche Filling

  • 5 oz pancetta (or lardons if you're lucky enough to find it!)
  • 4 eggs and 2 egg yolks
  • 1 1/4 cups heavy cream
  • 1 tsp salt
  • Black pepper to taste

First, Make the Pastry:

Using a wooden spoon, beat together the butter, sugar and salt in a medium bowl until smooth. Mix in the flour, followed by  the egg yolks, and 2 tablespoons of ice water. Mix together until a smooth ball forms, only kneading the dough as much as necessary to bring it together. If the dough seems a bit dry, you can add more water, but be careful not to make the dough too wet.

Once the dough has come together, wrap in plastic wrap and chill overnight. (If you don't have the time, make sure to at least let it chill for an hour. )

When It's Time for Quiche:

Preheat the oven to 350 degrees F.

When you are ready to roll out the dough, take it out of the fridge and let it rest on the countertop for at least 30 minutes to make it easier to work with. Roll out the pastry dough between two even sheets of parchment paper until it is 1/4 inch thick, and use it to carefully line your tart pan. If you have any extra pastry dough, use it to patch up any cracks. Brush the sides  and pastry base with the leftover egg whites. Pop your tart pan back into the refrigerator while you prepare the filling.

To make the filling, fry the pancetta in a frying pan until golden brown and crispy, then, using a slotted spoon, transfer to a plate lined with paper towels to drain off any excess grease.

In a bowl, lightly beat the egg and egg yolks, then add the heavy cream, then the seasoning. Beat again until everything is mixed together well.

Remove the tart pan from the fridge, then scatter the cooled pancetta all around in the pastry shell. Next, pour in the egg mixture.

CAREFULLY transfer the quiche to the oven (I placed it on a baking sheet both for stability, and to catch any overflows), and bake for 30-45 minutes, depending on your oven. MAKE SURE to keep an eye on it so that it doesn't stay too long in the oven and crack. A perfect quiche has a golden brown top, and is set. No  one wants cracked quiche.

This quiche can be served warm or cold.

SOURCE:  Adapted slightly from The Little Paris Kitchen: 120 Simple but Classic French Recipes, by Rachel Khoo

Follow my blog with Bloglovin

Birthday 2015

birthdaycake1

I've been a new age for exactly one week today. The slider is quickly reaching the middle of the twenty- something scale, and it is a fact that both scares me and excites me, depending on the day.

There are two types of people I've met in this world: people who absolutely looove birthdays, and people who threaten physical harm if there's even so much as a whisper of their birthday in the air. Me? I think I fall somewhere in the middle. I like birthdays, I think they're cool. I think it's important to celebrate each one because you never know how many you're going to get in this world. But I don't really go all out. Honestly, it's partially because they tend to sneak up on me now that I'm no longer in elementary school and there's no longer the obligation of a parent to throw a mini party with enough tiny forks and plates and cups, and copious amounts of brightly-colored frosted cupcakes for each member of my class. I also don't go all about because there's so much hype around birthdays that once it's over, I always feel a little bit of loss because I have to wait another whole year to again be the Birthday Princess.

birthday2

I do exactly what I want, and when I want on my birthday; absolutely no exceptions. If I want to binge-watch an entire season of Friends in an afternoon, there is no judgement. If I want to sing at the top of my lungs to the hits off of The Emancipation of Mimi album in a house full of people, I'm going to do it. AND, if I want to bake my own birthday cake from start to finish and entirely from scratch, well, yeah I'm going to do it. And I did. I baked my own birthday cake. Three layers of very tender vanilla cake, slathered in a LOT of delicious buttercream frosting dyed a decidedly peach-ish tone depending on the angle, and topped with cute little sprinkles. It took me approximately four hours to make in total, and I loved every single second of it. For one, this cake is a GIANT step up from my last attempt to make a very small, very sad excuse for a cake. That very simple cake was hard work manifested. And it was delicious.

The older you get, the more time you spend reflecting. To that affect:

Five Very Important Things I've Learned in My Twenties So Far

  1. Friends come and go, and friendship is a two-way street. Only make the effort for those who make the effort for you. That's what makes it special.
  2. Quality over quantity in all aspects of life.
  3. Listen to your elders when they're trying to tell you something. They've got stories that are better than anything you'll see in theaters, and, apart from the tiny embellishment here and there to keep your attention, they're totally true.
  4. Work hard and have patience. You'll get everything you need and even some of the things you want, but it's probably going to take some time. And you know what? That’s okay.
  5.  Having a plan is great, but don't forget to deviate sometimes and just enjoy the ride. Nothing ventured, nothing gained as they say.

As far as birthdays go, this one was pretty ace.

Here's to many more, eh?

Bronte+Sydney's Chicago Adventures

IMG_1085 This is my friend, Bronte. I've known her for...nine years. Wait, NINE YEARS!? That can't be right. (holy moly, it IS right!) The first time I ever met her was when she came for a school visit the year earlier, and I did everything in my power to get her attention. After all, she was English, had an affinity for Tim Burton movies, had a super cool haircut, and, most importantly, she was NEW. I LOVE new kids. Back when I couldn't bake anything to save my life, I used to use a little self-deprecating humor to get attention. Nowadays, I shove a baked good in their face, and we go from there.

Bronte and I became fast friends. We're often on the same wave length, and like almost all the same things. It's hard to find true connections with people in this world, so when you've found one, you must hold on to it. Though Bronte has since moved back to England, we've never lost contact, and she's shown up in the Midwest several times since then.

When the stars align and I find myself in Chicago, I usually have a plan. It's usually a 2+ page list of activities to ensure that I don't squander even a minute of the opportunity to take a day trip to one of the greatest cities in America. I can also pick up a few harder-to-find baking ingredients whilst I'm in a bigger city, and I generally don't waste those opportunities either.

But this visit was a little different. There was no plan, really, other than when I was to arrive, and when I was to board the commuter train home. This time we had hours and hours to simply wander around the city, pop into shops and bakeries whenever we pleased, and just enjoy each other's company.

Bronte Chicago

We walked around, gabbed about old classmates, grabbed cupcakes and cake samples from Magnolia Bakery, went in search of sunglasses (Bronte), and lamented over the sudden disappearance of curls thanks to some powerful Chicago fog (Sydney).

Walking and continuous laughter can make a couple of gal pals awfully peckish. Since it was the middle of the dreaded lunch hour, and seeing as we were right in the heart of many, many businesses full of hungry office-dwellers, we decided that there was no chance we'd get seats in a restaurant. The best thing to do was grab some bangin' burgers from Good Stuff Eateryand have an impromptu picnic on the steps of the Art Institute. Bronte did a fabulous job of documenting that in the picture above.^^^

IMG_1086

So, OKAY, I fibbed a little. I did have a little bit of a plan: absolutely no matter what else happened, it was essential that Bronte and I find ourselves in the pie garden of Bang Bang Pie Shop. No matter what happens, if my feet are touching the streets of Chicago, those feet must jump on the blue line to Logan Square to get a piece of pie, or else.

And, I will say, I was NOT disappointed. When we arrived, I vowed to get something new; I tend to just venture back to things I like because I know I'll like them. And as I stared at the giant chalkboard filled with new possibilities, I'd made a decision to pick the first thing that sounded good to me. That is, until I noticed that the French Silk Pie was on the menu for the day. As much as I loved it, I just couldn't order it again. I HAD to get out of my comfort zone. But then, I noticed something different: that classic French Silk Pie had been given a Mexican twist. That was new enough for me!

Get this: Chocolate mousse and Ancho Reyes Chili Liqueur, topped with whipped cream and a little lime zest. PHENOMENAL. Now I'm going to have to figure out how to replicate it at home!

We rode the train home in comfortable silence, quite content with our relaxed day of adventures (and quite sleepy as well).

Thanks for a good day, Chicago. I'm going to live in you one day.

Fun-Sized Vanilla Sugar Doughnuts

vanilla dougnuts3 Two weeks ago we escaped to the land of country music, southern hospitality, and...the NRA Convention. But we didn't find out about that last one until we read in the paper that there would be 70,000+ extra bodies in the city at the same time as we were. That's right, we were in Nashville. And I never thought I would enjoy 80 degree weather so much.  I was basking in the warmth of a Southern sun, sweating from the humidity, sneezing because of blasted allergies that never give me peace, and loving every second of it. It's shocking what a torturous winter will do to a person who typically detests hot, humid weather. Truly amazing.

We went down to spend Easter with The Grands and of course, while I was there, I had to see my Nashvillian bestie, Hailey. This go-round, after collecting some supplies from Trader Joe's, we decided to venture into the kitchen and make something sweet: vanilla sugar doughnuts.

vanilla dougnut2

MAN, do I love doughnuts. Not many other things can lift my spirits if I'm having a bad morning like a well-made doughnut. I love them so much that I even splurged once on a special Nordic doughnut pan that can't be used for anything else (I hardly ever buy new bakeware unless it can be used multiple ways). But as much as I love doughnuts of all kinds, up until last week, I'd only made loads and loads of baked ones. Frying doughnuts was an entirely different adventure, and I'm glad Hails was by my side to experience it.

There were so many things I had to learn about doughnut-making. For instance, the name of the game is "patience." We needed a LOT of it. Doughnut dough is very special, and needs much rest in order to become beautiful, and also achieve its full potential. It's like a little baby that must always be warm, cool, and covered. It took forever. We were constantly peeking under the dish towel, then going "IS IT RISING? IT IS. IT IS RISING BECAUSE IT WAS AN INCH SHORTER BEFORE." But a good baker must have patience if said baker wants doughnuts. So we waited. And waited. And peeked under dish towels. And waited.

FINALLY, after literal hours, it was time to ever-so-gently roll out our dough, cut it, and then send circles of it swimming into the 350 degree F oil. I'm glad that Hailey and I both had our reservations about that super hot oil; that way, when I screamed each time in preparation for splash-back, I had someone to scream with me. She's a good friend.

vanilla doughnut 1

In the end, we walked away from Hailey's beautiful kitchen with two bags' worth  of fun-sized vanilla sugar doughnuts, and plans to bake something new, ambitious, and exciting the next time I'm in town.  In the meantime, I'm going into recipe-testing mode to come up with some real winners for you.


P.S. Not only is Hailey beautiful and talented, she's also a wonderful potter! Check out her etsy page, Clay Off 8th! Word on the street is she's got a housewares line in the works!!


Apple Spice Hand Pies

apple hand pies 1 Do you ever wonder, after making something new, how you could have lived without it before? That's how I feel about hand pies. Sure, I've bookmarked dozens of recipes in the never-ending black hole that is my "Recipes" folder, and I've even eaten them, but never had I realized how much I love hand pies, until I had twelve perfectly golden ones cooling on my wire rack. I should say though, that they weren't all for me. Last weekend one of my chums, who's been telling me about Penzey's for months now, decided to surprise me with a cute little jar filled to the brim with a rather hard to find ingredient: apple pie spice! It was a lovely gift, and to repay them, I decided that the best thing to do was make some apple spice hand pies. It was the best idea for all parties involved, really. apple hand pie 2Pies are not my strong suit; let's just throw all the cards on the table now. I once tried to make a savory cheddar and garlic pie with an apple cider vinegar crust, and everything was going pretty well, until I tried pouring the filling into the crust only to discover that I'd rolled the pie crust too thinly, and custardy filling was going everywhere. There was a lot of mopping up of counters and floors, but in the end, what was left was delicious. Will I make it again? Probably not. I dunno, it was pretty good. Never say never. ANYWAY, based on my so-so pie track record, making hand pies for the first time made me a little nervous. I had a limited amount of apples and butter, a pie crust that was a little crumbly when I had made it the night before, and I was missing the necessary 5 1/2 inch cookie cutter that the recipe called for. There was only one shot to get this right, and I was determined to show up the next day with pies in hand. Even if I could just get two, that would be enough. Turns out, I had nothing to worry about! Everything went off without a hitch after I got a little creative with the cookie cutter. Instead of one that is 5 1/2 inches (which is really hard to come by unless you're ready to order it online and wait), I was lucky enough to find an oversized coffee mug that was about 4 1/2 inches. Good enough! I floured the rim, pressed down and carefully wriggled each piece free. Easy. The trick to a good hand pie is finding the perfect balance between filling and pastry. Too little, and you're eating a lot of shell with the occasional bite of filling. Too much, and you're looking at a baking sheet with filling cooking exactly where you don't want it to be: on the outside. Either way, you'll end up with a very empty shell. The key is to put the filling right in the center, leaving room on both sides for folding over and crimping the edges. By adding the filling to the center, you're able to control the amount that goes on with each spoonful. If you feel like you need a little more, you're free to do so. It's much easier to add more than to *attempt* to take some out. And do yourself a favor: use a slotted spoon to scoop out your apple filling from the pan. The last thing you want is extra moisture, TRUST ME. What a mess. If you're wondering which apples to use, I used a mix of Gala and Lady Alice apples. Both worked really nicely. These apple spice hand pies are the buttery and spiced mini pies of your dreams.

What You'll Need:

For the Pie Pastry:

  • 3 cups all-purpose flour
  • 1/4 cup sugar
  • 1-1/2 tsp fine sea salt
  • 2-1/2 sticks (1-1/2 cups) unsalted butter, very cold, cubed
  • 1/3 cup all-vegetable shortening, very cold or frozen, cut into small pieces
  • 6-7 tbsp ice water

For the Apple Filling:

  • 5 cups apples, peeled, cored and diced (about 5 medium apples)
  • 2 tbsp unsalted butter
  • 1/2 cup (packed) brown sugar
  • 1 tsp ground cinnamon
  • 1/4 tsp ground nutmeg
  • 1/4 tsp ground cloves

OR

  • 2 tsp apple pie spice

For Brushing on Top:

  • 1/3-1/2 cup heavy whipping cream
  • Turbinado or Demerara Sugar for sprinkling

TO STORE: Carefully wrap in cling film and keep in a cool place. They taste great when popped back into the oven at a low temperature for 10-20 minutes. Find the recipe on Fork Knife Swoon!

Let's Make: Homemade Whipped Cream

photo-12 There are some people who will tell you that making your own basics is a waste of money because you can just as easily pick up anything at your local supermarket in no time flat. Those people, I can assure you, have never been dazzled by the home-made.

Sure, it's easy to pick up a tub of Cool-Whip (with all those delicious chemicals added in!), but you know what? It's also just as easy to bypass the frozen section entirely and grab yourself a pint of heavy whipping cream. Now go get some vanilla extract and some sugar...good. Now go to checkout and get outta there!

Just three simple ingredients are all you need to have the best whipped cream you've ever tasted in your life. I guarantee it. Oh, and did I mention that it's crazy easy and takes 2 minutes? But keep a watchful eye; whip too much and you're on your way to butter. If you don't whip enough, you've got soup. It's sweet-tasting soup, but not what we're going for.

Basically, this kitchen basic is best homemade.


Crazy Easy Whipped Cream

What You'll Need:

-1 pint cold heavy whipping cream

-4 tablespoons sugar

-1 teaspoon vanilla extract


Directions:

1. Combine all ingredients in the bowl of a stand mixer, or a medium-sized bowl.

2. With the mixer set to high speed, beat until stiff peaks form (should take about a minute if you're using a stand mixer; may take a tad longer with a hand mixer). Try not to over beat.

3. Go forth with the knowledge that life-changing whipped cream can be made in the comforts of your own home. In other words: enjoy!

This will keep for about three days well-covered and refrigerated.