NYT Blueberry Muffins

SINCE THE DAWN OF TIME (...the early 1990s...) blueberry muffins have been a staple in my life. They're the go-to treat when I'm in an airport and want something sweet in a hurry. They're my pick-me-up when I have them on-hand and I've had a rough day. They've been in the Special Sunday Breakfast rotation at my house for two whole decades. They're just the epitome of classic baked goods in my book.

Before I became a baker and didn't truly know what a difference home-baking could make in a person's life, my go-to if I wanted blueberry muffins was the store-bought boxed mix. You know which one I'm talking about, don't you? The one with a  cellophane  bag full of flour mix and chemicals, and a slim tin can full of tiny, preserved blueberries swimming in syrup. Then you just had to add a few eggs and a cup of milk, and you were on your way. At the time, those muffins, always served still-warm from the oven and a bit crispy (if not a little dry to be honest) on the outsides tasted great, but it hasn't been until I was the age and stage that I am now that I realized I could've been having it so much better all this time.  Don't get me wrong; those mixes definitely have their place...somewhere, but, my friend, fresh is always best. Sure, it may take a little longer to measure out all the ingredients when you're making blueberry muffins from scratch, but really, how much time are you actually  saving by using boxed cake mix? Not as much as you think.

Despite the fact that blueberry muffins are such a classic, there are perhaps dozens of ways that you can prepare them. And believe me, as someone who has had her fair share of muffins, I've also tried a fair share of those recipes. One particular favorite of mine (and incidentally one of the first recipes I EVER tried) comes from Joy the Baker. She doesn't stray too far from the standard, but she takes things up a notch in her recipe with the inclusion of melted brown butter instead of regular-old softened and unsalted. It brings a sort of nuttiness and depth of flavor that I just absolutely love.

And while that recipe is definitely wayy up there on "Sydney's Favorite Baked Goods, Blueberry Muffin Category" list, something inside me was desperately seeking a recipe that stayed within tradition. If I'm going to have that perfect cup of coffee early on a Sunday morning, with the window shades opened and the glow of dawn seeping in, I want to capture that moment just-so. I want that feeling of being in a coffeehouse somewhere where they serve you cafe treats exactly the way they were intended to be served and consumed: no muss, no fuss, just something that tastes phenomenal. Enter: the New York Times Blueberry Muffins.

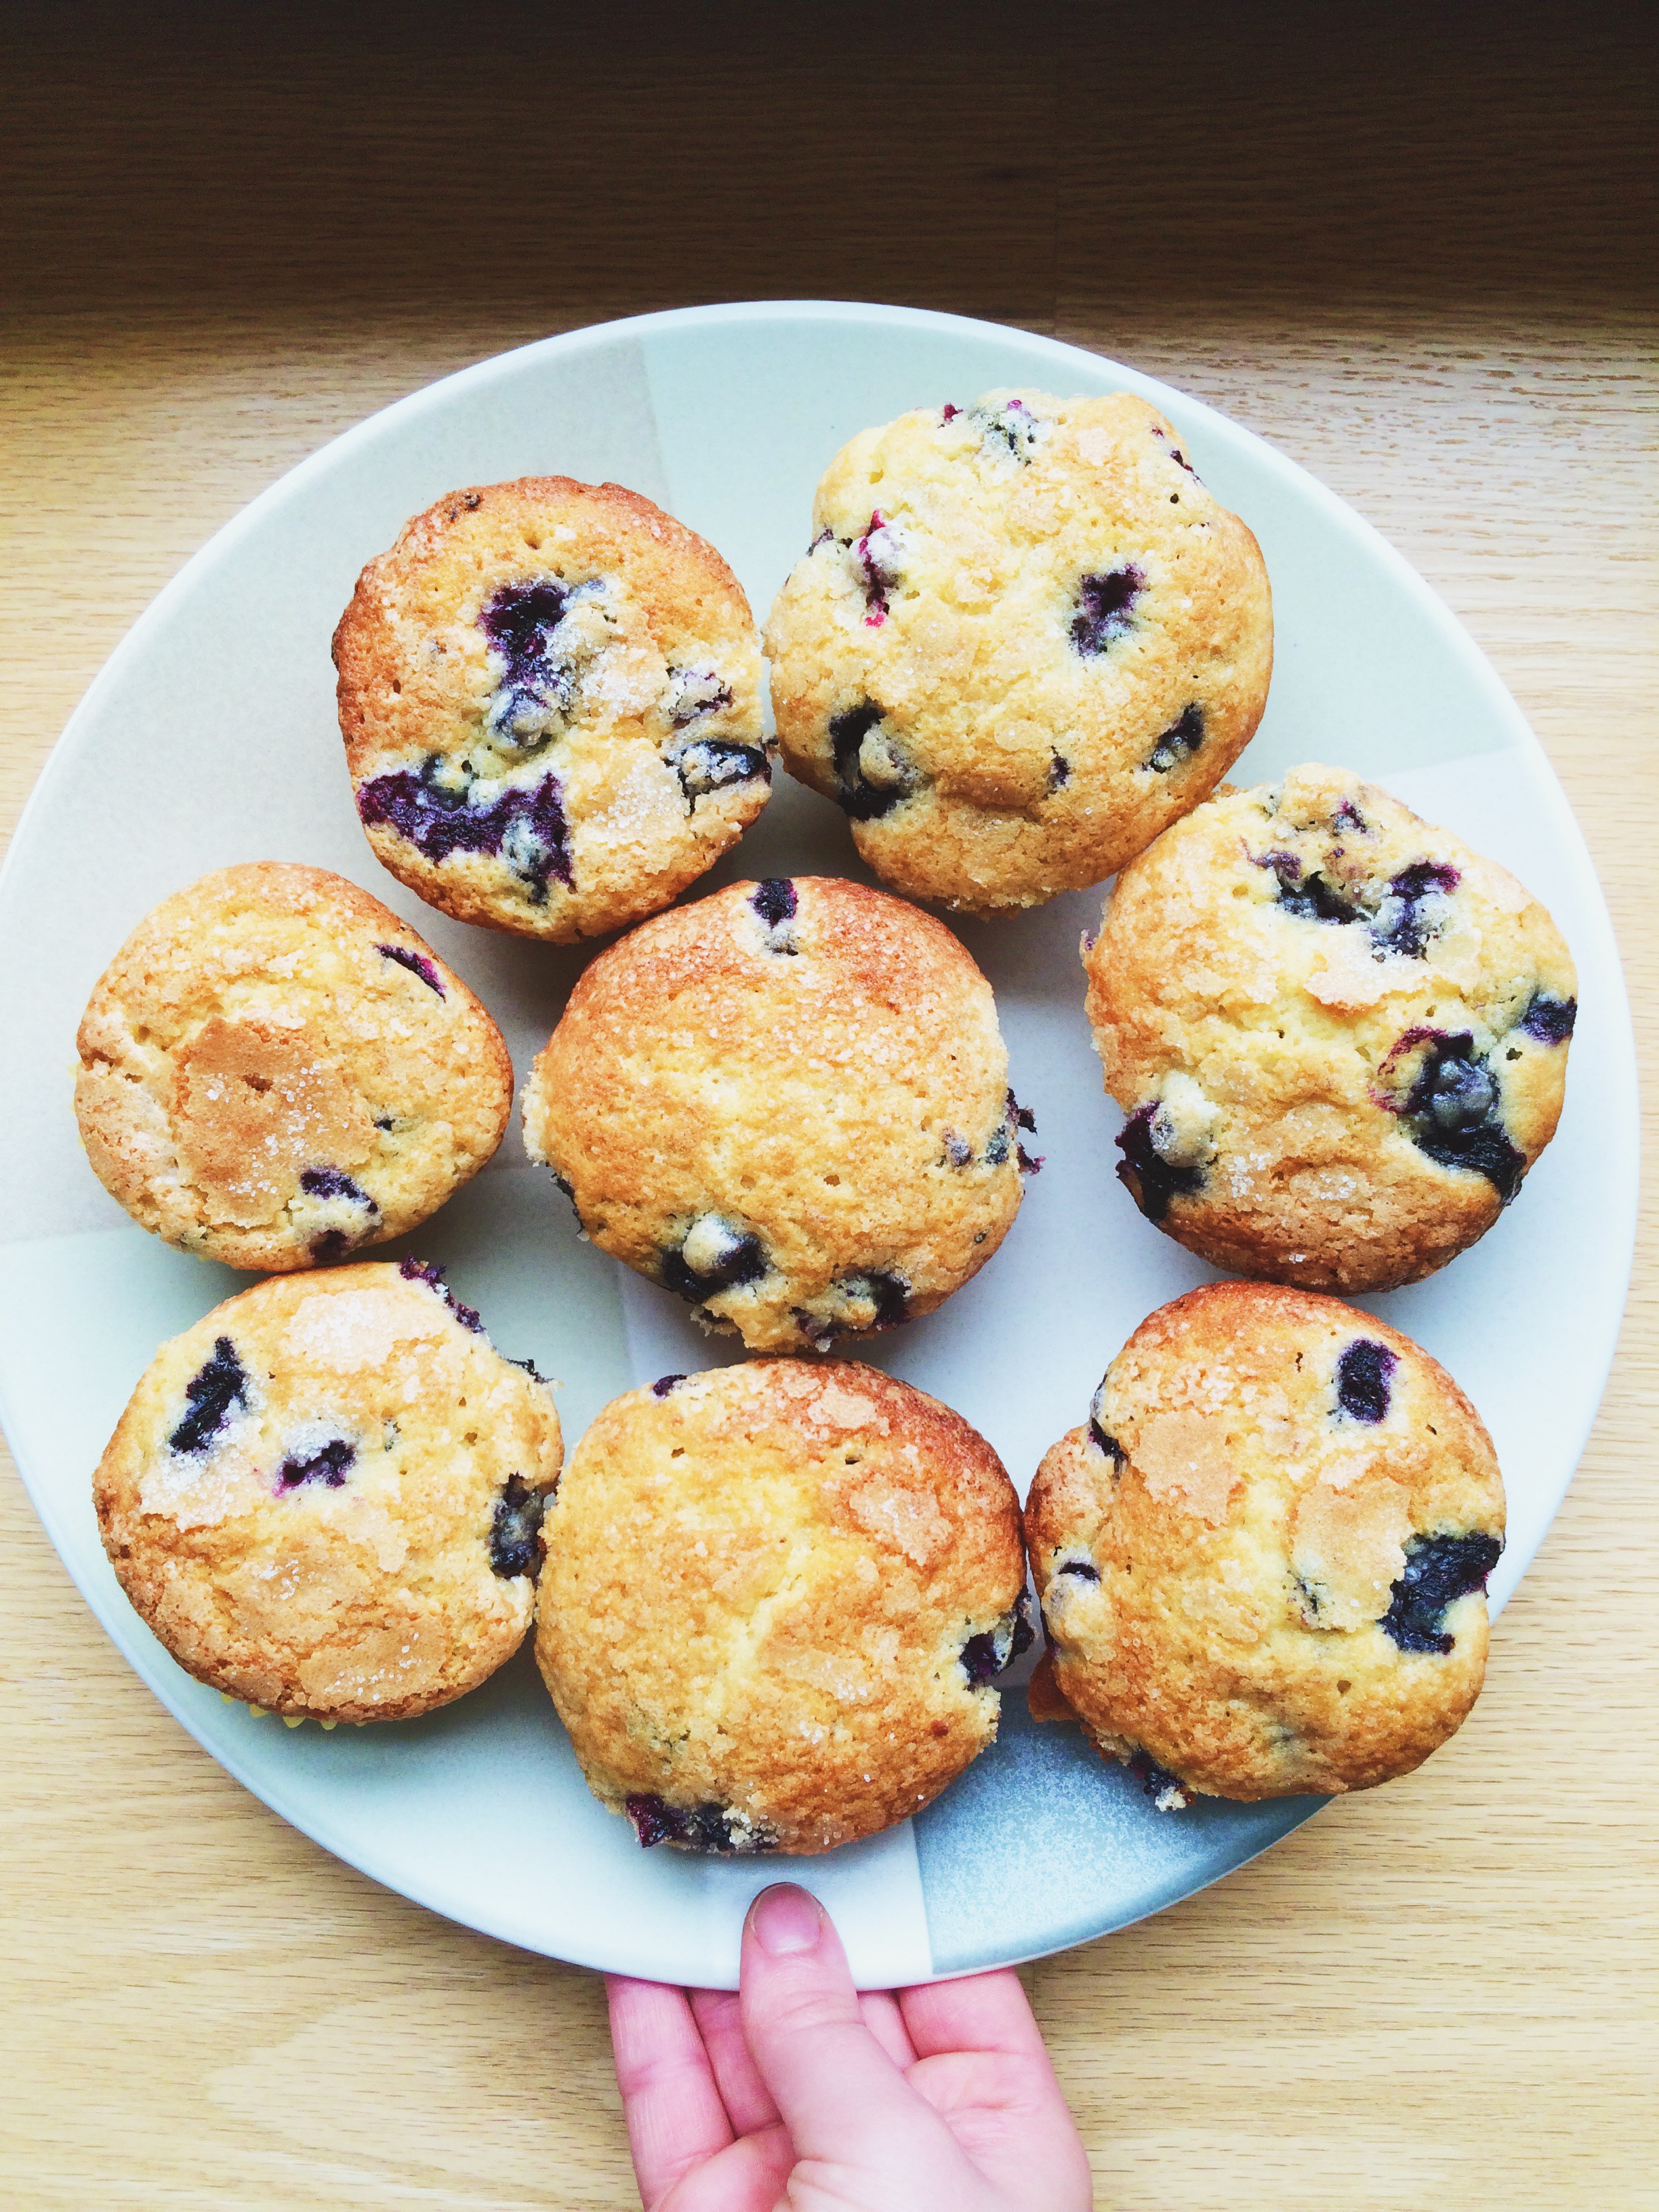
These muffins are the perfect celebration of summer blueberries (although, frozen and thawed blueberries will work perfectly well when it's off-season). It calls for two cups, which means that all twelve of these muffins are packed with plump antioxidant-rich blueberries just waiting to burst when you bite into them. And as much as I love a good crispy, crumbly topping made out of flour, sugar, and butter, sometimes a little coarse sugar will also do the trick of adding a bit of texture quite nicely.

Hey, blueberry muffins are a classic for a reason.


NYT BLUEBERRY MUFFINS

What You'll Need:

  • 1/2 cup butter, softened (I've been really into Irish butter lately! Have you heard about Kerrygold?)
  • 1 1/4 cups sugar
  • 2 eggs
  • 1 teaspoon vanilla extract
  • 2 cups flour
  • 2 teaspoons baking powder
  • 1/2 cup milk
  • 2 cups blueberries, washed, drained, and picked over
  • 3 teaspoons sugar

(Baker's Note: Some of the commenters suggested that the blueberries should be rolled in a bit of flour before being added to the batter to prevent them from sinking while baking. I tried it, and it's definitely something to consider!)


Find the recipe HERE from the New York Times!

Baked Lemon Brioche French Toast with Raspberries

  Processed with VSCO with s3 preset

Lately I've had a hankering for french toast, but not a ton of time (or patience) in the morning to make it happen.  You have to soak the eggy bread in custard, you have to fry it on the stove, you have to fix the other side dishes that balance out the meal, you have to heat the syrup, etc. etc. etc. Who has time for that when every day you spend a an hour negotiating with your alarm clock for just five more minutes? So what does one do when they need a bright spot in a week of monotony, but very little time in the morning to make that happen? They fall in love with a make-ahead recipe like this one for Lemon Brioche French Toast with a fresh helping of minty-fresh raspberries on the side. Hello, bright spot.

This recipe is a citrus lover's dreaaaam. There's lemon zest in the custard mixture, then another hit in the freshly-squeezed lemon juice glaze.

What's lovely about this baked version of french toast is the pillowy-soft consistency (almost like bread pudding) of the inner filling, mixed with a little bit of crispiness from the crusty top layer. And what better complement to the sweetness of the lemon brioche than the fresh, slightly tart macerated raspberries with mint? It's tasty, and your breath will never smell better in your whole life.

This is a breakfast recipe for those bakers out there that love to plan ahead, like myself. Anything that can cut my overall time even the slightest bit, I'm willing to do. The make-ahead factor of this recipe is what makes it a total keeper: this dish can be made 24 whole hours in advance, and, if you ask me, the longer it sits in the fridge, the better it actually becomes! Overall prep time the night before is probably around 20-30 minutes, then cook time the next morning is around 20-30 minutes, making total time an hour MAXIMUM. Fab, right? Imagine what you can get done while your french toast is baking in the oven? We're talkin' bacon, we're talkin' eggs, we're talkin' the works, people. I seriously can't say enough great things about it. Oh wait, there's one more: leftovers reheat PERFECTLY. So don't feel guilty if it's just you enjoying a special breakfast for yourself; there's no need to waste a thing. If you play your cards right, you could have a special breakfast almost every day of the week. And breakfast is the most important meal of the day, you know.

Have it for brunch, or have it on a regular old Monday. Either way, you're on your way to a baked breakfast of champions.


LEMON-BRIOCHE FRENCH TOAST W/ MINTY RASPBERRIES

What You'll Need:

(For the French Toast)

  • 2 lemons, zested and juiced
  • 3 large eggs
  • 1/4 cup light brown sugar, packed
  • 3 cups whole milk
  • 1 teaspoon vanilla extract
  • 1/4 teaspoon salt
  • 1/2 teaspoon ground nutmeg
  • 1 1/2 cups confectioners' sugar, plus more for dusting

(For the Minty-Raspberries)

  • 12 ounces raspberries, lightly washed and inspected
  • 3 tablespoons sugar, plus more if adjustment is needed
  • 1/4 cup loosely-packed mint leaves


DIRECTIONS 

*If you're making it ahead*

Grease well a 9 x 13 pan with butter, then set aside.

Slice the bread into 1/2 inch thick slices, then cut each slice in half. Next, take half of the bread slices and lay them in the baking sheet, making sure that there are overlapping layers. Sprinkle the bread slices with half of the lemon zest.

In a large bowl, whisk the eggs, then whisk in the brown sugar. Whisk until the ingredients are well combined. Next, whisk in the milk, vanilla, salt, nutmeg, and the rest of the lemon zest. Pour half of the custard mixture over the bread in the prepared baking dish, then layer the rest of the bread on top. Evenly pour the rest of the custard mixture over the bread to coat it.

Cover and refrigerate overnight. In the morning, take the casserole out of the fridge and let it sit at room temperature for at least 10 minutes before baking.


*If you're making it the same day*

Preheat the oven to 425 degrees F.

Do all of the instructions above.

When ready, bake the lemon brioche french toast for 20-30 minutes (make sure to check on it every so often because the crust of the bread tends to darken quite quickly), or until golden brown on top and puffy.

While the french toast is baking, whisk the lemon juice with the confectioners' sugar. Once you have taken the french toast out of the oven, immediately drizzle the glaze evenly over the top. Next, add a few extra teaspoons of confectioners' sugar to a fine strainer or shaker and add a light dusting over the top of the casserole.

Let the dish cool for at least 15 minutes before serving,

*While the dish is cooling*

Add the raspberries to a medium-sized bowl, then add the sugar and fresh chopped mint. Gently mix together, then let sit for 5 minutes so that the raspberries have a chance to release their juices. Add more sugar if the raspberries are still a little tart.

Serve the french toast in large slices, with raspberries on the side.


To store: Cover the dish in plastic wrap and store in the fridge. Let it come to room temperature for 10 minutes before reheating in the oven.


SOURCE: Slightly adapted from The Kitchn

Vanilla Chai Chocolate Truffles

On this episode of "Sydney Makes Easy Things That Impress Her Friends," we're talkin' 'bout chocolate truffles. But not just any regular chocolate truffles, oh no, we're throwing vanilla chai into the mix. Essentially, they're chocolate balls, but doesn't the word "truffle" just make it sound much fancier? Ya, I agree.

The bond that a woman of color has with her hairdresser is one that is sacred, and must be fostered and nurtured. I do this by surprising mine with edible treats at least once a month. And since the hot cross buns that I made a few weeks back were given to family and church members, I decided that my beloved beautician should get something specifically made JUST for her. And like many, many women that I know, she looooooooooves  chocolate. So, I thought, what better treat than just straight-up homemade truffles?

During the holiday season my television basically stays on Food Network and Cooking Channel, and I watched a special episode of Giada at Home in which she made chocolate truffles for some "guests" (more likely the production crew, but ya know, TV magic and all that) who were stopping by for a holiday party. She stepped it up by brewing a bunch of bags chai  in heavy cream, then taking it off the heat and pouring it over chocolate to melt it. Then she stirred it all together until it turned into chocolate ganache, refrigerated it for a few hours until it set, then scooped out the mixture by the tablespoon, rolled it into a ball, coated it in cocoa powder, and then wrapped a little gold leaf around each for a classy touch. They were so cute and elegant, so I logged the recipe away for an occasion when I would really, really want to make them. But when it came time to make these truffles, wouldn't you know it, I didn't have any gold leaf on hand (I'm not workin' with a Food Network budget here), and instead of brewing with classic chai, I decided to switch it up with my favorite bundling of vanilla chai tea bags. Was it a success? Oh yeah. She loved them!

These truffles are perfect for anyone who has a semi-sweet tooth. They've got a bit of an edge to them, with just the hint of sweetness to balance everything out. Basically, you get this intensely rich, deep chocolatey flavor, mixed with the warmth of spices that you find in classic chai, and finished off with the subtle hint of vanilla. The vanilla may just be a gentle whisper, but it definitely won't let you ever forget that it's there.

Best of all, they can be made wayyyy in advance, which works perfectly for me because I can enjoy leftover truffles that didn't fit in the gifted container for weeks to come.

Vanilla Chai Chocolate Truffles: Good for friendship, good for random chocolate cravings.


VANILLA CHAI CHOCOLATE TRUFFLES 

What You'll Need:

  • 1 1/2 cups heavy cream
  • 7 bags vanilla chai tea (I like Bigelow)
  • 1/4 teaspoon salt
  • 9 oz dark chocolate, finely chopped
  • 2/3 cup cocoa powder


DIRECTIONS

Before you begin, tie all of your tea bag strings together in a knot. This makes it much easier to fish them out when you've finished with them.

Pour the heavy cream into a small saucepan, then add your tea bags. Place the pan over medium-low heat, warming the cream slowly; stir occasionally. You'll know when your mixture is heated through when you see little bubbles start to form around the edges of the cream, about 5-7 minutes. Simmer for 3 minutes more, then remove from heat.

Remove the tea bags from the sauce pan. Place the finely chopped chocolate and salt in a medium bowl, then strain the cream mixture over it using a fine-mesh strainer. Let sit for 3 minutes so that the chocolate begins to melt on its own. Slowly whisk the melted chocolate into the cream starting in the center of the bowl, then slowly making your way outwards. Remember to do this slowly and carefully so that the chocolate doesn't seize up! Continue whisking until the mixture is smooth and completely blended. Place a piece of plastic wrap DIRECTLY on top of the ganache, and press down gently to make sure the surface is completely covered.  Let set in the  refrigerator for AT LEAST 3 hours, but the best is overnight. The mixture should be firm by that time, but still easy to work it.

Measure your coca powder, then place in a small, shallow bowl. With a tablespoon cookie scoop (or just a tablespoon measuring spoon), scoop even rounds of ganache into your palm, then very quickly but gently roll into a ball.  Next. roll the ball in the coca powder to coat; gently shake off any excess.. Repeat this process until you've run out of ganache. Place your truffles in an airtight container and refrigerate until you are ready to serve.

Make Ahead: The truffles can be made several weeks ahead of time, kept refrigerated in an airtight container. On the day of serving, roll each in the cocoa powder.


SOURCE: Very, very slightly adapted from Giada De Laurentis 


WEEKEND READS

What am I looking forward to this week? Brooklyn  will be on my doorstep in TWO DAYS. I told you last week that the book changed my life, and when I heard that they were making a movie....well, I could barely contain myself. Unfortunately, going to see it in theaters proved to be much more difficult than say, if I wanted to see Zoolander 2, so I resigned to wait until it came out on DVD. AND THAT DAY IS FAST APPROACHING. I've been re-reading the book in anticipation of comparisons, and literally crossing out the days in my calendar. So stoked.

Here's what else I've been reading this week:

Using food to fight the power? I’m all about it! How Suffragists Used Cookbooks as a Recipe for Subversion

Do you dye Easter eggs? I haven’t done it in agessss, but I might start this year now that I’ve seen these awesome minimalist designs! So rad.

Learning to arrange flowers is on my eternal to-do list. Here’s a fun article about supermarket flower hacks!

Donut + Macaroon= The Macaronut is upon us. Silly? Yes. Delicious? I’m thinking also yes, yes, and yes.

I'm  definitely teetering on the line between ‘too much’ and ‘just enough’ clutter every single day of my life; Strike the Right Balance: Having Just Enough 'Good Clutter' .

Have you pre-ordered Sweeter Off the Vine yet?? Yossy Arefi is one of my favorite food photographers/bloggers ever! You HAVE to buy this book. March 22nd, get here faster!!


How's your Sunday going? Mine's rainy, and I'm feeling very sleepy/content.

Dark Chocolate and Anise Biscotti

There are two sides to me. One side has this need to bake things all the time. The other side is aware that if I bake all the time, then I will feel obligated to eat everything I've made in the event that I don't have anyone to share the wealth with. It's very complicated. That's why I love, love, love biscotti. They're crunchy, they're sturdy, and they last for WEEKS at a time.  I have the freedom to nibble (or not nibble) at my leisure without the looming pressure to not waste a single crumb. It's beautiful.

Biscotti are tough cookies in the best way. The longevity of them is fantastic, but they're also the perfect option for care packages. As much as I love the Midwest (especially now that I can walk outside without a parka), most of the people I care about live in completely different parts of the country. You know that I am a big fan of sending and receiving gifts in the mail. but the edible options for packages are limited. Biscotti are PERFECT for this task.

This week I whipped up a quick batch of Buttery-Cayenne Pecans, then made these Dark Chocolate Anise Biscotti, wrapped everything in half a roll of bubble wrap, threw in a couple of heartfelt cards, then sent them on their way. Two days later, I got a "thank you" text, and a very warm heart. Care packages are my jam. And one of these days, you and I are going to make one together, step-by-step.

As you're well aware by now, I am a huge fan of deceptively easy recipes. Making biscotti? Wayyyy easier than you think. All you have to do is keep up with the time. The rest is a total breeze.

What I love most about this recipe is that it's a lot like having a chocolate chip cookie, but with a hint of licorice. And if you aren't a black licorice fan (I'm not,), have no fear, you'll still love these The anise seeds bring a subtle flavor of licorice that does nothing but completely compliment the oodles of dark chocolate chunks throughout. And I will never turn down a crispy cookie that brings a little texture to the game. If a little softness is more of what you're after, you totally have my permission to dunk a couple of these babies in a steaming cup of coffee.

Eat some biscotti.

Send some to your friends.

Do your thing.


DARK CHOCOLATE AND ANISE BISCOTTI 

What You'll Need:

  • 2 cups all purpose flour
  • 1 1/2 teaspoons anise seeds, slightly crushed
  • 1 teaspoon baking powder
  • 1/4 teaspoon salt
  • 6 tablespoons unsalted butter, softened
  • 1 cup granulated sugar, plus more for sprinkling
  • 2 large eggs
  • 1 large egg yolk
  • 4 oz chocolate, roughly chopped

DIRECTIONS

Place oven racks in the center and upper third of the oven, then preheat to 325 degrees F. Line two cookie sheets with parchment paper. Set aside.

Whisk together the flour, slightly crushed anise seeds, baking powder, and salt in a medium bowl, then set aside.

In the bowl of a stand mixer fitted with the paddle attachment (or with a hand mixer, or with a wooden spoon), cream together the butter and sugar on medium speed until light and fluffy; about 5 minutes.

Reduce mixer speed to low, then add one egg and the egg yolk, then beat until well combined; about 3 minutes.

Add the flour mixture all at once to the stand mixer, and beat on low until well combined. The dough may seem a bit crumbly. Next, add the chocolate chunks and make sure they are evenly distributed throughout.

Divide the dough in half, then place each half on a parchment-lined cookie sheet. Gently knead the dough a few times, just to get it to come together a little more. Next, shape each dough into logs about 8 inches long, and 1 1/2 inches wide. Beat the remaining egg, then generously brush it over each log. Next, sprinkle sugar liberally over each log.

Bake the biscotti on both racks for 20 minutes, then swap racks and bake for an additional 15-20 minutes, until the biscotti are golden brown and baked all the way through.

Take your cookie sheets out of the oven, and let the biscotti rest for a few minutes. Once the biscotti logs are cool enough to handle, cut into 1-inch slices using a serrated knife, cutting in a swift motion.

Place the cookies cut side up onto the baking sheets, then put back in the oven for another 15-25 minutes, depending on how crisp you'd like your biscotti to be. (I prefer mine on the crispier side, so I kept an eye on mine for 25 minutes.)

For an even crispiness, flip your biscotti over and bake for another 2-5 minutes.

Let cool, then store in an airtight container for up to 2 weeks. 


SOURCE: Adapted from Joy the Baker Cookbook: 100 Simple and Comforting Recipes 

WEEKEND READS

An Ode to Downton Abbey

DA

Why is it that you have to go away?

Indefinitely, I'd love for you to stay

But at least I still get to press "play..."

ONE LAST TIME

Guys, I'm totally not ready for Downton Abbey to be over! It's been my staple January show for FOUR YEARS (I got in on the fun two years into the game), and I'm just not ready to part with it. Sure, I know shows can't last forever, but six seasons just doesn't feel like enough. And what I don't want is for the finale to end and everyone just goes about living their lives, leaving me to use my own imagination as to how each person gets on. I'd rather the finale last four hours tonight and just show me how every single person lives a super long, happy life, then passes away. Or at LEAST to show what happens to Downton during World War Two. Perhaps they take in some children from London? I feel like there's good material there. At any rate, I'm not ready to say goodbye. Are you?

Let's procrastinate the inevitable adieu of one of the greatest shows on television together.

Here are some of my favorite reads of the week:

-Brooklyn the movie may not have won last week at the Oscars, but it won every award in my book. Here's a nice comparison of Brooklyn then vs. Brooklyn now. P.S. Have you read the book? Get on it. Brooklyn: A Novel changed everything for me.

-Prepare yourselves: Marimekko is coming to Target NEXT MONTH. TOO AMPED.

-I’m in the market for some new specs, and was looking for companies that are different from the usual suspects. Thanks, Brit + Co!

-This beats 4 pretzels in a foil package any day: Air France + Daniel Boulud = Best In-Flight Meals Ever.

-I always love a good food photography app, and this new one by the LINE Corporation, "Foodie," looks promising! Have you guys tried it yet?


Happy Sunday/ Happy Last Time That We'll Ever See A New Episode of Downton Abbey...Day!

WEEKEND READS

Screen Shot 2016-02-27 at 8.34.14 PM Life is beautiful because life currently includes 54 degree weather. I freed my light jacket from its prison (my closet) and willingly ventured outdoors; can you believe it? I saw so many bikers and joggers, and kids riding tricycles, and dogs pulling on their leashes, and neighbors that I haven't seen in months emerging from their cocoons. It's been a magical sight t0 behold. But this glorious Spring-like weather is fleeting, so if you've missed the teeny-tiny window of non-freezing weather, now's a great time to catch up on some reading.

Here's what I've been diggin' this week:

Old Hollywood Glamour + Food = Love. Here’s what they served at the very first Oscar’s.

I’m all about nice-smellin homes. The Kitchn’s got some nice tips!

As Saveur Magazine perfectly put it: “We don’t talk about Midwestern food enough.” I wholeheartedly agree. Sugar Cream Pie anyone?

I’m on a The Office kick as of late, so seeing BJ Novak tweet out his list of never-ending ideas for Michael Scott via The List App, was all kinds of awesome.

Have you heard of the Swedish equivalent to tea time, Fika? This should totally catch on.

Speaking of Tea Time...When Britain Fought Against the Tyranny of Tea Breaks.

We should all be out buying the latest issue of Bon Appetit. Why, you ask? Because it was shot ENTIRELY on iPhones! I can get behind that.

Real talk: all I’ve ever really wanted is Meryl Streep’s kitchen in It’s Complicated; Memorable Kitchens in Cinematic History


If you need me, I'll be becoming one with nature for the next 5 hours.


Happy Sunday!

Pumpkin Spice Scones

What to do when you have a ton of pumpkin puree leftover from making pumpkin pie? Make pumpkin spice scones, and have a happy breakfast-time for the rest of the week! Sounds like a plan.

We're getting snow, guys. The first snowfall of the year is upon us, and I don't actually think I'm ready for it. I mean, I'm a cold weather person for SURE, but you actually have to ease me into it! You can't just spring potentially six inches of snow on me like it's no big deal. First, a beautiful dusting. Then, an inch or two. Then, a beautiful blanket just in time for Christmas. THAT'S how it's supposed to go. Ah,well. We'll get it right next year.

At any rate, one of the nicer things about terrible weather is the comforting heat of the oven, and obviously the baked reward that emerges from it. And these scones? Great reward.

First of all, anything with pumpkin in it gets a big ol' stamp of approval from me no matter what. But to have it in a wedge, drizzled with deliciously-sweet spiced glaze, is extra special. Perfect for your coffee. Perfect for your life.

For those of us that love pumpkin bread, these scones will be right up your alley. Generally, scones are more on the biscuit side, but the moisture from the pumpkin puree actually shakes things up...in a good way. What you get with these is a crispy-on-the-edge, moist-in-the-middle combination that is totally divine. Just make sure to keep a close watch on these little guys--- too long in the oven and they'll dry out a little too much, losing what I think makes them so great.

If you're looking for a quick and DELICIOUS way to 1) make breakfast 2) use up precious pumpkin, these are totally the way to go.

Now, go. Go make them.

PUMPKIN SPICE SCONES

What You'll Need:

For the scones:

  • 1 3/4 cups all-purpose flour
  • 1/3 cup sugar
  • 2 teaspoons baking powder
  • 1/2 teaspoon baking soda
  • 1/4 teaspoon salt
  • 1 teaspoon cinnamon
  • 1/8 teaspoon ground cloves
  • 1/8 teaspoon ground ginger
  • 1/8 teaspoon nutmeg
  • 1/4 cup very cold unsalted butter, cut into 1/2 inch cubes
  • 1/2 cup pumpkin puree
  • 2 tablespoons buttermilk
  • 1 large egg, room temperature
  • 1 teaspoon vanilla extract

For the glaze:

  • 1 cup powdered sugar, sifted
  • 1/4 teaspoon cinnamon
  • 1 1/2 tablespoons milk
  • 1 tablespoon unsalted butter, melted
  • 1 tablespoon vanilla extract

DIRECTIONS

Preheat the oven to 400 degrees F. Line a baking sheet with parchment paper. Set aside.

Whisk together the flour, sugar, baking powder, baking soda, salt, and all the spices in a large bowl. Add your cubed butter into the bowl and, using either your fingers or a pastry cutter, cut in the butter until the mixture resembles a coarse meal. Set aside.

In a smaller bowl, whisk together the pumpkin, buttermilk, egg, and vanilla extract until well combined. Fold your wet ingredients into the bowl with your dry ingredients until just incorporated.

Using a floured wooden spoon, or a floured bench scraper, scrape the mixture out onto a a lightly floured surface. Using floured fingers, carefully pat the dough into a roughly-8 inch circle. Then, using either a floured knife, or floured bench scraper, cut the circle into eight equal wedges. Once your wedges are formed, transfer each to your prepared baking sheet. If you'd like, use a dry pastry brush to brush off any excess dough.

Bake until golden, about 15-17 minutes. Keep a close eye on them so they don't burn. Once out of the oven, let cool for two minutes on the baking sheet before transferring to a wire rack to cool.

While They're Cooling, Let's Make the Glaze!

Combine the sugar, cinnamon, milk, butter, and vanilla extract in a small bowl.

Final Step! Glaze Those Scones!

Place a baking sheet lined with wax paper under your wire cooling rack to catch any drippings. Add glaze to your scones in any design you'd like. Dip them in, or drizzle glaze over each top using a spoon. It's totally up to you! Once glazed, let set for at least 20 minutes.

To store: If you're not eating the scones the day you make them, store them unglazed in an airtight container for up to 2 days ahead of time, and  glaze just before you're ready to serve.


SOURCE: Adapted slightly from Tutti Dolci 

Gluten Free Spiced Pumpkin Pie

K, we should probably start talking about Thanksgiving now, no? And what's better to talk about when we talk about Thanksgiving, than the true table staple? Pumpkin Pie. My favorite.

There's a debate every year in which the people in my family argue the importance of double P. Some people love it, some people hate it. Maybe it's the texture? I'm not really sure. All I know is there better be a silky Pumpkin Pie with hand-whipped cream on the table on the last Thursday of every November, or someone's in trouble. And if I have to be the one to make it, then so be it. At least I'll sleep well knowing that I already have my dessert plate mapped out for maximum consumption. But lately I've been thinking about my gluten-intolerant friends: what do they do when a flaky all-butter crust (my go-to for every pie), or a sweet and buttery graham cracker crust is not an option?

Last weekend we attended a Ladies' Day event in Milwaukee which my mother helped plan, and I volunteered to bake. Everything was going great, meal-plan wise until I was informed that there were gluten allergies and thus, the desserts must be completely gluten-free. I quickly assured her that it wouldn't be a problem, but I'll be honest: I was nervous. Despite the fact that I have a best friend who is gluten-intolerant, whenever food is involved, it's usually someone else making it and I don't have to worry about it. I made her flour-less chocolate cake once (it was DIVINE), but that was it.

Would I really have to buy new flours and ingredients that I probably would never use again? Or worse, use BOXED CAKE MIX?

I shudder to think. (Hi, I'm dramatic.)

Luckily, I was flipping through the pages of the November 2015 issue of Martha Stewart Living and came across the answer to all of my problems: Gluten-Free Pumpkin Pie! I was ecstatic of course. One, because you know how much I love pie and use any excuse to make it. And two, because I could use ingredients I have on hand absolutely all the time! I ran it by the committee, was told that I would have to make three, and was sent on my way.

I may have spent seven hours in the kitchen, but there's nothing I love more than making pie.

Now, what makes this pie GF you may ask? The CRUST! Three cups of Rice Chex (naturally and wonderfully GF), butter, brown sugar, and a little salt. Pulse those together in a food processor (I have a baby one that holds 4 cups), then spread into a pie plate, and bake it for 12 minutes to set. It's SUPER EASY, and CRAZY DELICIOUS. That brown sugar caramelizes in the oven, making the crust buttery and sweet with a hint of a crunch still. And pair that with the sweet pumpkin-y custard that is the filling, plus  the homemade whipped cream that was carefully piped onto the top, and it's just perfect.

I tell ya, it was a total hit amongst the gluten-lovers and gluten-intolerant alike, for we could all stuff our faces with pie in harmony.

Make it for Thanksgiving, make it forever.


GLUTEN-FREE SPICED PUMPKIN PIE 

What You'll Need:

Pie Crust:

  • 3 cups Rice Chex
  • 5 tablespoons unsalted butter, melted
  • 5 tablespoons packed light-brown sugar
  • 1/4 teaspoon coarse salt (I used coarse kosher salt)

Spiced Pumpkin Pie:

  • 1 1/2 cups unsweetened pumpkin puree
  • 3 large eggs, room temperature
  • 3/4 cup packed light-brown sugar
  • 1 tablespoon cornstarch
  • 1/2 teaspoon coarse salt (I used coarse kosher salt)
  • 1 teaspoon ground cinnamon
  • 1/4 teaspoon grated nutmeg
  • 1 cup whole milk

DIRECTIONS

First, let's make the pie crust:

Preheat the oven to 375 degrees

Pulse together the cereal in a food processor until finely ground. Then add the melted butter, brown sugar, and salt. Pulse until well combined.

Press the crust mixture evenly into the bottom and up the sides of a 9-inch pie pan. Bake until golden brown about 12 minutes. Set on a wire rack to cool completely.

OKAY, PIE TIME!

Reduce the oven temperature to 325 degrees F.

In a large bowl, whisk together the pumpkin puree and eggs.

In a smaller bowl, stir together the sugar, cornstarch, salt, cinnamon, and nutmeg. Transfer the dry ingredients into the bowl with the pumpkin-egg mixture, and mix until well combined. Then, whisk in the milk.

Place your cooled pie pan on a rimmed baking sheet to reduce the chance of your filling spilling out on the way to the oven. CAREFULLY pour filling into the center of the crust for more even spreading. DO NOT OVERFILL. You may have some filling leftover, and that's okay! You do not want an overflow in the oven, trust me.

Transfer your pie on the baking sheet to the oven and bake until filling is just set, ABOUT 50-55 minutes, but KEEP AN EYE ON IT. If a custard-based pie (like this one) is over-baked, it will crack, and no one wants that. (But if it does crack, you can always cover it with whipped cream, so don't fret.)

Set on a wire rack to cool completely.

Once cooled, pipe or spread on some homemade whipped cream if you're into it, and transfer pie to the fridge to chill before serving.

(MAKE AHEAD: This pie can be made up to 2 days ahead of time. KEEP REFRIGERATED.)

SOURCE: Slightly adapted from Martha Stewart Living

Last-Minute Halloween: Easy Lady Fingers

If you're trying to be kind of festive, but find yourself running out of time this Hallow's Eve, you should TOTALLY make some lady fingys. It's SUPER EASY: Just a basic sugar cookie recipe, a little food coloring, a paint brush, and some slivered almonds, and you're done!

The movie marathon is starting in a few hours (I may be the only one that watches, but so be it), and I refused to celebrate one of the best holidays without at least SOMETHING kind of creepy and festive. And I love cookies. So here we are.

What's super great about these (besides how simple they are to make) is that you really can't mess up. Halloween isn't about being perfect, in fact, the more imperfect the better! When you're rolling out your fingers, it's up to you how you want them to look. Do you want them to be bent and out of shape with brownish-yellow nails, or perfectly manicured with your favorite color like you've just brought them home from the salon? It's totally up to you. Go all out!

Since I made these for my family, I figured I should keep things kind of tame (I've seen examples of lady fingers where the ends have been dipped in raspberry jelly to look like they'd just been severed off the hand!), but next year? Next year we're upping the ante.

Until then, this is the perfect last-minute Halloween project for you and your friends, served however you'd like. Maybe all in a bowl? Or, you can be like me, and use it as a prop to point to things I want, but am too lazy to get myself. It's whatever you choose!

HAPPY HALLOWEEN, GUYS!! Be safe. Make sure all the kids that come to your door know how adorable they look, because they always do.


LADY FINGERS 

What You'll Need:

  • Food-safe paintbrush
  • 1-2 tablespoons red food coloring (or your favorite color, OR leave them plain)
  • 30 blanched almond slivers
  • 2 large eggs, at room temperature
  • 1/2 teaspoon vanilla extract
  • 1 stick unsalted butter, at room temperature
  • 1/2 cup confectioners' sugar
  • 5 tablespoons granulated sugar
  • Pinch of salt
  • 1 2/3 cups all-purpose flour

DIRECTIONS

Place food coloring in a small bowl, and, using a small food-safe paintbrush, color one side of each almond. Set aside on a sheet of wax paper to dry.

Separate one egg. Set the egg white in the fridge; we'll need it later. In a small bowl, whisk together the yolk, remaining egg, and vanilla extract until well combined. Set aside.

In the bowl of a stand mixer fitted with the paddle attachment (or using a hand mixer, or a wooden spoon), combine the butter, both sugars, and salt. Beat on medium speed until well combined. Next, add the egg mixture and mix until well combined and smooth, about 2-3 minutes. Add the flour, then mix on low speed until JUST combined.

Wrap the dough in plastic wrap, then chill in the fridge for 25-30 minutes to firm up.

While the dough is chilling, preheat the oven to 350 degrees F, and line two cookie sheets with parchment paper.

Once your dough has chilled, divide the dough in half, working with one half at a time. Keep the remaining half in the fridge wrapped in plastic wrap until you're ready to use it. Lightly flour your work station.

Using a knife or bench scraper, divide the first half into 15 pieces. Roll each piece back and forth with your palms into a finger shape (whether they be really thin fingers, or really short fingers, or really craggily fingers, it's up to you!), about 3-4 inches long. Pinch the dough in two places on one end to create knuckles. Lightly score each finger with the back of the knife to create the natural lines we have in our fingers. Push down on the nail bed LIGHTLY to make it easier to attach the fingernails later. Transfer fingers to the cookie sheets, and repeat the process with the other half of dough. (Note: Make sure to work kind of quickly when making the fingers because the dough warms up really fast, making it harder to work with!)

Once all of your fingers have been formed, brush the egg white from earlier lightly over each finger to create a light browning once they're in the oven. Position each almond nail, then push down to attach (Be careful not to push to0 hard so you don't a. chip a nail or b. misshape the finger). If you find that the nail isn't attaching, add a little more egg white to the area to create a sort of glue.

Bake in the oven until slightly browned, about 10-12 minutes. Let cool completely.

Enjoy!

SOURCE: Adapted from Martha Stewart