Vanilla Chai Chocolate Truffles

On this episode of "Sydney Makes Easy Things That Impress Her Friends," we're talkin' 'bout chocolate truffles. But not just any regular chocolate truffles, oh no, we're throwing vanilla chai into the mix. Essentially, they're chocolate balls, but doesn't the word "truffle" just make it sound much fancier? Ya, I agree.

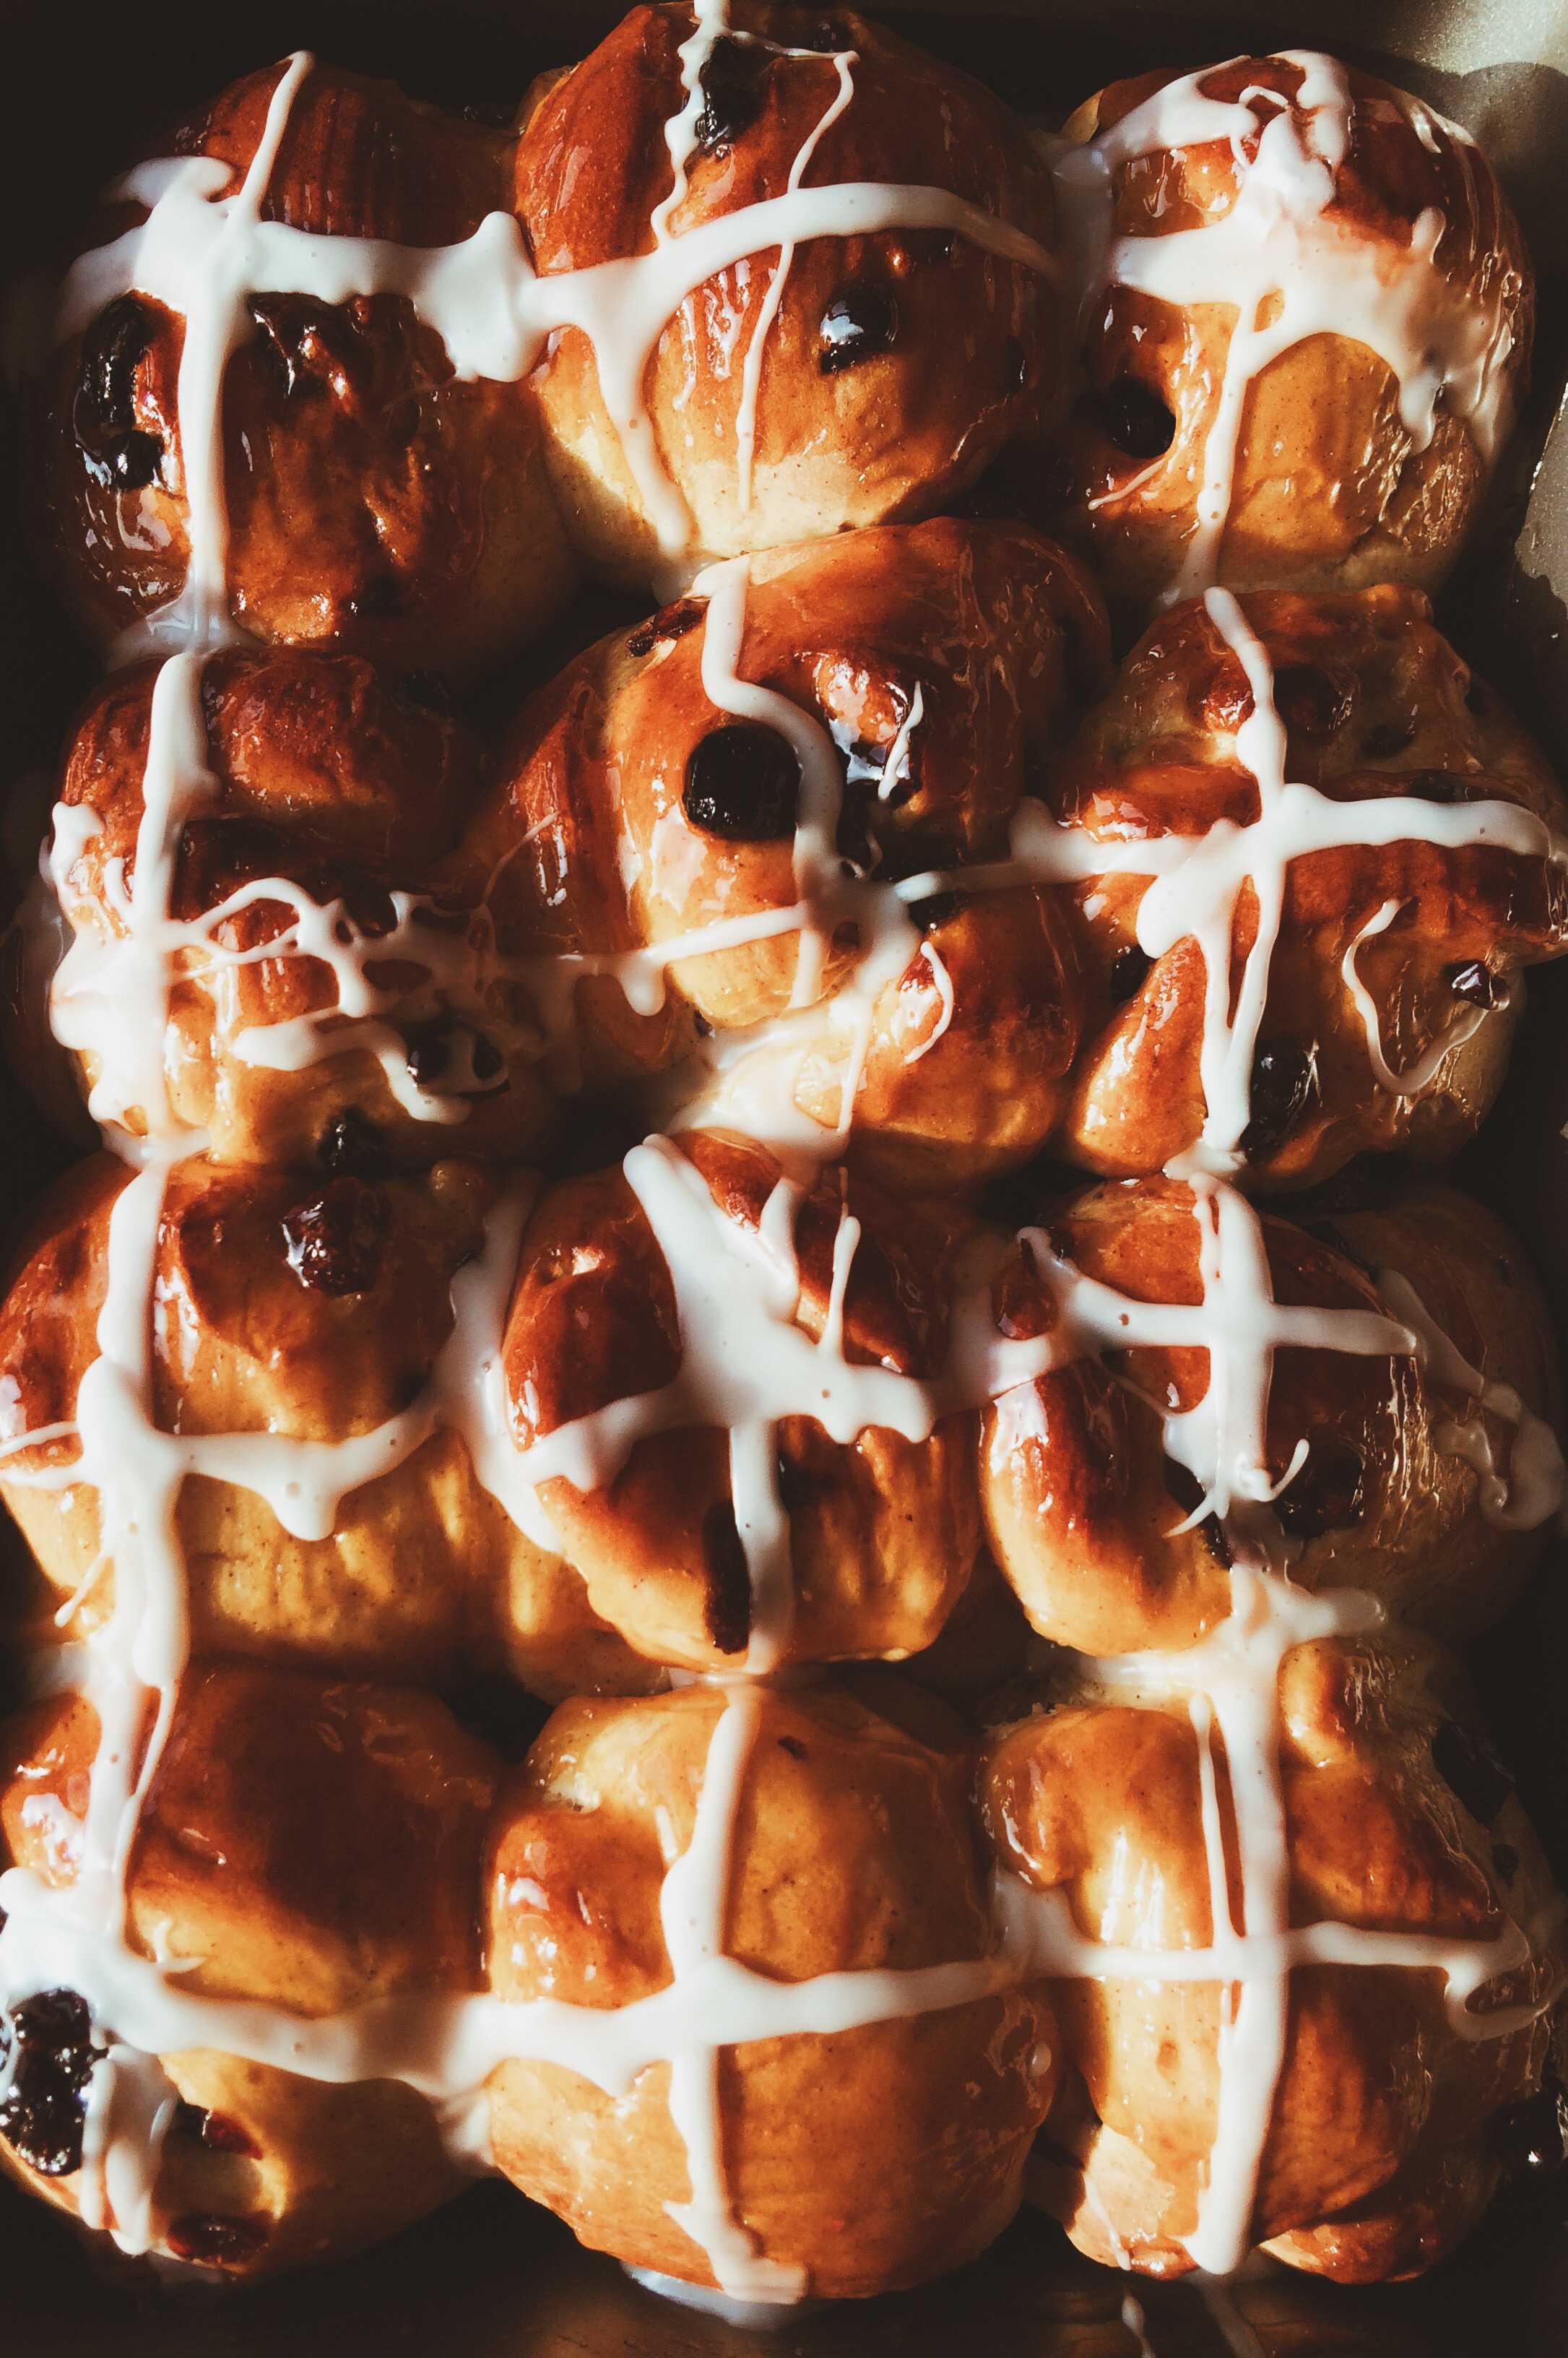
The bond that a woman of color has with her hairdresser is one that is sacred, and must be fostered and nurtured. I do this by surprising mine with edible treats at least once a month. And since the hot cross buns that I made a few weeks back were given to family and church members, I decided that my beloved beautician should get something specifically made JUST for her. And like many, many women that I know, she looooooooooves  chocolate. So, I thought, what better treat than just straight-up homemade truffles?

During the holiday season my television basically stays on Food Network and Cooking Channel, and I watched a special episode of Giada at Home in which she made chocolate truffles for some "guests" (more likely the production crew, but ya know, TV magic and all that) who were stopping by for a holiday party. She stepped it up by brewing a bunch of bags chai  in heavy cream, then taking it off the heat and pouring it over chocolate to melt it. Then she stirred it all together until it turned into chocolate ganache, refrigerated it for a few hours until it set, then scooped out the mixture by the tablespoon, rolled it into a ball, coated it in cocoa powder, and then wrapped a little gold leaf around each for a classy touch. They were so cute and elegant, so I logged the recipe away for an occasion when I would really, really want to make them. But when it came time to make these truffles, wouldn't you know it, I didn't have any gold leaf on hand (I'm not workin' with a Food Network budget here), and instead of brewing with classic chai, I decided to switch it up with my favorite bundling of vanilla chai tea bags. Was it a success? Oh yeah. She loved them!

These truffles are perfect for anyone who has a semi-sweet tooth. They've got a bit of an edge to them, with just the hint of sweetness to balance everything out. Basically, you get this intensely rich, deep chocolatey flavor, mixed with the warmth of spices that you find in classic chai, and finished off with the subtle hint of vanilla. The vanilla may just be a gentle whisper, but it definitely won't let you ever forget that it's there.

Best of all, they can be made wayyyy in advance, which works perfectly for me because I can enjoy leftover truffles that didn't fit in the gifted container for weeks to come.

Vanilla Chai Chocolate Truffles: Good for friendship, good for random chocolate cravings.


VANILLA CHAI CHOCOLATE TRUFFLES 

What You'll Need:

  • 1 1/2 cups heavy cream
  • 7 bags vanilla chai tea (I like Bigelow)
  • 1/4 teaspoon salt
  • 9 oz dark chocolate, finely chopped
  • 2/3 cup cocoa powder


DIRECTIONS

Before you begin, tie all of your tea bag strings together in a knot. This makes it much easier to fish them out when you've finished with them.

Pour the heavy cream into a small saucepan, then add your tea bags. Place the pan over medium-low heat, warming the cream slowly; stir occasionally. You'll know when your mixture is heated through when you see little bubbles start to form around the edges of the cream, about 5-7 minutes. Simmer for 3 minutes more, then remove from heat.

Remove the tea bags from the sauce pan. Place the finely chopped chocolate and salt in a medium bowl, then strain the cream mixture over it using a fine-mesh strainer. Let sit for 3 minutes so that the chocolate begins to melt on its own. Slowly whisk the melted chocolate into the cream starting in the center of the bowl, then slowly making your way outwards. Remember to do this slowly and carefully so that the chocolate doesn't seize up! Continue whisking until the mixture is smooth and completely blended. Place a piece of plastic wrap DIRECTLY on top of the ganache, and press down gently to make sure the surface is completely covered.  Let set in the  refrigerator for AT LEAST 3 hours, but the best is overnight. The mixture should be firm by that time, but still easy to work it.

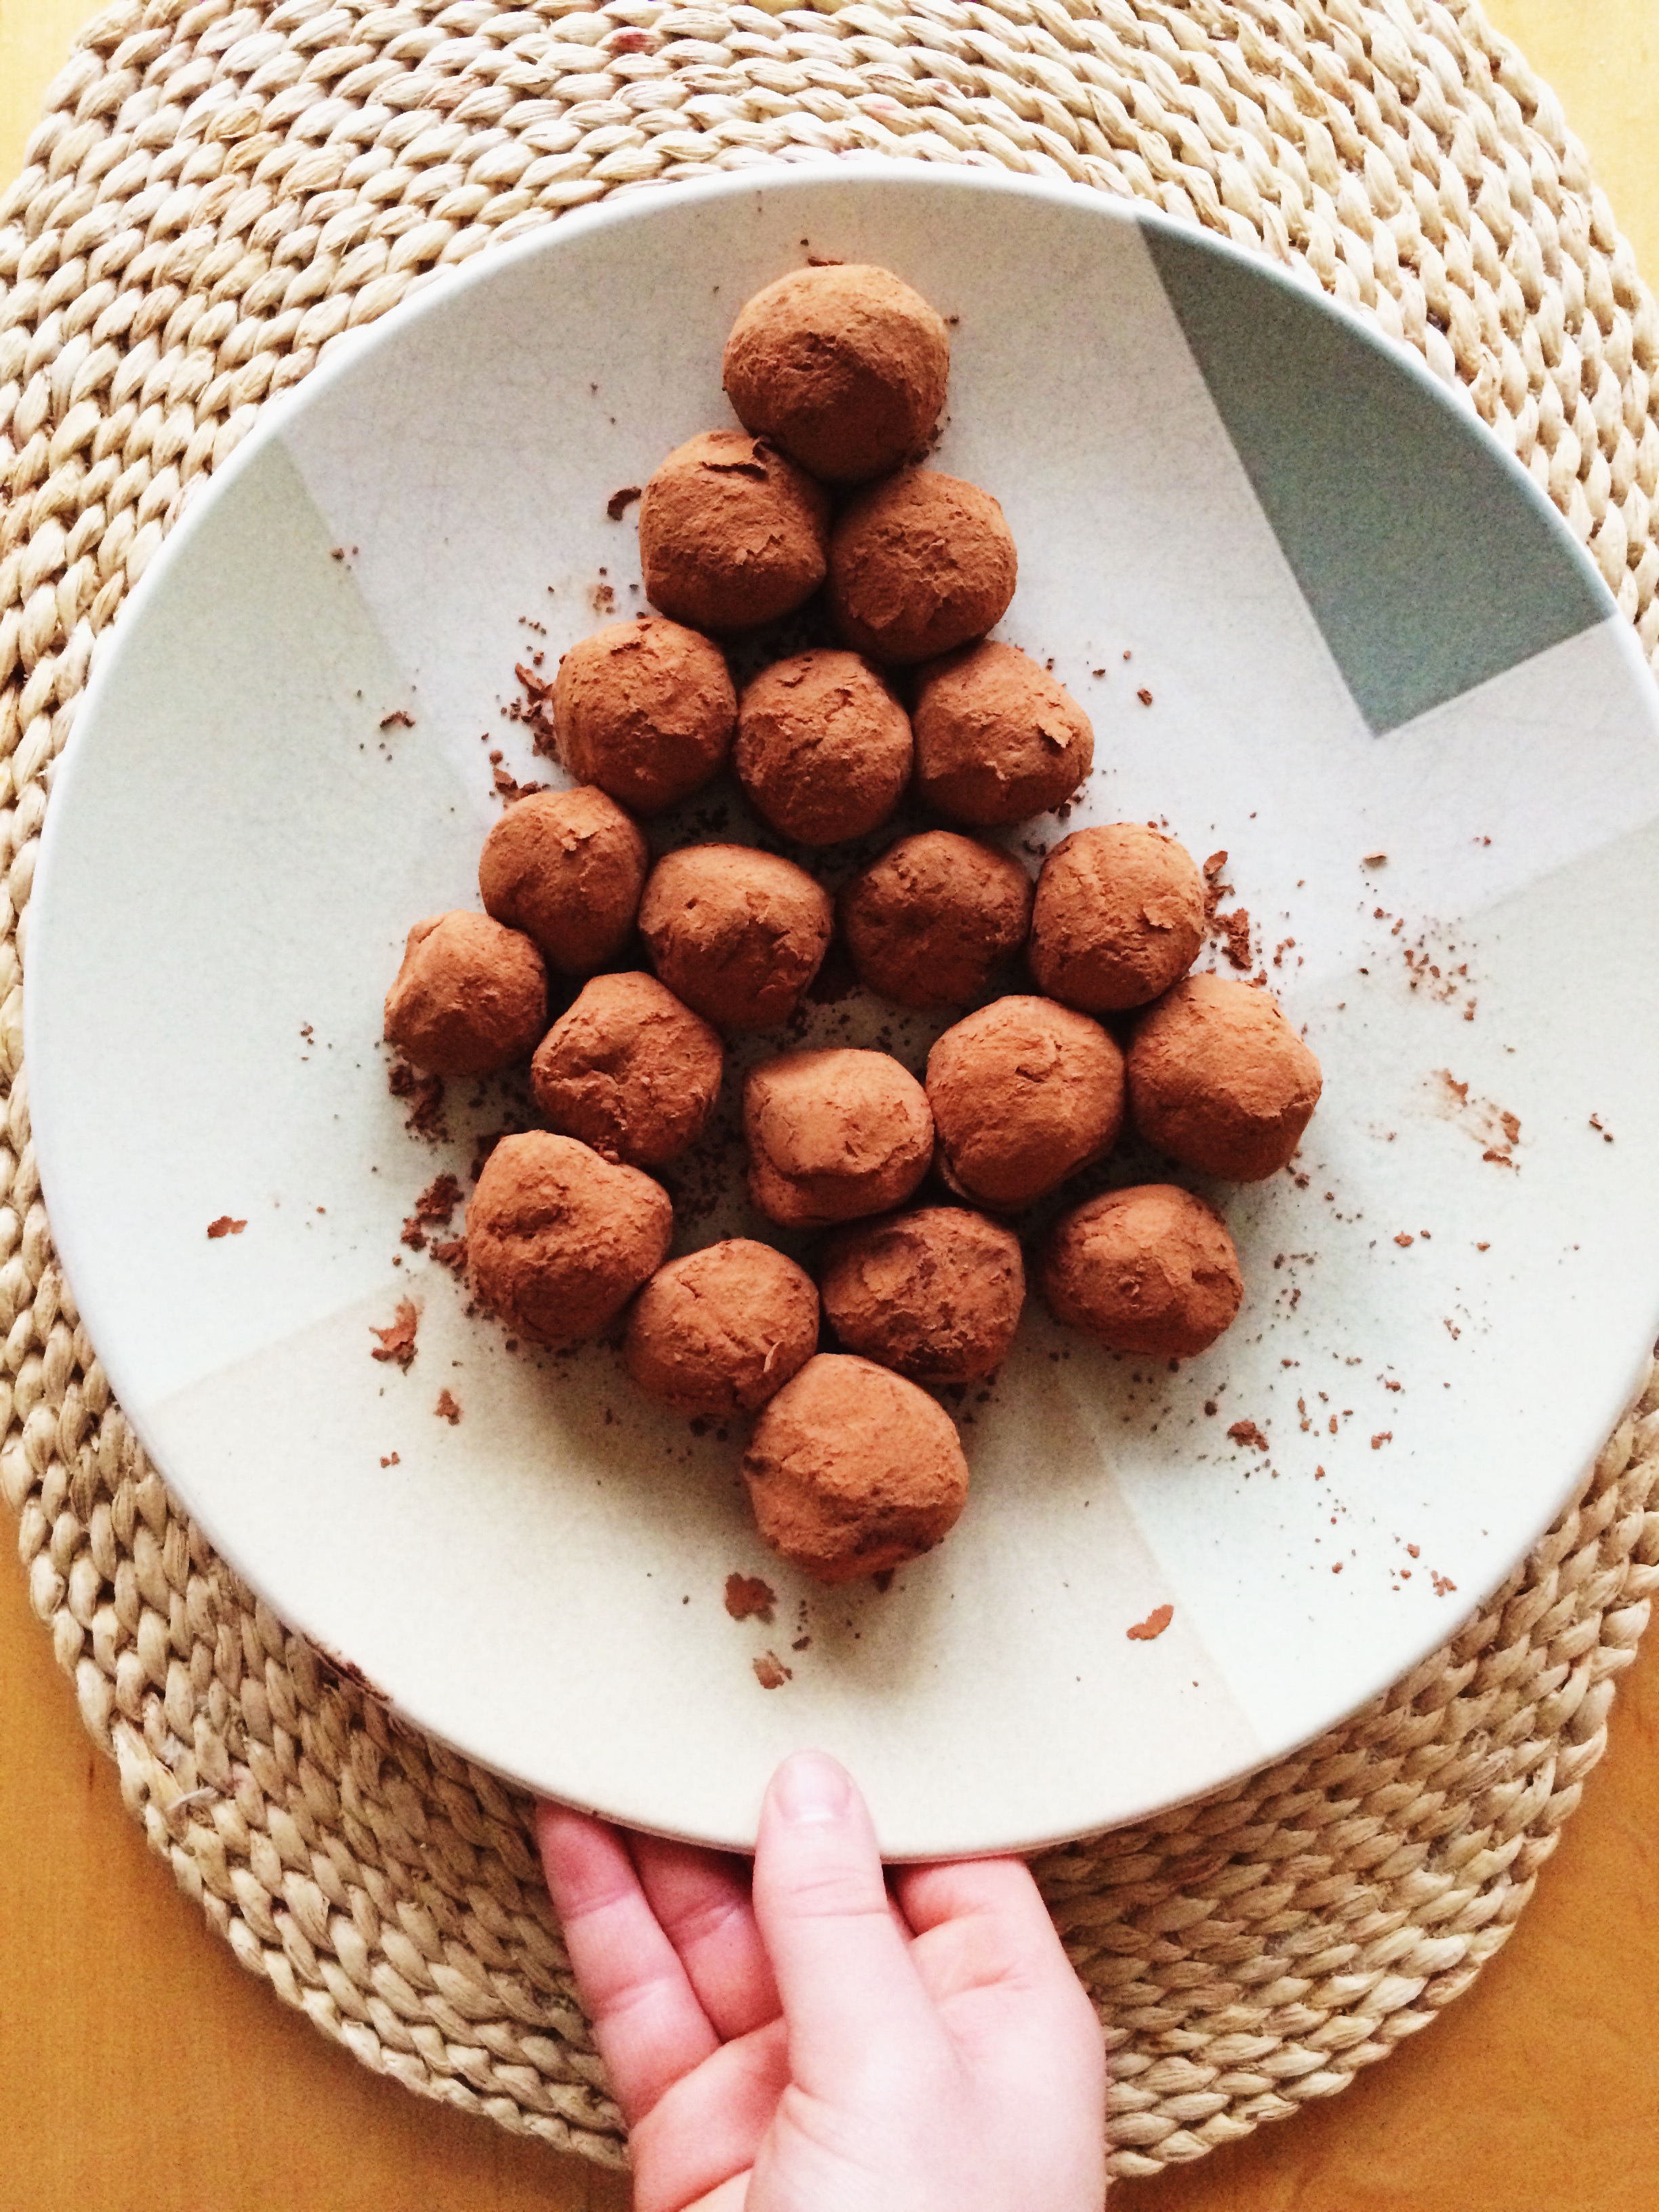
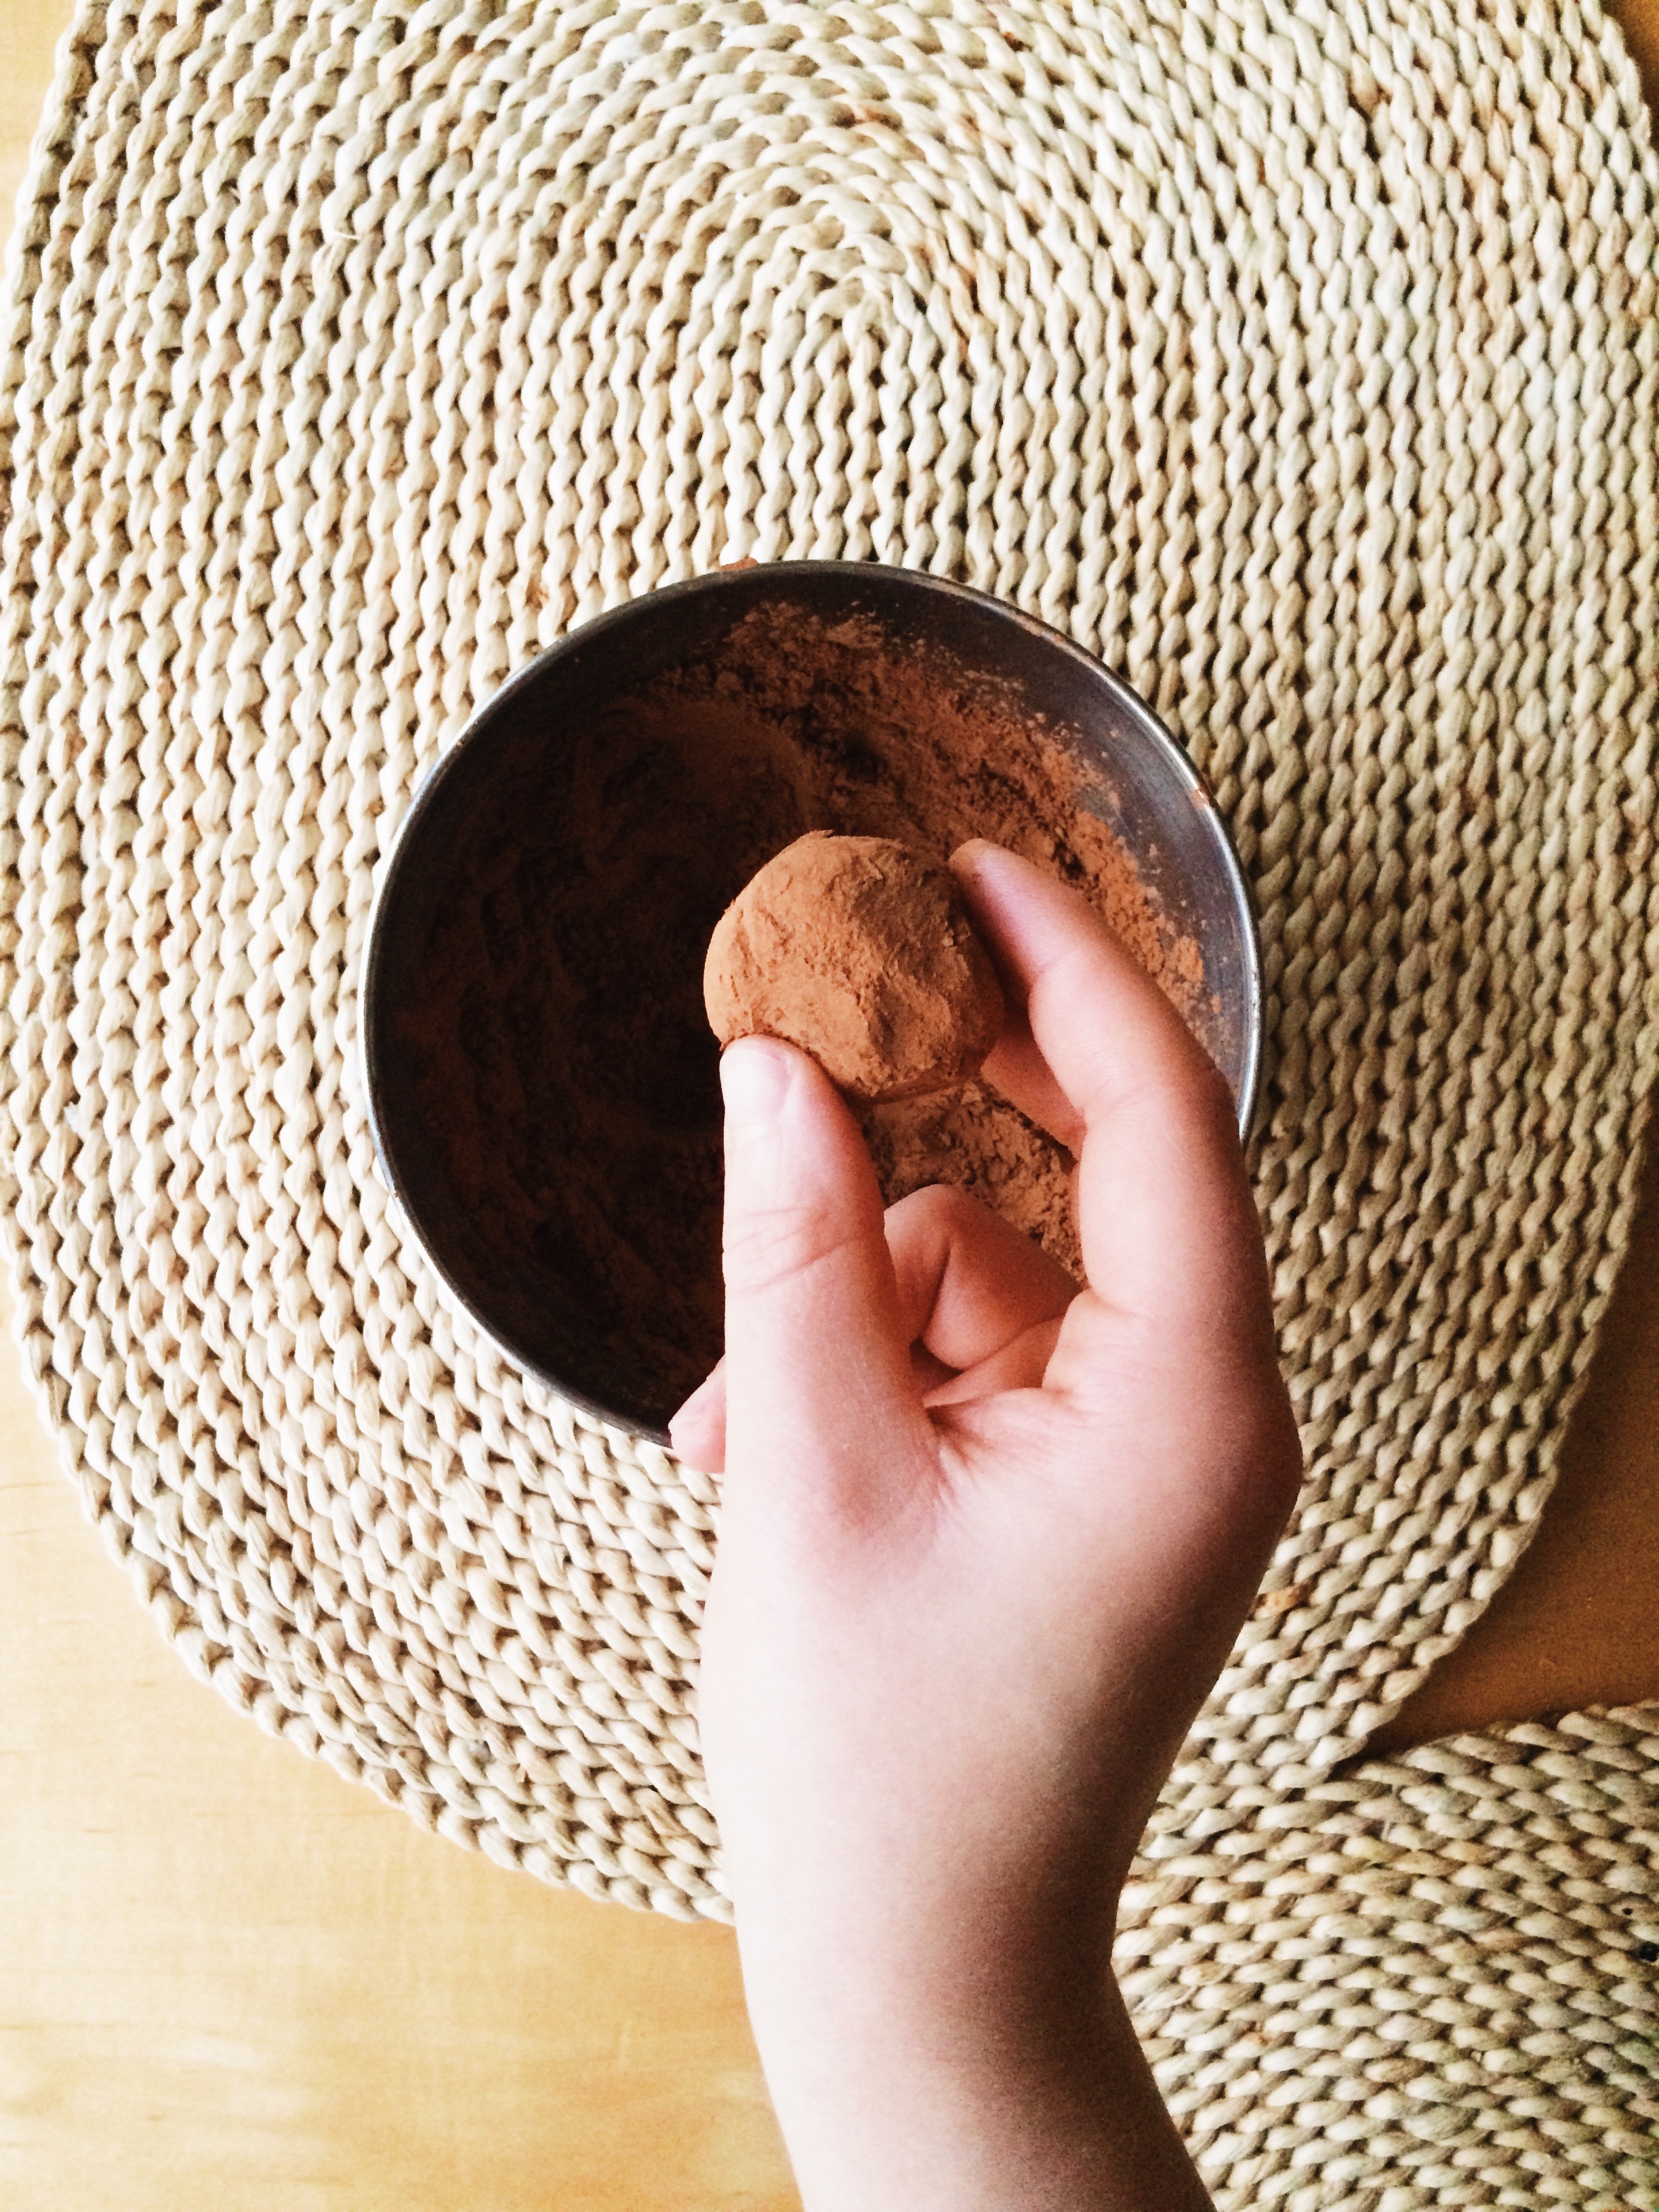
Measure your coca powder, then place in a small, shallow bowl. With a tablespoon cookie scoop (or just a tablespoon measuring spoon), scoop even rounds of ganache into your palm, then very quickly but gently roll into a ball.  Next. roll the ball in the coca powder to coat; gently shake off any excess.. Repeat this process until you've run out of ganache. Place your truffles in an airtight container and refrigerate until you are ready to serve.

Make Ahead: The truffles can be made several weeks ahead of time, kept refrigerated in an airtight container. On the day of serving, roll each in the cocoa powder.


SOURCE: Very, very slightly adapted from Giada De Laurentis 


Hot Cross Buns

Hiiiiiiiiiiiii, how was your Easter??  Mine was epic and uplifting, and full of food. Simply the best.

Have you ever had hot cross buns? This was my first year. Before that, my only knowledge of them began and ended with the song of the same name that I was forced to learn on the recorder in 7th grade. That was it. (Fun fact: I haven't picked up the recorder since.) But when you're young, it's almost a necessity that you start your own traditions and/or jump on holiday-specific bandwagons, so here we are. And I have to tell you: I can't believe I've lived my life up until now without hot cross buns. I mean, it's crazy. I can honestly say, in the four years that I have been baking, hot cross buns are the best things to ever come out of my oven. BY. FAR. Easter Sunday's breakfast was just EXCELLENT, you guys.

Best served warm, these buns are yeasty, squishy, icing-topped perfection. Traditionally, hot cross buns are filled with dried fruit like raisins, currants, cherries, or dates, but my grocery store was serisouly lacking in the traditional dried mixed fruit bags. What I found instead was a mix of dried strawberries, blueberries, cherries, and cranberries, and I LOVED that combination when paired with the warmed apricot jam and blend of cardamom and cinnamon spices. And while I enjoyed the little bursts of strawberries I got, next time 'round, I'll try to make my own fruit mix because the cardamom-cinnamon was practically begging for raisins. Either way, fruit in yeast rolls just WORKS.

You may see these most often on Easter, but something tells me these would work extremely well around Christmas time...or just all-year-round in general.


It's never too late for Hot Cross Buns.


Find the recipe HERE from Bon Appetit! 


WEEKEND READS

What am I looking forward to this week? Brooklyn  will be on my doorstep in TWO DAYS. I told you last week that the book changed my life, and when I heard that they were making a movie....well, I could barely contain myself. Unfortunately, going to see it in theaters proved to be much more difficult than say, if I wanted to see Zoolander 2, so I resigned to wait until it came out on DVD. AND THAT DAY IS FAST APPROACHING. I've been re-reading the book in anticipation of comparisons, and literally crossing out the days in my calendar. So stoked.

Here's what else I've been reading this week:

Using food to fight the power? I’m all about it! How Suffragists Used Cookbooks as a Recipe for Subversion

Do you dye Easter eggs? I haven’t done it in agessss, but I might start this year now that I’ve seen these awesome minimalist designs! So rad.

Learning to arrange flowers is on my eternal to-do list. Here’s a fun article about supermarket flower hacks!

Donut + Macaroon= The Macaronut is upon us. Silly? Yes. Delicious? I’m thinking also yes, yes, and yes.

I'm  definitely teetering on the line between ‘too much’ and ‘just enough’ clutter every single day of my life; Strike the Right Balance: Having Just Enough 'Good Clutter' .

Have you pre-ordered Sweeter Off the Vine yet?? Yossy Arefi is one of my favorite food photographers/bloggers ever! You HAVE to buy this book. March 22nd, get here faster!!


How's your Sunday going? Mine's rainy, and I'm feeling very sleepy/content.

Dark Chocolate and Anise Biscotti

There are two sides to me. One side has this need to bake things all the time. The other side is aware that if I bake all the time, then I will feel obligated to eat everything I've made in the event that I don't have anyone to share the wealth with. It's very complicated. That's why I love, love, love biscotti. They're crunchy, they're sturdy, and they last for WEEKS at a time.  I have the freedom to nibble (or not nibble) at my leisure without the looming pressure to not waste a single crumb. It's beautiful.

Biscotti are tough cookies in the best way. The longevity of them is fantastic, but they're also the perfect option for care packages. As much as I love the Midwest (especially now that I can walk outside without a parka), most of the people I care about live in completely different parts of the country. You know that I am a big fan of sending and receiving gifts in the mail. but the edible options for packages are limited. Biscotti are PERFECT for this task.

This week I whipped up a quick batch of Buttery-Cayenne Pecans, then made these Dark Chocolate Anise Biscotti, wrapped everything in half a roll of bubble wrap, threw in a couple of heartfelt cards, then sent them on their way. Two days later, I got a "thank you" text, and a very warm heart. Care packages are my jam. And one of these days, you and I are going to make one together, step-by-step.

As you're well aware by now, I am a huge fan of deceptively easy recipes. Making biscotti? Wayyyy easier than you think. All you have to do is keep up with the time. The rest is a total breeze.

What I love most about this recipe is that it's a lot like having a chocolate chip cookie, but with a hint of licorice. And if you aren't a black licorice fan (I'm not,), have no fear, you'll still love these The anise seeds bring a subtle flavor of licorice that does nothing but completely compliment the oodles of dark chocolate chunks throughout. And I will never turn down a crispy cookie that brings a little texture to the game. If a little softness is more of what you're after, you totally have my permission to dunk a couple of these babies in a steaming cup of coffee.

Eat some biscotti.

Send some to your friends.

Do your thing.


DARK CHOCOLATE AND ANISE BISCOTTI 

What You'll Need:

  • 2 cups all purpose flour
  • 1 1/2 teaspoons anise seeds, slightly crushed
  • 1 teaspoon baking powder
  • 1/4 teaspoon salt
  • 6 tablespoons unsalted butter, softened
  • 1 cup granulated sugar, plus more for sprinkling
  • 2 large eggs
  • 1 large egg yolk
  • 4 oz chocolate, roughly chopped

DIRECTIONS

Place oven racks in the center and upper third of the oven, then preheat to 325 degrees F. Line two cookie sheets with parchment paper. Set aside.

Whisk together the flour, slightly crushed anise seeds, baking powder, and salt in a medium bowl, then set aside.

In the bowl of a stand mixer fitted with the paddle attachment (or with a hand mixer, or with a wooden spoon), cream together the butter and sugar on medium speed until light and fluffy; about 5 minutes.

Reduce mixer speed to low, then add one egg and the egg yolk, then beat until well combined; about 3 minutes.

Add the flour mixture all at once to the stand mixer, and beat on low until well combined. The dough may seem a bit crumbly. Next, add the chocolate chunks and make sure they are evenly distributed throughout.

Divide the dough in half, then place each half on a parchment-lined cookie sheet. Gently knead the dough a few times, just to get it to come together a little more. Next, shape each dough into logs about 8 inches long, and 1 1/2 inches wide. Beat the remaining egg, then generously brush it over each log. Next, sprinkle sugar liberally over each log.

Bake the biscotti on both racks for 20 minutes, then swap racks and bake for an additional 15-20 minutes, until the biscotti are golden brown and baked all the way through.

Take your cookie sheets out of the oven, and let the biscotti rest for a few minutes. Once the biscotti logs are cool enough to handle, cut into 1-inch slices using a serrated knife, cutting in a swift motion.

Place the cookies cut side up onto the baking sheets, then put back in the oven for another 15-25 minutes, depending on how crisp you'd like your biscotti to be. (I prefer mine on the crispier side, so I kept an eye on mine for 25 minutes.)

For an even crispiness, flip your biscotti over and bake for another 2-5 minutes.

Let cool, then store in an airtight container for up to 2 weeks. 


SOURCE: Adapted from Joy the Baker Cookbook: 100 Simple and Comforting Recipes 

Classic Chocolate Pie

There's something very special about being a Northerner with deep connections to the South: tradition. Whether you are up North or down South, there is nothing more sacred than tradition. I love that.

These days in the culinary world, it's about finding the next big innovation. It's about blowing peoples' minds with the new and the shocking. It's about re-inventing the already re-invented. Everything has to be bigger and better and larger than life. But, isn't it nice to sometimes just take a quick step back to honor the classics? Isn't it important to acknowledge the things that have lasted the test of time? I think so. I think that, along with apple pie, chocolate pie is about as classic as they come.


What I love about this chocolate pie is that it really is a classic in more than one sense of the word. It's easy, which the best pies always are. And it's just straight-up what it is: super. super chocolatey.

No fuss, no frills, just supreme fudginess and an utterly buttery, flaky pie crust. And don't forget a generous slathering of homemade whipped cream on top; that's a must-have.


CLASSIC CHOCOLATE PIE  

What You'll Need:

  • 1 Flaky Pie Crust 
  • 1 1/2 cups sugar
  • 3 tablespoons unsweetened cocoa powder
  • 4 tablespoons unsalted butter, melted
  • 2 large eggs, beaten
  • 3/4 cup evaporated milk
  • 1 teaspoon pure vanilla extract
  • 1/4 teaspoon salt
  • homemade whipped cream, for serving (optional)
  • 1 ounce dark chocolate, for shaving (optional)


Find the recipe on Food and Wine.

WEEKEND READS

Screen Shot 2016-02-27 at 8.34.14 PM Life is beautiful because life currently includes 54 degree weather. I freed my light jacket from its prison (my closet) and willingly ventured outdoors; can you believe it? I saw so many bikers and joggers, and kids riding tricycles, and dogs pulling on their leashes, and neighbors that I haven't seen in months emerging from their cocoons. It's been a magical sight t0 behold. But this glorious Spring-like weather is fleeting, so if you've missed the teeny-tiny window of non-freezing weather, now's a great time to catch up on some reading.

Here's what I've been diggin' this week:

Old Hollywood Glamour + Food = Love. Here’s what they served at the very first Oscar’s.

I’m all about nice-smellin homes. The Kitchn’s got some nice tips!

As Saveur Magazine perfectly put it: “We don’t talk about Midwestern food enough.” I wholeheartedly agree. Sugar Cream Pie anyone?

I’m on a The Office kick as of late, so seeing BJ Novak tweet out his list of never-ending ideas for Michael Scott via The List App, was all kinds of awesome.

Have you heard of the Swedish equivalent to tea time, Fika? This should totally catch on.

Speaking of Tea Time...When Britain Fought Against the Tyranny of Tea Breaks.

We should all be out buying the latest issue of Bon Appetit. Why, you ask? Because it was shot ENTIRELY on iPhones! I can get behind that.

Real talk: all I’ve ever really wanted is Meryl Streep’s kitchen in It’s Complicated; Memorable Kitchens in Cinematic History


If you need me, I'll be becoming one with nature for the next 5 hours.


Happy Sunday!

Heart-Shaped Jammy Sammy Cookies

I know February 14th is long-gone, but I subscribe to Valentine's Day-cutesienss 365 days out of the year.

By the way, how was your Valentine's Day? Mine was surprisingly fun this year, which has freed me from the cycle of weird/awkward/disastrous scenes of Valentine's Day past. I volunteered at the an annual Sweetheart Dinner (last year I made this French Silk Pie), and had a BLAST. There were several courses involved, and no time to take a breath as we were each cooking over our respective dishes (I was on dessert duty but got roped into making seafood Alfredo once we got there). Lots of "behind"-s, and "this is ready to go out!"-s, and "We need more ginger ale for the punch!"-s were thrown out, and it reminded me of how much I love being in a busy kitchen. I live for that hustle and bustle sometimes. I mean, I've never dried so many dishes, or continuously scrubbed the same countertops so many times in my entire life, but MAN was it worth it. It was a really classy affair.

Would you like to know the best bit? These cookies were a BIG HIT!

"Jammy Sammie Cookies" is just the name that I wrote to be cute/slightly annoying. You're probably more familiar with the name "Linzer," because of the filling and shape cut out of the center. I generally see Linzer cookies the most during the Holiday Season, but if you ask me, the cookie cutout + filling pairing should be a yearlong affair. And what goes better with a heart shape on Valentine's Day than fresh strawberry jam? Red is like the official unofficial color of V-Day, so the filling of these cookies were required to match accordingly.

Quick question: how do you feel about homemade jam? Me? I'm all about it. I feel like there's nothing that makes me feel cozier than when I'm making jam from scratch. Sure, it takes way less time to just pick a jar off the shelf at your local grocery store, but when you make it yourself you: A) Know exactly what has gone into it, and B) MADE. IT. YOURSELF. Helloooooooo! It's (relatively) fast, (totally) easy, (unbelievably) fresh, and you know it's always made with love.

Now pair that sweet, sweet jam with some deliciously soft shortbread plus a liberal sprinkling of powdered sugar for good measure, and you've got the stuff of dreams, kids. What could be better?

Since you'll definitely have jam left over after filling the cookies, might I make a few suggestions as to what to use it on?

  1. Biscuits
  2. Scones
  3. Toast
  4. Fingers dipped in
  5. By the spoonful
  6. etc. etc.

And let's just quickly talk about the versatility of these cookies, shall we? Yes, they were made for February 14th, but they can go wayyy beyond that. We're talkin' tea parties, birthday parties, bridal showers, picnics, breakfasts, coffee breaks, dates, etc. etc. Cookie hearts filled with homemade jam never go out of season.

It's a beautiful thing.


HEART-SHAPED JAMMY SAMMY COOKIES

What You’ll Need:

For the shortbread:

2 sticks unsalted butter, at room temperature

1 cup granulated sugar

1/4 teaspoon salt

1 large egg + 1 large egg yolk, room temperature

1 teaspoon vanilla extract

2 1/2 cups all-purpose flour

Powdered sugar for sprinkling

For the jam:

32 oz (two 16 oz containers) strawberries

1/2 cup + 1 tablespoon  brown sugar

Pinch of salt

Zest of 1 whole lemon + juice of half a lemon


DIRECTIONS:

First, let’s make the shortbread cookie dough:

 In the bowl of a stand mixer fitted with the paddle attachment (or a hand mixer, or a wooden spoon), add the butter, sugar, and salt and beat until light and fluffy, about 3-5 minutes. Add the egg and egg yolk one at a time, making sure each addition is well combined. Next, add the vanilla extract. Add the flour in three batches, making sure each addition is well combined (but don’t over-mix), before adding more flour. When necessary, scrape down the sides of the bowl using a rubber spatula.

Once your dough has just come together, lay your dough out on a plastic sheet, then divide it in half. Wrap each half tightly in plastic wrap, then shape to form discs. Refrigerate the discs for at least one hour, but best is overnight.

Ok, dough’s done, now let’s make the jam:

Rinse strawberries before using, and let drain completely before getting started.

Once your strawberries have been washed, hull each strawberry, then cut into quarters. Place all of your cut up strawberries in a medium sauce pan. Next, add your brown sugar, pinch of salt, lemon zest, and lemon juice. Using a potato masher (or the back of a wooden spoon), muddle all of your ingredients together, making sure that the berries’ juices are starting to release, and your sugar and salt have started to dissolve.

Cook your fruit compote, stirring frequently, over medium-high heat until your jam has thickened, and it passes the line test (a line can be drawn down the center of the spoon without the juices running); On my stove, that takes about 30-35 minutes. Along the way, make sure to give your jam a few taste tests, and adjust the flavors to your liking. The mixture will bubble quite a bit and juice may jump out of the pan occasionally, so watch out for that!

When your jam has come together, take it off the heat and let it cool completely before transferring it to a mason jar or tupperware container.

This jam will last for several weeks refrigerated.

VERY IMPORTANT: DO NOT leave the stove whilst you’re making your jam. One minute it can still be too runny, then the next you’re cleaning burnt strawberry syrup out of the pan until your arms fall off. Trust me. Stay put. Keep stirring.

Ok, my dough has rested. Time to make some cookies!

Preheat the oven to 375 degrees F, and line two baking sheets with parchment paper. Set aside.

Remove the first disc of dough and let sit on a counter for ten minutes; this allows it to come to room temperature, thus making it much easier to roll out.

Liberally flour a rolling pin and work surface.

Roll the cookie dough out to a 1/8 inch thickness, then, using a floured heart-shaped cookie cutter, cut out shapes. Transfer the hearts to the cookie sheets lined with parchment paper, about 1-inch apart. Stamp a hole out of the center of half the cookies using the tip of a circle piping tip. Repeat the process with any remaining scraps, and with the second disc of dough.

Bake the cookies one sheet at a time for 7-10 minutes (depending on your oven),  or until the cookies have started to lightly brown around the edges. Allow the cookies to cool for five minutes on the baking sheet before transferring them to wire racks to cool completely.

Transfer the cookies with the holes cut out of the center to one of the cool baking sheets (keep the parchment paper on). Sprinkle a generous amount of powdered sugar over them using a sifter, mesh strainer, or powdered sugar shaker. (Aren’t you glad you have the parchment paper now to catch the excess sugar?) Flip the bottom cookies (no holes in them) over so that the underside is facing you, then apply about a teaspoon of jam right in the center of each. Place the tops on, then lightly press down so that you create a sandwich. The jam should spread evenly to the edges and through the center hole without overflowing. Enjoy!

To Store: Refrigerate in an airtight container for up to a week.


SOURCE: Adapted from A Cozy Kitchen

Cappuccino-Chocolate Sandwich Cookies

I have a question for all the Martha Stewart fans out there: Are you watching Martha Bakes?? If not, go. GO RIGHT NOW. GO SET YOUR DVR! I'll wait here.

OK, did you do it? Good. You won't regret it.

You know what's so rare? Baking shows without all the bells and whistles. Shows these days so are heavily edited for "drama," and condensed so much that you don't really feel like you could belong in that world. When I tune into a baking/cooking show, I want to feel like I'm actually in your kitchen as you TEACH ME SOMETHING! I don't want to be dazzled if it means that whatever has dazzled me is so unattainable that I shouldn't even bother to try. That's why I love Martha Bakes. Martha gets down to the nitty gritty. Whatever she makes, she makes in full. And yeah, there is a bit of "TV Magic"; sometimes what she's just made is already baked, but for the most part, the step--by-step, no matter how long it takes, is there. It's perfect. It's attainable.

This week, while going through the collection of MBs on my DVR, I discovered that Martha had done an episode entirely dedicated to coffee. Yes and yes. I was completely on board. She made cakes, she made ice cream, she made pie. It was all quite divine. But what really caught my eye (and I'll be honest: for all the thousands of hours spent watching cooking and baking shows, I hardly ever make anything from the episodes I've watched), was the cappuccino-chocolate sandwich cookies. They were cute and little, so deliciously chocolatey-looking, and a seemingly easy project to take on on a whim. I have an entire mason jar full of ground espresso beans, and I've been looking for ways to lighten the load a little bit. These sandwich cookies did very nicely indeed.

Processed with VSCOcam with s2 preset

You know, it's funny, I feel like a person who can really take or leave coffee. I have friends who have to have it first thing in the morning, and truly treat it like gold. To me, it's nice, but it holds very little significance in my life. (That significance is reserved for Mexican Coca-Cola I think.) But there are times when I positively NEED the taste of coffee as soon as possible. Usually that comes in the form of an emergency trip to a local coffeehouse, but I think it's good to broaden one's horizons to solid forms of coffee as well. And BOY are these cookies  the jolt of caffeine you need to brighten up your day.

Having one of these cookies is like having a quick cup of espresso with a dash of cream. But instead of those sweet little cups, you have a sweet and chocolately three-bite cookie. The dough alone had me breathing deeply, so when it came time to taste-test, OBVIOUSLY I was on cloud nine. I couldn't stop nibbling for ages, so you KNOW the final result was going to be delicious.

The taste of coffee is very present, but not overwhelming. The balance of the two chocolates just enhances the overall pleasure of the ground espresso. And the chocolate cream? OHHHHHHHH so good. Buttery and choclately, and addictive. And since there are two whopping tablespoons of straight-up ground espresso beans in the cookie part, plus a little more  in the chocolate drizzle, I think you can safely swap out that third cup of coffee for one or two of these lil guys.

If you couldn't tell by now, Sydney is allllllll about these cookies. I bounced off the walls and I loved it.

I think you'll love these, too.


CAPPUCCINO-CHOCOLATE SANDWICH COOKIES

What You'll Need:

  • 1 1/3 cups heavy cream
  • 10 oz milk chocolate, finely chopped (I only had chocolate chips, so if that's what you have, use it!)
  • 1 1/3 cups all-purpose flour
  • 2 tablespoons finely ground espresso beans
  • 1/4 teaspoon coarse kosher salt
  • 12 tablespoons (1 1/2 sticks) unsalted butter, softened at room temperature
  • 1/2 cup confectioner's sugar
  • 1 teaspoon vanilla extract
  • 2 oz bittersweet chocolate, for drizzling + 1/8 teaspoon finely ground espresso beans

DIRECTIONS

First, let's make the chocolate ganache filling

Bring heavy cream to a simmer in a small saucepan, then pour over milk chocolate in a bowl. Stir until smooth and there are no lumps left. Place a sheet of plastic wrap directly onto the surface (placing the plastic wrap directly on top prevents it from developing a skin), then let it set in the refrigerator for 4 hours, or overnight.

While the ganache is setting, let's make the cookie dough

In a medium bowl, whisk together the flour, espresso, and salt. Set aside.

In the bowl of a mixer with the paddle attached, beat together butter and sugar on medium-high speed until pale and fluffy, about 5 minutes. Make sure to scrape down the sides of the bowl, Next, add the vanilla.

Add flour mixture to the mixer in two additions, and mix on medium-high speed until the dough JUST comes tougher. Do not over mix. Turn out dough onto a sheet of plastic wrap, and form a disc. Once the disc is formed, tightly wrap it in plastic. Place in the refrigerator for at least 30 minutes. Alternatively, you can freeze the dough for 15-20 minutes if you're running a little short on time.

OK, everything's set, so we should bake the cookies!

Preheat the oven to 350 degrees F, and line two baking sheets with parchment paper.

Take the dough out of the refrigerator, and let come to room temperature for about 10 minutes. Once the dough has softened a bit at room temperature, place it between two sheets of parchment paper, and roll out to about 1/8 inch thickness. Using a floured 2-inch cookie cutter, cut out rounds, then transfer them to the lined cookie sheets, placing them about 1/2 inch apart. Re-roll the scraps, and repeat the process. (Note: If the dough gets too soft, wrap it in plastic wrap, then throw it back in the fridge for 5-10 minutes or so.)

Freeze your cookies for 10 minutes to make sure they keep their shape in the oven.

Bake until your cookies are set, but not browned, about 7-9 minutes depending on your oven. Once out of the oven, let cool for 5 minutes on the baking sheets, then transfer the cookies to a wire rack to cool completely.

While your cookies are cooling, it's time to whip some ganache! 

Whisk the chilled ganache filling by hand until soft peaks have formed, about 20 minutes. It might be hard to do at first, but with a little elbow grease, you can whip this heavy cream mixture by hand! YOU CAN DO IT! (Or, you can totally use a mixer if you want.)

Alright, time to put it all together

Transfer the mixture to a pipping bag fitted with a 1/4 inch round piping tip (OR, transfer to a plastic bag with the end snipped off). Turn half of the cookies over so that the bottoms of the cookies are facing you, then pipe about 2 teaspoons  of mixture on top of each. Place the other half of the cookies on top to create sandwiches.

Melt the drizzle chocolate!

Melt the 2 ox of bittersweet chocolate, then mix in the 1/8 teaspoon of espresso. Using a spoon (or another small plastic bag) drizzle chocolate over each cookie sandwich in any pattern you'd like! Let chocolate drizzle set for about 10 minutes. Enjoy!

To store: Place cookies in a single layer in an airtight container for up to 5 days.

SOURCE: Adapted from Martha Stewart via Martha Bakes 

How to Make Chicken Stock Without a Recipe (But There's a Recipe!)

Remember that time, just a month ago, when everyone was in awe of the warm weather outside and we thought, "Aw, man. I kind of miss the snow, and that delicious nip of cold in the air..." HOW WRONG WE WERE! I haven't seen the ground in two weeks, and I have an industrial-sized bottle of lotion by my side practically 24/7. But I suppose it could be worse. It could be 2 degrees F outside. OH WAIT. ALSO HAPPENING. Someone wake me when Spring gets here.

I will say this: when I have nowhere to go, there is nothing prettier or more serene than the wintery wonderland I see out my window. It's so peaceful, and so beautiful. It makes the cold almost worth. Almost.

But Midwestern winters aren't all bad; freezing temperatures give me the chance to catch up on all the domestic projects that I keep writing down on my never-ending list. One big one? Making homemade chicken stock!

It's 2016, people. Let's start making our own.

I go through a lot of chicken stock at my house. I use it for burrito bowls and soups, mostly, and I definitely get tired of running to the store all the time to pick up multiple containers. It's so incredibly easy to make at home, PLUS, you're not wasting a thing! All you need is a rotisserie chicken from the grocery store (you can use the meat in sandwiches, salads, on nachos, in soups, etc. etc.) and some of your favorite vegetables and herb seasonings. It's so simple, so economical, and VERY TASTY.

The fun part about making your own chicken stock is that you get to modify it to your particular tastes. If you like things a little spicier, kick it up a notch with a teensy bit of cayenne (a lot goes a long way). If you hate celery, leave it out! And homemade stock is an especially fun thing to make when you have a ton of leftover veggies and nothing to put them in. Waste not, want not.

Your main ingredients are: a chicken carcass cut into pieces, water, salt, and pepper. After that, it's up to you! Once you've put the ingredients you like into the pot, fill it with water so that everything is covered by about 1-2 inches, bring it to a boil, then let it simmer for three hours. If at any point you start to see the water level get a little low, simply add more! And that's it. Once your stock is done, skim off any film that's reached the top with a slotted spoon, strain the stock into a large bowl, and discard all the solids. (Here's a tip: When I'm using fresh herbs, I like to tie them all together with a little kitchen twine. That way, once it's time to strain, I can easily fish them out. ) Make sure your stock is completely cool, then separate it evenly into Mason or Weck jars. If you have plans to use it within a week, pop some stock in the fridge. If you've got future plans, pop your jars in the freezer. It lasts indefinitely. Just make sure to defrost it in the refrigerator overnight before you use it!

And there you have it. You can totally make homemade stock without a recipe! But if you're looking for a little guidance, scroll down for what I put in mine.

Everything's better homemade.


HOMEMADE CHICKEN STOCK

What You'll Need:

  • 1 chicken carcass, broken into pieces
  • 2 whole onions, quartered
  • 8+ baby carrots, chopped
  • 5 celery sticks, chopped
  • 3 whole garlic cloves, peeled
  • 1/2 teaspoon whole black peppercorns
  • 2 bay leaves
  • 4+ sprigs of fresh thyme, tied together with kitchen twine
  • Pinch of salt

DIRECTIONS

In the bottom of a pot that is at least 4 quarts, place the broken-up chicken carcass, onions, baby carrots, celery sticks, garlic cloves, peppercorns, bay leaves, thyme, and salt. Make sure that everything is evenly distributed.

Fill the pot with water until all of the contents are covered by at least 1-2 inches of water.Place the pot over medium-high heat, and bring to a boil. Reduce the heat to low, then let simmer for 3 hours. The stock will occasionally bubble, and the contents may shift a little bit. If the water starts to reduce, add more. You want to make sure that everything is fully submersed in water at all times.

Using a slotted spoon, collect and discard any foam or film on the top of  the stock, then strain the stock into a large bowl. Throw away all of the solid pieces that have landed in the strainer. Let the stock cool completely before transferring it evenly into Mason or Weck jars. If you're planning to use the stock within a week, store it in the refrigerator. If not, it will freeze indefinitely. Once you're ready to use it, simply let the frozen stock defrost in the refrigerator overnight.

Hey, you just made chicken stock. 'Grats.


SOURCE: Adapted from The Kitchn Cookbook

Merry Christmas + Happy Holiday Baking

Processed with VSCOcam with s2 preset

HOW CUTE ARE THOSE SCHNAUZER GINGERBREAD MEN?? My best friend Emily got me that cookie cutter for my birthday three years ago, and I've FINALLY gotten the chance to use it! Oscar approves.

Almost every waking moment has been spent in the DD kitchen this week rolling , cookie-cutting, re-rolling, oven window watching, and tasting "just to make sure they taste good," then realizing at least three have disappeared.  The Christmas dinner dessert table shall overflow with goodies.

If you haven't gotten around to making any cookies, it's not too late to jump in on the fun! Here are some lovely links to some fab recipes:

-The Ultimate Sugar Cookies + Royal Icing

-Classic Gingerbread

-Bacon, Oatmeal, and Raisin Cookies  <---- My new FAVORITE COOKIES.


MERRY CHRISTMAS + HAPPY HOLIDAYS! 

See ya in 2016.