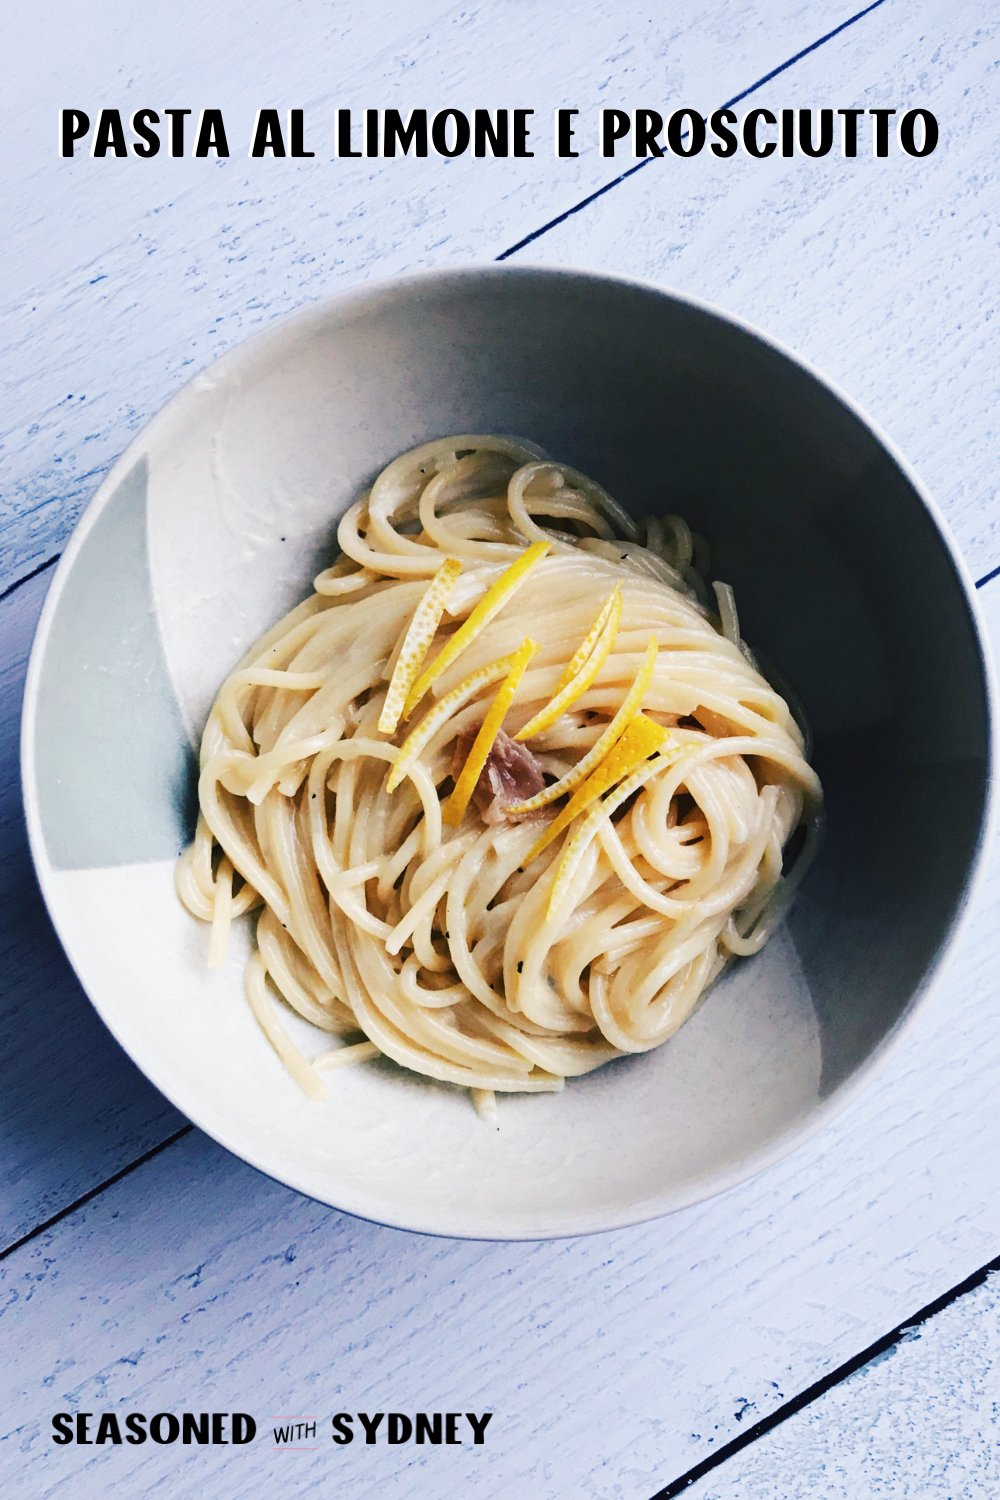
Pasta al limone e prosciutto

pasta al limone e proscuitto recipe - seasoned with sydney

Weeknight dinners are always the most challenging, between work and school and everything else you’ve got going on in your life, there’s very little time to lay out a meal everyone will love. But just because you’re limited on time (has anyone noticed the days are just getting shorter and shorter!?), doesn’t mean that what you put together in the kitchen has to be dull. What if I told you that you could get a sophisticated pasta dish on the dinner table in less than an hour without sacrificing flavor OR flair?

Are you as excited as I am? Cool, keep reading!

pasta al limone e proscuitto recipe - seasoned with sydney

Pasta al limone is an absolute classic, known for the zippiness of the citrus mixed with the slight saltiness of the parmesan cream sauce. But what if we could elevate that flavor even more?

A couple weeks ago, while conducting a routine raid of the refrigerator to make room for the upcoming bi-weekly grocery trip, I thought about what I could add to the near-perfect pasta dish I was about to make that wouldn’t take away from any of its unique flavor. There in front of me, a package of prosciutto presented itself, leftover from making a big batch of collard greens (more on those at Thanksgiving!) earlier in the week. About 1.5 ounces remained of the 3 oz package, so I cut it up into 1-inch pieces, and tossed them in at the end. I wanted an element of smokiness to round out the other flavors, but didn’t want to overwhelm the dish with too much saltiness (parmesan cheese is naturally salty, plus coarse kosher salt is added in for additional seasoning). What I ended up with in each bite was salty-meaty bits of prosciutto, savoriness from the creamy cheese sauce, and a big hit of brightness coming not only from the lemon zest and juice in the sauce, but the long strips of lemon zest added on top. It was, in a word, perfetto!

This recipe is quick, easy, and can feed a family of four with the possibility of leftovers for lunch the next day. A delicious win-win if you ask me!

Pasta al Limone e Prosciutto

pasta al limone e prosciutto recipe - seasoned with sydney

What You’ll Need:

  • 1 lemon

  • 16 oz spaghetti

  • Coarse kosher salt

  • 3/4 cup heavy whipping cream

  • 6 tablespoons unsalted butter

  • 1 cup finely grated parmesan cheese

  • 1.5 oz prosciutto, cut into 1-inch pieces

  • Freshly ground black pepper

Directions

Using a vegetable peeler or very sharp knife, cut 4 2-inch long strips of lemon zest. Slice each strip lengthwise into thin strands, then set aside for later. Using a microplane, finely zest the rest of the lemon into a large pot that can withstand high temperatures (like a dutch oven). Into a small bowl, juice the lemon until you’ve got about 2 tablespoons. Set aside for later.

In a large pot of boiling, liberally-salted water (the pasta water should taste like the ocean) cook the pasta following the package directions for al dente.

While the pasta is cooking, add the heavy whipping cream to the pot with the grated lemon zest and cook over medium heat, whisking often. Do this until the cream has come to a simmer (this should take about 2-4 minutes). Reduce the heat to medium-low, then whisk in the butter 1 tablespoon at a time, making sure each addition of butter has completely melted before adding another. Once all the butter has been added and the sauce looks thicker and creamier, remove the pot from the heat.

Just before removing the pasta from the pot of boiling water, carefully ladle about 1 cup of pasta water into a clean measuring cup. Add about 3/4 of the pasta water to the cream sauce and return the cream sauce to medium heat. Use tongs to transfer the pasta from the pot with boiling water to the pot of the cream sauce. Cook the pasta in the cream sauce, making sure to toss often. At this point, begin adding the grated parmesan in small increments until the cheese is fully melted and the sauce is creamy. Next, add the prosciutto and continue to cook, tossing the pasta often, until the prosciutto has had a chance to warm up, about 2 minutes. Stir in the lemon juice and season with kosher salt to taste.

Transfer the pasta to bowls and season with freshly ground black pepper. Top with the lemon zest strips and sprinkle on a little more parmesan cheese if preferred.

Source: Adapted from Bon Appetit

P.S. Let’s connect! Follow me on Facebook, Twitter, and Instagram!

Quick(er) + Easy Skillet Pizza

skillet pizza recipe - seasoned with sydney

I’ve reached the pizza-making part of quarantine.

It all started a few months ago when I came across this article from Food52 touting a quick and cost-effective way to make a pizza at home using a regular cast-iron skillet instead of a fancy pizza stone. I gave it a try and was absolutely amazed by the results: a crispy crust with delightfully-cheesy edges (with supreme caramelization), a pillowy soft center, and a (relatively) quick and uncomplicated preparation process.

skillet pizza recipe - seasoned with sydney

I have been known in the past to try my hand at making pizza at home, but the process always seems so long - one of the biggest parts of making your own pizza is the waiting. Some recipes I’ve tried have called for two hours of active dough-making, and 24 hours of refrigeration for the dough to fully develop. Who has that kind of time? This recipe calls for an hour of dough-making, a less-strenuous kneading process, and only a 12-hour waiting period. Any homemade pizza worth eating will require some planning (a small inconvenience for a custom pie you’ve made yourself), but I love that the wait time is instantly cut in half! And because we’re using a skillet instead of a sheet pan (my old go-to), heat distribution is even, leading to a crispy, pan-style pizza crust.

skillet pizza recipe - seasoned with sydney

My favorite part about this pizza dough is that once you’ve got the basics down (cheese first, then the tomato sauce to prevent a soggy crust), the pizza toppings are SUPER customizable! I even suspect that with the right cheese blend, you can even convert this pizza dough into the perfect vehicle for white pizza as well! (I smell a future recipe on the way…)

skillet pizza recipe - seasoned with sydney

Sick of the soggy and disappointing store-bought pizzas stacked up in your freezer? I think it’s time you took pizza night into your own hands with this versatile, non-fussy skillet pizza recipe!

Quick(er) + Easy Skillet Pizza

Skillet Pizza recipe - Pinterest.png - seasoned with sydney

What You’ll Need:

  • 2 cups all-purpose unbleached flour

  • 3/4 teaspoon fine sea salt

  • 1/4 teaspoon sugar

  • 1/2 teaspoon active dry yeast

  • 3/4 cup lukewarm or room temperature water

  • 1 tablespoon olive oil, plus 2 tablespoons olive oil for the pan

  • 2 cups low-moisture mozzarella, grated

  • 1/2 cup marinara sauce

Optional (My personal favorite toppings!):

  • 1 cup thin pepperoni slices (or more, depending on your preference)

  • 2 tablespoons red onion, finely diced

  • Fresh basil, lightly chopped

Directions

In a large mixing bowl, place flour, salt, sugar, yeast, water, and 1 tablespoon of the olive oil. Mix together well to form a shaggy, slightly sticky mass of dough with no dry spots.

Scrape down the sides of the bowl to create a rough ball of dough, then cover the bowl for five minutes.

After five minutes, uncover the bowl and, with a slightly wet hand, reach between the side of the bowl and the dough and lift, stretching the bottom of the dough up and over itself in one motion. Repeat this process three more times, rotating the bowl 90 degrees each time.

Re-cover the bowl and let the dough rest for five minutes. After five minutes, wet your hand again and repeat the stretching and folding process, then re-cover the dough and let it rest again for five minutes. Repeat the folding and resting two more times. After the final fold, cover the bowl and let the dough rest for 45 minutes. (I have found the best results by placing the dough in a proofing bucket with an airtight lid, but covering with a kitchen towel or cling wrap works too.)

After 45 minutes, transfer the dough to a gallon-sized resealable storage bag lightly coated with olive oil. Once the dough is in the bag, be sure to drizzle a little more olive oil over the top to prevent the dough from drying out. Refrigerate the dough for as little as 12 hours, or as long as 72 hours. At this stage, the dough will slowly rise and begin to develop its flavor.

About 2.5 hours before you’re ready to make your pizza, place two tablespoons of olive oil in a large (preferably 10-inch) cast-iron skillet, making sure the bottom is fully coated. Using a pastry brush, a paper towel, or even your fingers, apply additional olive oil up the sides of the pan to prevent the pizza from sticking later.

Transfer the dough from the fridge to the pan, flipping in once on each side to make sure it’s evenly coated in olive oil. Slowly, using the tips of your fingers, begin spreading the dough to the edges of your pan. As you do it, you should see yourself lightly creating dimples in the dough. If you experience any resistance from the dough, such as shrinking back, wait a few minutes and try again.

Cover the dough with plastic wrap and let it rise for 2 hours at room temperature. The final result should be a pillowy-soft dough full of tiny air bubbles.

30 minutes before you’re going to start making the pizza, place oven racks in the bottom and upper third of the oven, then pre-heat to 450 degrees Fahrenheit.

Once you’re ready to bake your pizza, sprinkle the mozzarella evenly over the dough, making sure that the dough is entirely covered from edge to center, meaning no bare spots.

Next, dollop small spoonfuls of the marinara sauce all over the top, but do not spread. The sauce will spread as the dough bakes. At this point, add all other pizza toppings evenly (see my personal favorites above!).

Bake the pizza on the bottom rack for about 20 minutes, until the cheese is bubbling and the crust has taken on a golden brown hue. Quickly remove from the oven. Using a small spatula, check the bottom. If the bottom is golden brown, but the top is still pale, place the pizza back in the oven for another 2-4 minutes (i usually have to leave mine in for the full 4 minutes. This will depend on your oven). Use your own intuition to discern when the pizza has reached your definition of doneness.

Remove the pizza from the oven and carefully and quickly run a table knife or small spatula along the edge between the pizza and the pan to ensure that the pizza doesn’t stick to the pan via the cheese hardening as it cools. Wait for about 2 minutes, then carefully lift and transfer the pizza from the skillet to a cooling rack (I like to place something under the cooling rack to catch any runaway toppings or leaks) to finish cooling (this will prevent a soggy bottom).

Serve the pizza while it’s still warm, but not screaming hot. Enjoy!

TO STORE: Any leftovers can be stored in an airtight container for up to one week. To return it to its crispy glory, heat it in a 350 degree Fahrenheit oven for about 10 minutes.

SOURCE: Adapted from Food52 via King Arthur Baking Co.


Homemade Everything Bagel Seasoning

everything bagel seasoning, seasoned with sydney

Ah, Everything Bagel Seasoning: the splendid combination of salt, crunch, and umami mixed into one. Perfect for sprinkling on homemade bagels, fried eggs, avocado toast, and even by the occasional spoonful directly into your mouth - the possibilities are truly endless, and that’s a beautiful thing.

everything bagel seasoning, overhead picture - seasoned with sydney

Throughout the years I’ve seen countless brands getting into the Everything Bagel Seasoning game, from Trader Joe’s to McCormick. While it’s been a fan favorite flavoring mix for decades, Everything Bagel Seasoning has grown in popularity recently thanks in part to food world superstars like Molly Yeh and Gaby Dalkin, who frequently incorporate it into their recipes. Dalkin even partnered with Williams-Sonoma to come out with her own line of Everything Bagel Seasoning.

everything bagel seasoning spread out - seasoned with sydney

So with so many pre-made options on the market located practically everywhere, you might be wondering: why make your own?

My answer? As with countless other things in life, homemade is always the best. Not only will you get to control the proportions (fancy a little more minced garlic or want an enhanced crunchiness with extra sesame seeds?), you’ll also get the sense of accomplishment that only comes from creating something from nothing using your own hands - and with this being an incredibly low-stakes DIY endeavor, the payoff I’d say is pretty high!

So go ahead, grab your favorite spice jar and the ingredients and get to work creating a magical combination that will take your favorite dishes to the next level. You’ll be glad you did!

EVERYTHING BAGEL SEASONING

Everything Bagel Seasoning - Seasoned with Sydney

What You’ll Need:

  • 1 tablespoon poppy seeds, plus more

  • 1 tablespoon black sesame seeds, plus more

  • 1 tablespoon white sesame seeds, plus more

  • 1 tablespoon dried minced garlic, plus more

  • 1 tablespoon dried minced onion, plus more

  • 1 teaspoon coarse kosher salt, plus more

DIRECTIONS

In a small mixing bowl, combine the poppy seeds, black sesame seeds, white sesame seeds, minced garlic, minced onion, and coarse kosher salt. Mix well.

Transfer the combined mixture to your preferred spice storage container such as a spice jar or another small, airtight container.

Repeat the process until the storage jar has reached capacity.

To store: Store in a dry place. Mixture should last for several months.

*Use this as a guide and don’t be afraid to add or subtract based on your preferences. The beauty of adding “everything” is you get to decide just what “everything” means to you!

Lightly Spiced + Everything Nice Christmas Cookies

This year, I am the Christmas Queen. SERIOUSLY. I am so incredibly proud of myself because I have NOT waited until the very last minute for my gifts. Usually, things get pretty down to the wire for me and I wind up finding myself staring at the impossibly long line at the post office praying that I can get things out on-time, then paying an arm and a leg to insure that possibility becomes a reality. But not this year, friends. This year, your girl started shopping a full TWO (2) months in advance. Granted, that first purchase was actually for myself (holiday cards), and I didm't buy anything else for a month, but it COUNTS. I will say this though: I've been behind on my holiday cookie making/ consumption. Only ONE batch of classically-Christmas cookies (oo alliteration) has made it out of the kitchen, and it's already December 21st! I'm ashamed. BUT, I plan to make up for this in the coming weeks. First up: these very lightly spiced (+ everything nice) Christmas cookies!

These are very, very simple cookies meant for when you want a taste, but you don't have a ton of time to fuss. The base is a classic sugar dough recipe, but with a hint of every single spice you have ever associated with Fall/winter.

These cookies are crispy, buttery and a bit little crunchy from the optional topping of Demerara sugar, which I recommend because not only does it add an extra layer of texture,  it also makes your cookies sparkle like they're supposed at Christmas time. And although these cookies do have spice, it's only a hint. I like it because it elevates your sugar cookie, and gives it a little more oomph. These cookies are for sugar cookie purists looking to fray a little from the pack. Go crazy, but not too crazy, know what I mean?

Try some!


LIGHTY SPICED + EVERYTHING NICE CHRISTMAS COOKIES

What You'll Need:

1/4 teaspoon ground cinnamon

1/4 teaspoon ground ginger

1/8 teaspoon ground cloves

1/8 teaspoon ground allspice

3/4 teaspoon kosher salt

1/2 teaspoon baking powder

3 cups all-purpose flour, plus more for rolling

2 1/2 sticks unsalted butter, chilled and cut into cubes

1 cup sugar

1 large egg

1 large egg yolk

1 teaspoon vanilla extract

Demerara sugar for topping, optional


DIRECTIONS 

Whisk the spices, salt, baking powder, and 3 cups flour in a small bowl. Set aside.

Using an electric mixer with the paddle attachment (or a hand mixer, or a wooden spoon), beat the butter and sugar on high speed until well-combined. Next, add the egg, egg yolk, and vanilla extract, and beat until combined. Scrape the sides and the bottom of the bowl if necessary.

Reduce the speed to low, then add about half of the dry ingredients until just combined. Then, add the rest and mix until combined; be careful not to over mix.

Form the dough into two 3/4 inch thick disks (you should see flecks of spices throughout the dough), wrap each disk in plastic wrap, then chill in the refrigerator for at least 2 hours, or overnight.

Place racks in the upper and lower thirds of the oven. Preheat the oven to 325 degrees F. Line two cookie sheets with parchment paper.

Let one disk of dough come to room temperature on the counter for 5-10 minutes so that is softens slightly. On a sheet of parchment paper that has been lightly floured, roll out the first disk of dough to 1/4 inch thickness, dusting with flour if it gets too sticky. Make sure to also flour your rolling pin, and cookie cutters. Cut out shapes with your cookie cutters, then transfer to the cookie sheets. Leave about 1 inch of space between each cookie.

Bake cookies about 12-16 minutes, rotating from front to back and top to bottom halfway through baking, until the edges are lightly golden brown. If using, immediately sprinkle Demerara sugar liberally on the tops of each cookie, then let them sit for five minutes on the baking sheet before transferring them to wire racks to cool completely. Repeat with the remaining cookie dough.

TO STORE: Cookies will last for at least a week if kept in an airtight container.


SOURCE: Adapted from Bon Appetit and Dorie's Cookies

Vanilla Chai Chocolate Truffles

On this episode of "Sydney Makes Easy Things That Impress Her Friends," we're talkin' 'bout chocolate truffles. But not just any regular chocolate truffles, oh no, we're throwing vanilla chai into the mix. Essentially, they're chocolate balls, but doesn't the word "truffle" just make it sound much fancier? Ya, I agree.

The bond that a woman of color has with her hairdresser is one that is sacred, and must be fostered and nurtured. I do this by surprising mine with edible treats at least once a month. And since the hot cross buns that I made a few weeks back were given to family and church members, I decided that my beloved beautician should get something specifically made JUST for her. And like many, many women that I know, she looooooooooves  chocolate. So, I thought, what better treat than just straight-up homemade truffles?

During the holiday season my television basically stays on Food Network and Cooking Channel, and I watched a special episode of Giada at Home in which she made chocolate truffles for some "guests" (more likely the production crew, but ya know, TV magic and all that) who were stopping by for a holiday party. She stepped it up by brewing a bunch of bags chai  in heavy cream, then taking it off the heat and pouring it over chocolate to melt it. Then she stirred it all together until it turned into chocolate ganache, refrigerated it for a few hours until it set, then scooped out the mixture by the tablespoon, rolled it into a ball, coated it in cocoa powder, and then wrapped a little gold leaf around each for a classy touch. They were so cute and elegant, so I logged the recipe away for an occasion when I would really, really want to make them. But when it came time to make these truffles, wouldn't you know it, I didn't have any gold leaf on hand (I'm not workin' with a Food Network budget here), and instead of brewing with classic chai, I decided to switch it up with my favorite bundling of vanilla chai tea bags. Was it a success? Oh yeah. She loved them!

These truffles are perfect for anyone who has a semi-sweet tooth. They've got a bit of an edge to them, with just the hint of sweetness to balance everything out. Basically, you get this intensely rich, deep chocolatey flavor, mixed with the warmth of spices that you find in classic chai, and finished off with the subtle hint of vanilla. The vanilla may just be a gentle whisper, but it definitely won't let you ever forget that it's there.

Best of all, they can be made wayyyy in advance, which works perfectly for me because I can enjoy leftover truffles that didn't fit in the gifted container for weeks to come.

Vanilla Chai Chocolate Truffles: Good for friendship, good for random chocolate cravings.


VANILLA CHAI CHOCOLATE TRUFFLES 

What You'll Need:

  • 1 1/2 cups heavy cream
  • 7 bags vanilla chai tea (I like Bigelow)
  • 1/4 teaspoon salt
  • 9 oz dark chocolate, finely chopped
  • 2/3 cup cocoa powder


DIRECTIONS

Before you begin, tie all of your tea bag strings together in a knot. This makes it much easier to fish them out when you've finished with them.

Pour the heavy cream into a small saucepan, then add your tea bags. Place the pan over medium-low heat, warming the cream slowly; stir occasionally. You'll know when your mixture is heated through when you see little bubbles start to form around the edges of the cream, about 5-7 minutes. Simmer for 3 minutes more, then remove from heat.

Remove the tea bags from the sauce pan. Place the finely chopped chocolate and salt in a medium bowl, then strain the cream mixture over it using a fine-mesh strainer. Let sit for 3 minutes so that the chocolate begins to melt on its own. Slowly whisk the melted chocolate into the cream starting in the center of the bowl, then slowly making your way outwards. Remember to do this slowly and carefully so that the chocolate doesn't seize up! Continue whisking until the mixture is smooth and completely blended. Place a piece of plastic wrap DIRECTLY on top of the ganache, and press down gently to make sure the surface is completely covered.  Let set in the  refrigerator for AT LEAST 3 hours, but the best is overnight. The mixture should be firm by that time, but still easy to work it.

Measure your coca powder, then place in a small, shallow bowl. With a tablespoon cookie scoop (or just a tablespoon measuring spoon), scoop even rounds of ganache into your palm, then very quickly but gently roll into a ball.  Next. roll the ball in the coca powder to coat; gently shake off any excess.. Repeat this process until you've run out of ganache. Place your truffles in an airtight container and refrigerate until you are ready to serve.

Make Ahead: The truffles can be made several weeks ahead of time, kept refrigerated in an airtight container. On the day of serving, roll each in the cocoa powder.


SOURCE: Very, very slightly adapted from Giada De Laurentis 


Hot Cross Buns

Hiiiiiiiiiiiii, how was your Easter??  Mine was epic and uplifting, and full of food. Simply the best.

Have you ever had hot cross buns? This was my first year. Before that, my only knowledge of them began and ended with the song of the same name that I was forced to learn on the recorder in 7th grade. That was it. (Fun fact: I haven't picked up the recorder since.) But when you're young, it's almost a necessity that you start your own traditions and/or jump on holiday-specific bandwagons, so here we are. And I have to tell you: I can't believe I've lived my life up until now without hot cross buns. I mean, it's crazy. I can honestly say, in the four years that I have been baking, hot cross buns are the best things to ever come out of my oven. BY. FAR. Easter Sunday's breakfast was just EXCELLENT, you guys.

Best served warm, these buns are yeasty, squishy, icing-topped perfection. Traditionally, hot cross buns are filled with dried fruit like raisins, currants, cherries, or dates, but my grocery store was serisouly lacking in the traditional dried mixed fruit bags. What I found instead was a mix of dried strawberries, blueberries, cherries, and cranberries, and I LOVED that combination when paired with the warmed apricot jam and blend of cardamom and cinnamon spices. And while I enjoyed the little bursts of strawberries I got, next time 'round, I'll try to make my own fruit mix because the cardamom-cinnamon was practically begging for raisins. Either way, fruit in yeast rolls just WORKS.

You may see these most often on Easter, but something tells me these would work extremely well around Christmas time...or just all-year-round in general.


It's never too late for Hot Cross Buns.


Find the recipe HERE from Bon Appetit! 


Dark Chocolate and Anise Biscotti

There are two sides to me. One side has this need to bake things all the time. The other side is aware that if I bake all the time, then I will feel obligated to eat everything I've made in the event that I don't have anyone to share the wealth with. It's very complicated. That's why I love, love, love biscotti. They're crunchy, they're sturdy, and they last for WEEKS at a time.  I have the freedom to nibble (or not nibble) at my leisure without the looming pressure to not waste a single crumb. It's beautiful.

Biscotti are tough cookies in the best way. The longevity of them is fantastic, but they're also the perfect option for care packages. As much as I love the Midwest (especially now that I can walk outside without a parka), most of the people I care about live in completely different parts of the country. You know that I am a big fan of sending and receiving gifts in the mail. but the edible options for packages are limited. Biscotti are PERFECT for this task.

This week I whipped up a quick batch of Buttery-Cayenne Pecans, then made these Dark Chocolate Anise Biscotti, wrapped everything in half a roll of bubble wrap, threw in a couple of heartfelt cards, then sent them on their way. Two days later, I got a "thank you" text, and a very warm heart. Care packages are my jam. And one of these days, you and I are going to make one together, step-by-step.

As you're well aware by now, I am a huge fan of deceptively easy recipes. Making biscotti? Wayyyy easier than you think. All you have to do is keep up with the time. The rest is a total breeze.

What I love most about this recipe is that it's a lot like having a chocolate chip cookie, but with a hint of licorice. And if you aren't a black licorice fan (I'm not,), have no fear, you'll still love these The anise seeds bring a subtle flavor of licorice that does nothing but completely compliment the oodles of dark chocolate chunks throughout. And I will never turn down a crispy cookie that brings a little texture to the game. If a little softness is more of what you're after, you totally have my permission to dunk a couple of these babies in a steaming cup of coffee.

Eat some biscotti.

Send some to your friends.

Do your thing.


DARK CHOCOLATE AND ANISE BISCOTTI 

What You'll Need:

  • 2 cups all purpose flour
  • 1 1/2 teaspoons anise seeds, slightly crushed
  • 1 teaspoon baking powder
  • 1/4 teaspoon salt
  • 6 tablespoons unsalted butter, softened
  • 1 cup granulated sugar, plus more for sprinkling
  • 2 large eggs
  • 1 large egg yolk
  • 4 oz chocolate, roughly chopped

DIRECTIONS

Place oven racks in the center and upper third of the oven, then preheat to 325 degrees F. Line two cookie sheets with parchment paper. Set aside.

Whisk together the flour, slightly crushed anise seeds, baking powder, and salt in a medium bowl, then set aside.

In the bowl of a stand mixer fitted with the paddle attachment (or with a hand mixer, or with a wooden spoon), cream together the butter and sugar on medium speed until light and fluffy; about 5 minutes.

Reduce mixer speed to low, then add one egg and the egg yolk, then beat until well combined; about 3 minutes.

Add the flour mixture all at once to the stand mixer, and beat on low until well combined. The dough may seem a bit crumbly. Next, add the chocolate chunks and make sure they are evenly distributed throughout.

Divide the dough in half, then place each half on a parchment-lined cookie sheet. Gently knead the dough a few times, just to get it to come together a little more. Next, shape each dough into logs about 8 inches long, and 1 1/2 inches wide. Beat the remaining egg, then generously brush it over each log. Next, sprinkle sugar liberally over each log.

Bake the biscotti on both racks for 20 minutes, then swap racks and bake for an additional 15-20 minutes, until the biscotti are golden brown and baked all the way through.

Take your cookie sheets out of the oven, and let the biscotti rest for a few minutes. Once the biscotti logs are cool enough to handle, cut into 1-inch slices using a serrated knife, cutting in a swift motion.

Place the cookies cut side up onto the baking sheets, then put back in the oven for another 15-25 minutes, depending on how crisp you'd like your biscotti to be. (I prefer mine on the crispier side, so I kept an eye on mine for 25 minutes.)

For an even crispiness, flip your biscotti over and bake for another 2-5 minutes.

Let cool, then store in an airtight container for up to 2 weeks. 


SOURCE: Adapted from Joy the Baker Cookbook: 100 Simple and Comforting Recipes 

Bite-Size Biscotti

I really, really like my beautician. Partially because she's one of the only people in this world who I would trust to dye my hair just-so, and partially because I've known her for a big chunk of my life. She likes me, and I like her, and she likes my baking, so I like her even more. When true-blue baking season starts up, the kitchen is always filled with more treats than my family could ever possibly eat, and I always pick out the best of the best to bring to her. Lately she's really been dropping hints that I've been slacking in the baked-good-delivery department, so I'm stepping up my game.

I love biscotti. It's crunchy and delicious, and there are so many flavor combinations out there that I'll never become bored with it. It's the perfect companion to cold-weather beverages, and since my tea kettle has seen a lot more action lately, I thought I would give these a shot.

Traditional biscotti can be time consuming, and nerve-wracking. If you don't get the first bake right, it can throw off the entire process. After all, you don't eat soft biscotti, you're looking for that satisfying crunch. If you still want the crunch, but don't have all day, try the mini version. These are just as satisfying, but it'll only take you a few hours, and most of that time is spent impatiently checking to see if the chocolate has set so you can dig in. Patience is your friend when baking, now and forever.

It should be noted that in this recipe, it calls for the zest of grapefruit, but  I think any citrus you've got laying around will do. It's not so much about the grapefruit as it is the presence of citrus that makes these biscotti bites stand out. I zested that grapefruit until I could zest no more because it was $1.25 and I was going to get my money's worth or die trying. (Dramatic, sorry.)

These bite-sized biscotti are for all fans of the salt-chocolate-cocunut-citrus-more chocolate flavor combination. May your teaspoons be heaping, your cookies crunchy,  your chocolate smoothly-tempered, and your tummies full of the quintessential coffeehouse treat. There are going to be some happy faces at the beauty shop tomorrow.

BITE-SIZED BISCOTTI

What You'll Need:

  • 1 1/4 cups all-purpose flour
  • 1 1/4 cups fine cornmeal (I used white cornmeal)
  • 1/2 teaspoon baking powder
  • 1/2 teaspoon coarse salt
  • 3/4 stick (12 tablespoons) unsalted butter, at room temperature
  • 1 cup granulated sugar
  • 2 large eggs, at room temperature
  • 1 1/2 cups sweetened shredded coconut
  • 2 tablespoons grapefuit zest (or two tablespoons of zest of your choice. Could be orange!)
  • 11 ounces bittersweet chocolate, finely chopped
  • Sanding sugar (I used Demerara because that's what I had in my pantry!), for sprinkling

DIRECTIONS 

Preheat oven to 350 degrees F.

In a medium bowl, whisk together flour, cornmeal, baking powder, and coarse salt. Set aside.

In the bowl of a standing mixer with the paddle attachment, beat the butter on medium speed until pale and fluffy, about 3 minutes. Add eggs, one at a time, until well combined. Next add the flour mixture and beat on low until just combined. Beat in the coconut, grapefruit zest, and about 5 ounces of the bittersweet chocolate. Mix until everything is evenly distributed.

Drop generous heaping teaspoonfuls of biscotti dough on parchment-lined baking sheets. Set each dough ball about 1 inch apart. Sprinkle the tops of each with a generous sprinkling of sanding sugar. Refrigerate for 30 minutes. (Note: I don't have an industrial-size refrigerator, so my fridge only holds so many baking sheets. My solution: scoop the remainder of your dough into a bowl and refrigerate. It'll still be cold enough to form dough balls that keep their shape in the oven.)

Bake, rotating sheets halfway through, until golden brown. This should take about 18-20 minutes depending on your oven.

Let cool completely on wire racks.

Once your biscotti bites have completely cooled, temper the remaining amount of bittersweet chocolate, stirring until smooth. Remove from heat. Dip the bottoms of the cookies in the melted chocolate, scraping off any excess chocolate with a spoon, or using the edge of the bowl. Set each on clean parchment-lined baking sheets. Refrigerate until chocolate is set, about 30 minutes. (Note: I didn't refrigerate again. Instead, I let them to set in a cool place in the house. It took a little longer, but I didn't have to take all of my food out of the fridge again.)

To Store: These can be be stored in a single layer for up to one week.

SOURCE: Martha Stewart

Fried Green BLTs

Fried Green BLT2 I think we all love a good BLT. I mean, it's a classic. But have you ever felt like you weren't getting that extra element of crunch? Sure, the bacon is supposed to pull triple duty as the salty, meaty, crunchy component to that sandwich, but still, sometimes you just need more. How about frying the tomatoes? Perfect.

On a particularly pleasant day, it's good to throw on your sun hat and shades, and your perfectly dainty fan to keep the heat at bay, and enjoy a nice, Southern-style sandwich out on the back porch. You're meant to enjoy food in warm weather, and you're most definitely not meant to spend a lot of time in the kitchen preparing it.

These fried green BLTs are not only a super-fast, very fresh lunch option, they're also totally perfect for a spontaneous summer picnic. They hold up and travel very well, and I may just be imagining it, but I think they actually taste ten times better when eaten al fresco. That might just me though.

All you need is an egg, unripe green tomatoes, some cornmeal, a little vegetable oil, some nice crispy bacon, some baby spinach, a little mayo, and fresh thick-sliced bread (don't forget to toast it!), and you've got a totally fresh take on a pretty traditional sammie. Now all you need is a tall glass of ice-cold sweet tea to wash it down, and you've got the perfect summer day. Aaaaaahhhhhhh.

Fried Green BLT


FRIED GREEN BLTs

What You'll Need:

  • 4 slices of bacon
  • 1/2 cup all-purpose flour
  • 1 large egg, beaten
  • 1 tablespoon water
  • 1/2 cup yellow cornmeal
  • Salt
  • Fresh black pepper
  • 1 pound unripe green tomatoes, sliced (Note: I've found that using a serrated knife not only makes it easier to cut the tomatoes, but it also keeps them from getting mashed, releasing too much of their juices, and bruising)
  • Canola or Vegetable oil
  • 8 thick slices of your favorite bread, toasted
  • Mayonnaise
  • Baby spinach or arugula

DIRECTIONS

Preheat the oven to 400 degrees F. Line a rimmed baking sheet with two layers of aluminum foil. Lay your bacon on the foil, and bake for 12-15 minutes, or until it has reached your desired level of crispiness. Once out of the oven, drain your bacon on paper towels.

Fill three separate bowels with flour, your egg and water mixture, and cornmeal. Season the cornmeal with plenty of salt and freshly ground pepper. Dip each tomato slice in the flour, then the egg mixture (shaking gently to remove any excess) and then finally into the cornmeal, making sure that every bit of it is covered. Place the slice on a wax-paper lined platter or plate. Repeat the process until all of your slices are perfectly coated.

In a large skillet, heat 1 tablespoon of vegetable or canola oil until it is shimmering. Add the tomatoes, and cook over medium-high heat, turning once, until golden brown and crispy. This should take about five minutes. Drain your tomatoes on paper towels.

To Assemble:

Lay four slices of toasted  bread on a cutting board, and lightly spread some mayonnaise on each. Next, add at least two slices of tomatoes on top. Next, cut your slices of bacon in half, and add two halves of each on top of the tomatoes. Top with a few spinach leaves.

Now, if you like open-faced sandwiches, then you're done! If you like a classic sandwich, top each with another slice of toasted bread, and cut in half. Enjoy!

SOURCE: Delish

Maple-Bourbon Pecan Pie

pecan pie 2 My dad's birthday was Sunday, and birthday cakes just don't fly with him. He'll eat them, but he never request them. Instead, you better be pulling out that pecan pie recipe. (Side note: how do you pronounce "pecan"?  In the Midwest, it's pronounced "pe-cahn." In the South, it's "pee-can" or else. I generally go with the latter, despite my upbringing.)

But ugh, pecan pies can be so boring if you're not careful, and making the same things over and over again can drive a girl crazy. But, it was his birthday, and on his birthday, things have to stay the same...with a few amped up modifications, of course!

pecan pie 1

Enter: bourbon. I love baking with bourbon. I don't like drinking it, but I LOVE the taste of it. It adds a richness, and a bit of sweet vanilla-smokiness that always takes things to the next level. Have you ever tried making vanilla extract with bourbon? Or how about bourbon caramels? I have to tell you, I can never make either any other way again.

pecan pie 3

Not only is bourbon a key component to this new pie, but there's also the addition of a little maple syrup. It's not a large amount, and it definitely doesn't stand out quite as boldly as the bourbon, but it has a very special place: it helps add more depth, and more complexity. Maple syrup is quite subtly-smoky, and so rich. When you add that subtle hint of smokiness, and mix it with the vanilla and oak notes that the bourbon brings, you've got a very flavorful partnership.

This whole pie works. IT JUST WORKS. The pie crust is flaky and soooo buttery, the pecans are crisp, and add that satisfying crunch, and that maple-bourbon combination? Just out of this world. Dad loved it (perhaps more than the traditional?), and was throughly sad to see an empty pie plate once again, a mere three days later. We were all sad to see it go, really.

pecan pie 4


So, OK, it's time to come clean: this pie was an experiment. I knew maple and bourbon would get along famously with the rest of the ingredients, but I was a bit nervous about the measurement modifications. When the expectation after dinner is to be served a slice of something you've grown to love just the way it is, deviations can be tricky. Perhaps this recipe was the real deal, or perhaps I got real  lucky. Either way, it'll take a few more test drives in the ol' test kitchen before it finds itself on DD. 

BUT, I'd never leave you hanging.. Here are some excellent recipes to try in the meantime:

Martha Stewart's Maple Bourbon Pecan Pie 

This simple Bourbon Pecan Pie (with an option to add a teaspoon or two of maple syrup) from Garden and Gun Magazine

OR how about this one from Epicurious?


Whichever you choose, know that I'll be right there next to you in spirit, with a fork in my hand ready to dig in.